
Do not index
I’ve been diving into ATS (Applicant Tracking System) integrations and recently found myself needing to build an integration for Bullhorn’s ecosystem. If you’re in a similar spot, you’ll likely encounter the need to create a custom action. This short tutorial will walk you through the process!
What is a custom menu action?
Custom tabs and menu actions appear on candidate, client, contact, job, and placement entities in Bullhorn. These custom menu actions are self-contained and hosted within Bullhorn’s browser application. When a user selects the action, it typically posts information like the entity type, entity ID(s), user information, and an auth code. It’s a way to send information from Bullhorn into your application on demand!
Setting Up Your Custom URL for a Bullhorn Action
Next, you’ll spin up a Node.js environment and use
ngrok to expose your local server to the internet so Bullhorn can post to your URL, allowing you to test creating a custom menu action. This example is spartan—you’ll likely integrate it as part of a larger application, save the response, and process it in some way—but it should give you an idea of the base requirements.1. Set Up Your Node.js Environment
Open up a terminal and create a new directory for your project
mkdir bullhorn-custom-action-test
cd bullhorn-custom-action-test
Initialize a new Node.js project:
npm init -y
Install the necessary packages:
npm install express body-parser
2: Write the Webhook Server Code
Create a file named
server.js:touch server.js
Add the following code to
server.js:const express = require("express");
const bodyParser = require("body-parser");
const app = express();
const port = 3000;
// Use body-parser to parse JSON bodies
app.use(bodyParser.json());
// Use body-parser to parse URL-encoded bodies (optional, if your webhook might send this format)
app.use(bodyParser.urlencoded({ extended: true }));
// Define the webhook endpoint
app.post("/webhook", (req, res) => {
const payload = req.body;
console.log("Received webhook:", payload);
// Respond to the webhook request
res.status(200).send("Entity recevied successfully");
});
// Start the server
app.listen(port, () => {
console.log(`Webhook server listening at http://localhost:${port}`);
});
Run the server:
node server.js
This will start a server listening for POST requests at
http://localhost:3000/webhook.3: Set Up ngrok
Next you’ll install Ngrok, If you don't have
ngrok installed, download and install it from ngrok.com.Open a new terminal window or tab and expose your local server to the internet with the following command:
ngrok http 3000
This command will create a secure tunnel to your local server and provide you with a public URL that looks something like this:
<https://abcdef1234.ngrok.io>
In the output from
ngrok, you’ll see a line like, you should copy the generated ngrok URL:Forwarding <https://abcdef1234.ngrok.io> -> <http://localhost:3000>
Copy the
https://abcdef1234.ngrok.io URL.You’ll use this URL to configure our custom action in Bullhorn and test that it works.
Configuring the Custom Action in Bullhorn
Each user who uses your integration will need to go through this configuration process to post to your application. First, navigate to the entity where you want to add the custom menu action. You can do this through the admin section by selecting "View Layout." In some editions, it’s located under Tools, then View Layout.

Next, go to the
Custom Menu Actions tab and click Add New.Fill out the form with the following details:
- Name: The name of your custom action.
- Enabled: Check this box.
- Location: Choose one of the three options:
In a record, on the menu: Appears when you click the entity record in the actions menu.
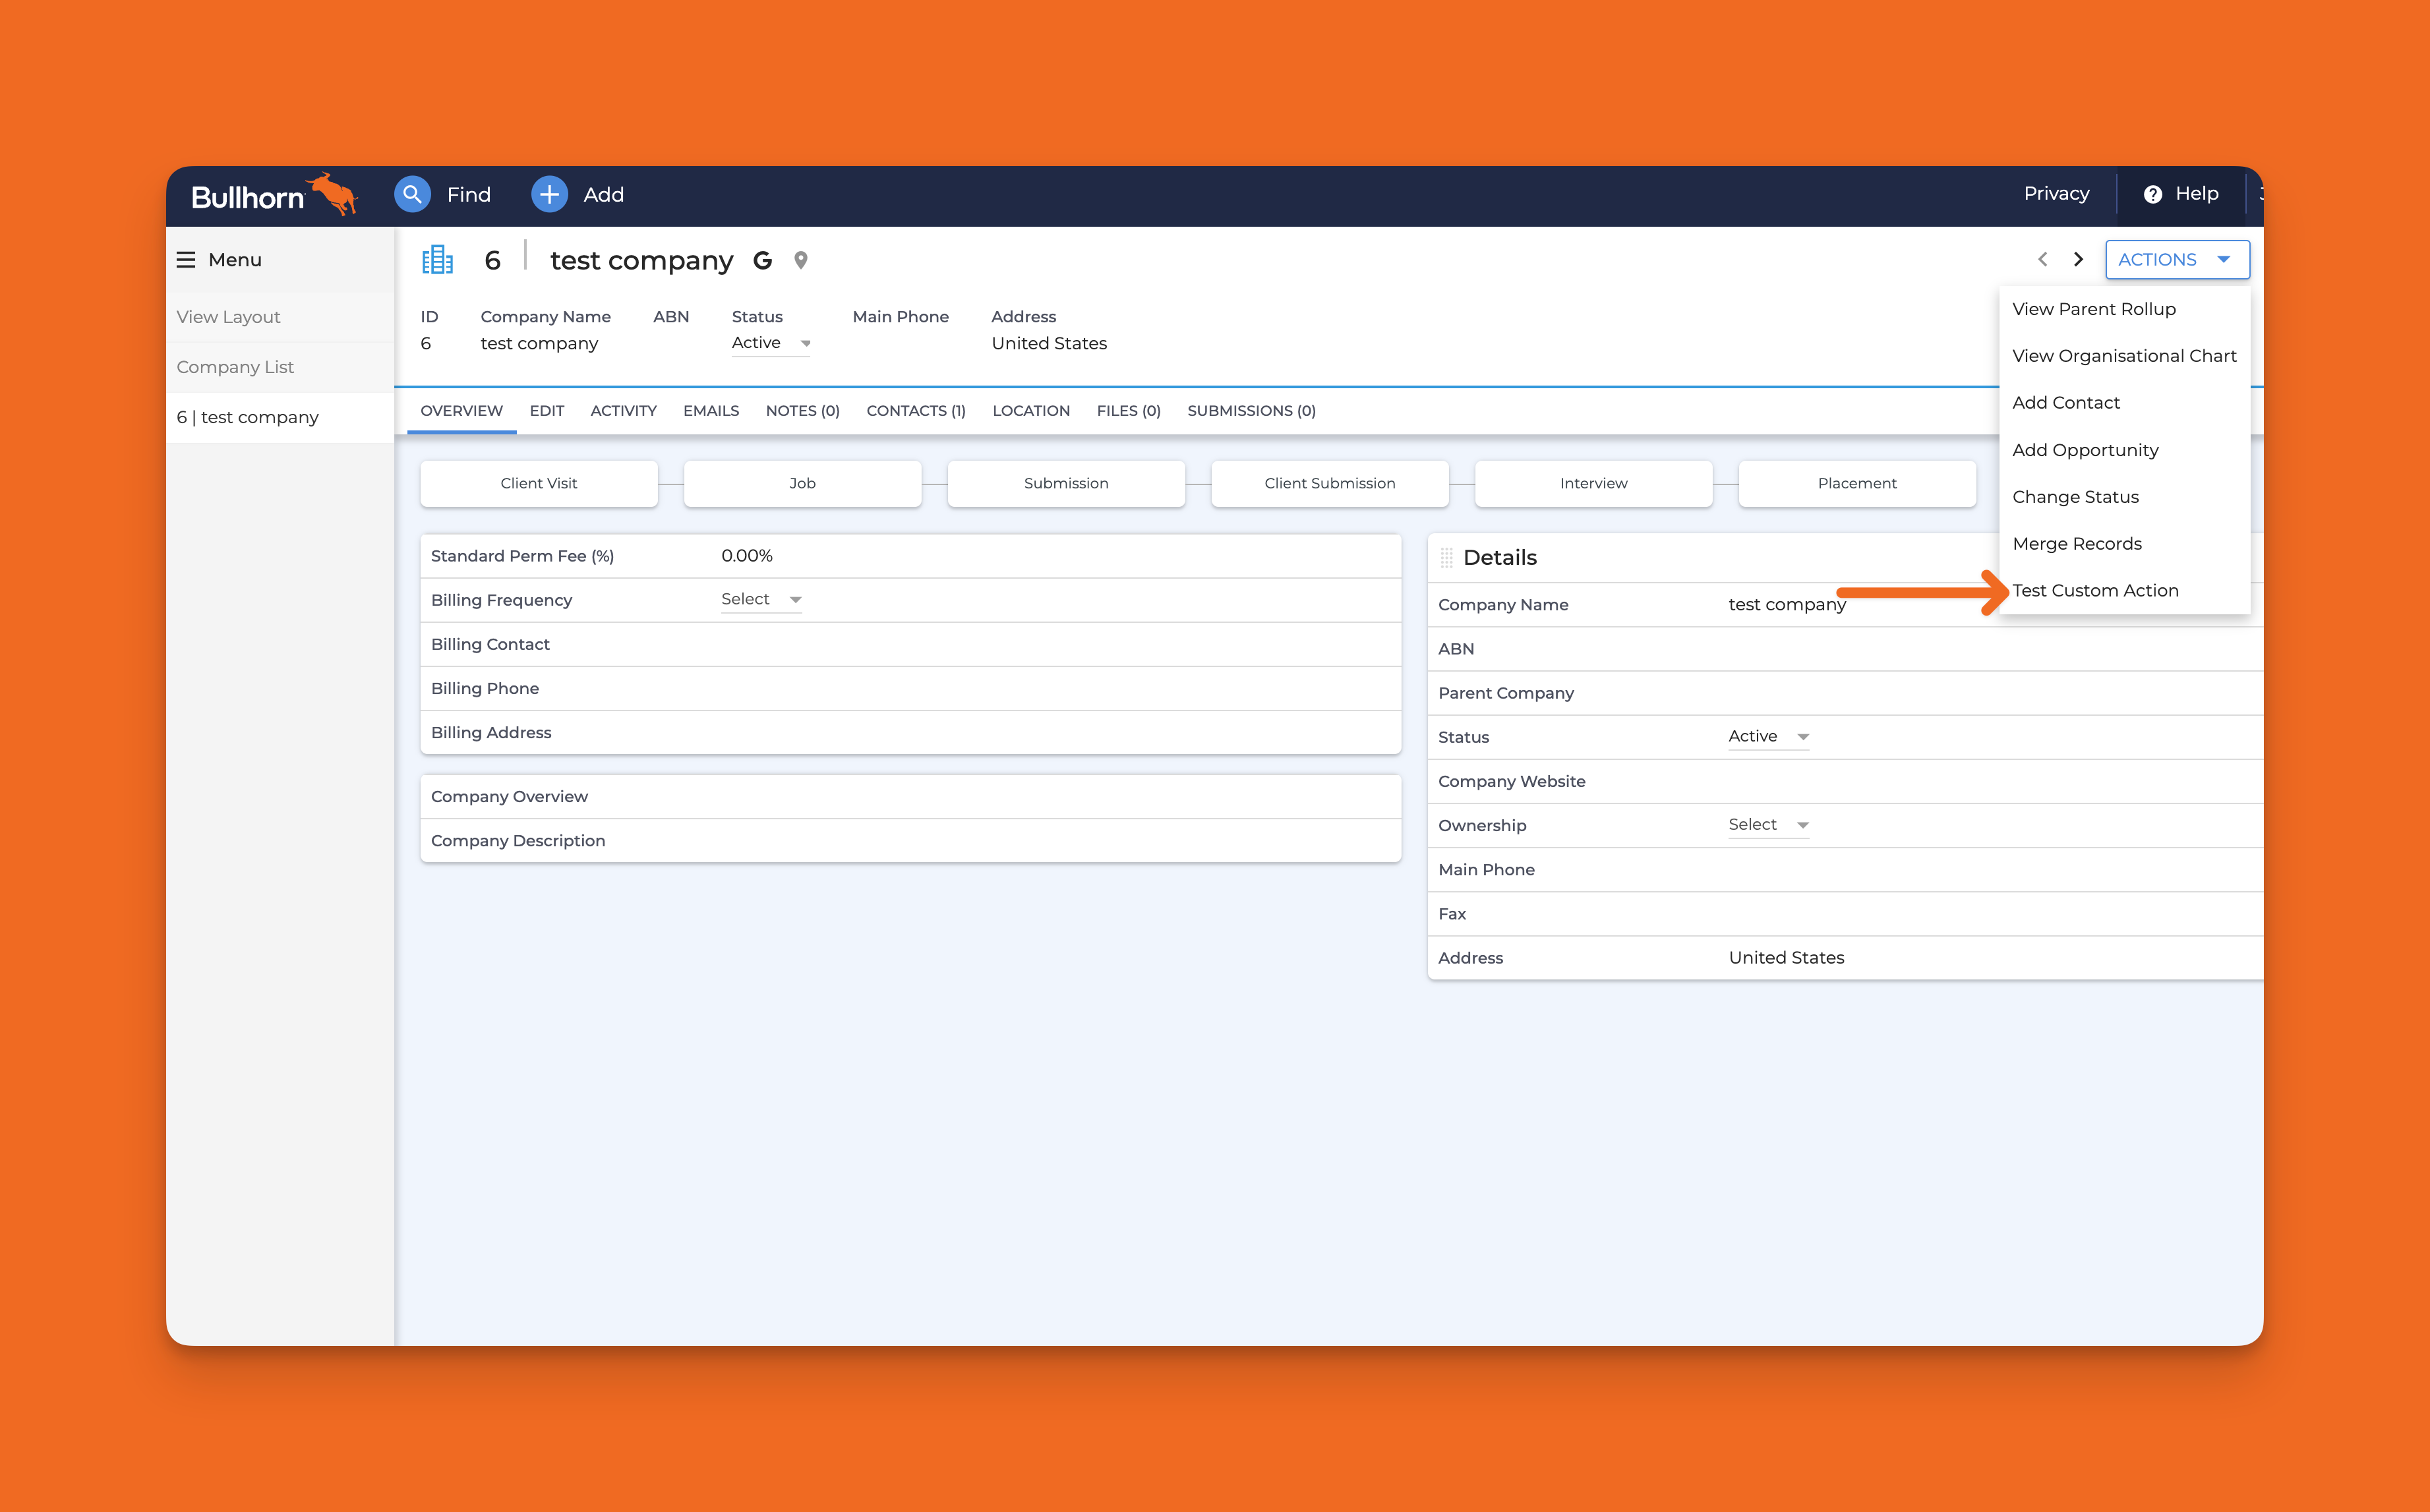
In a record, in the Update section: Appears in the update section.

On a record list, in the Action section: Appears in the action section.
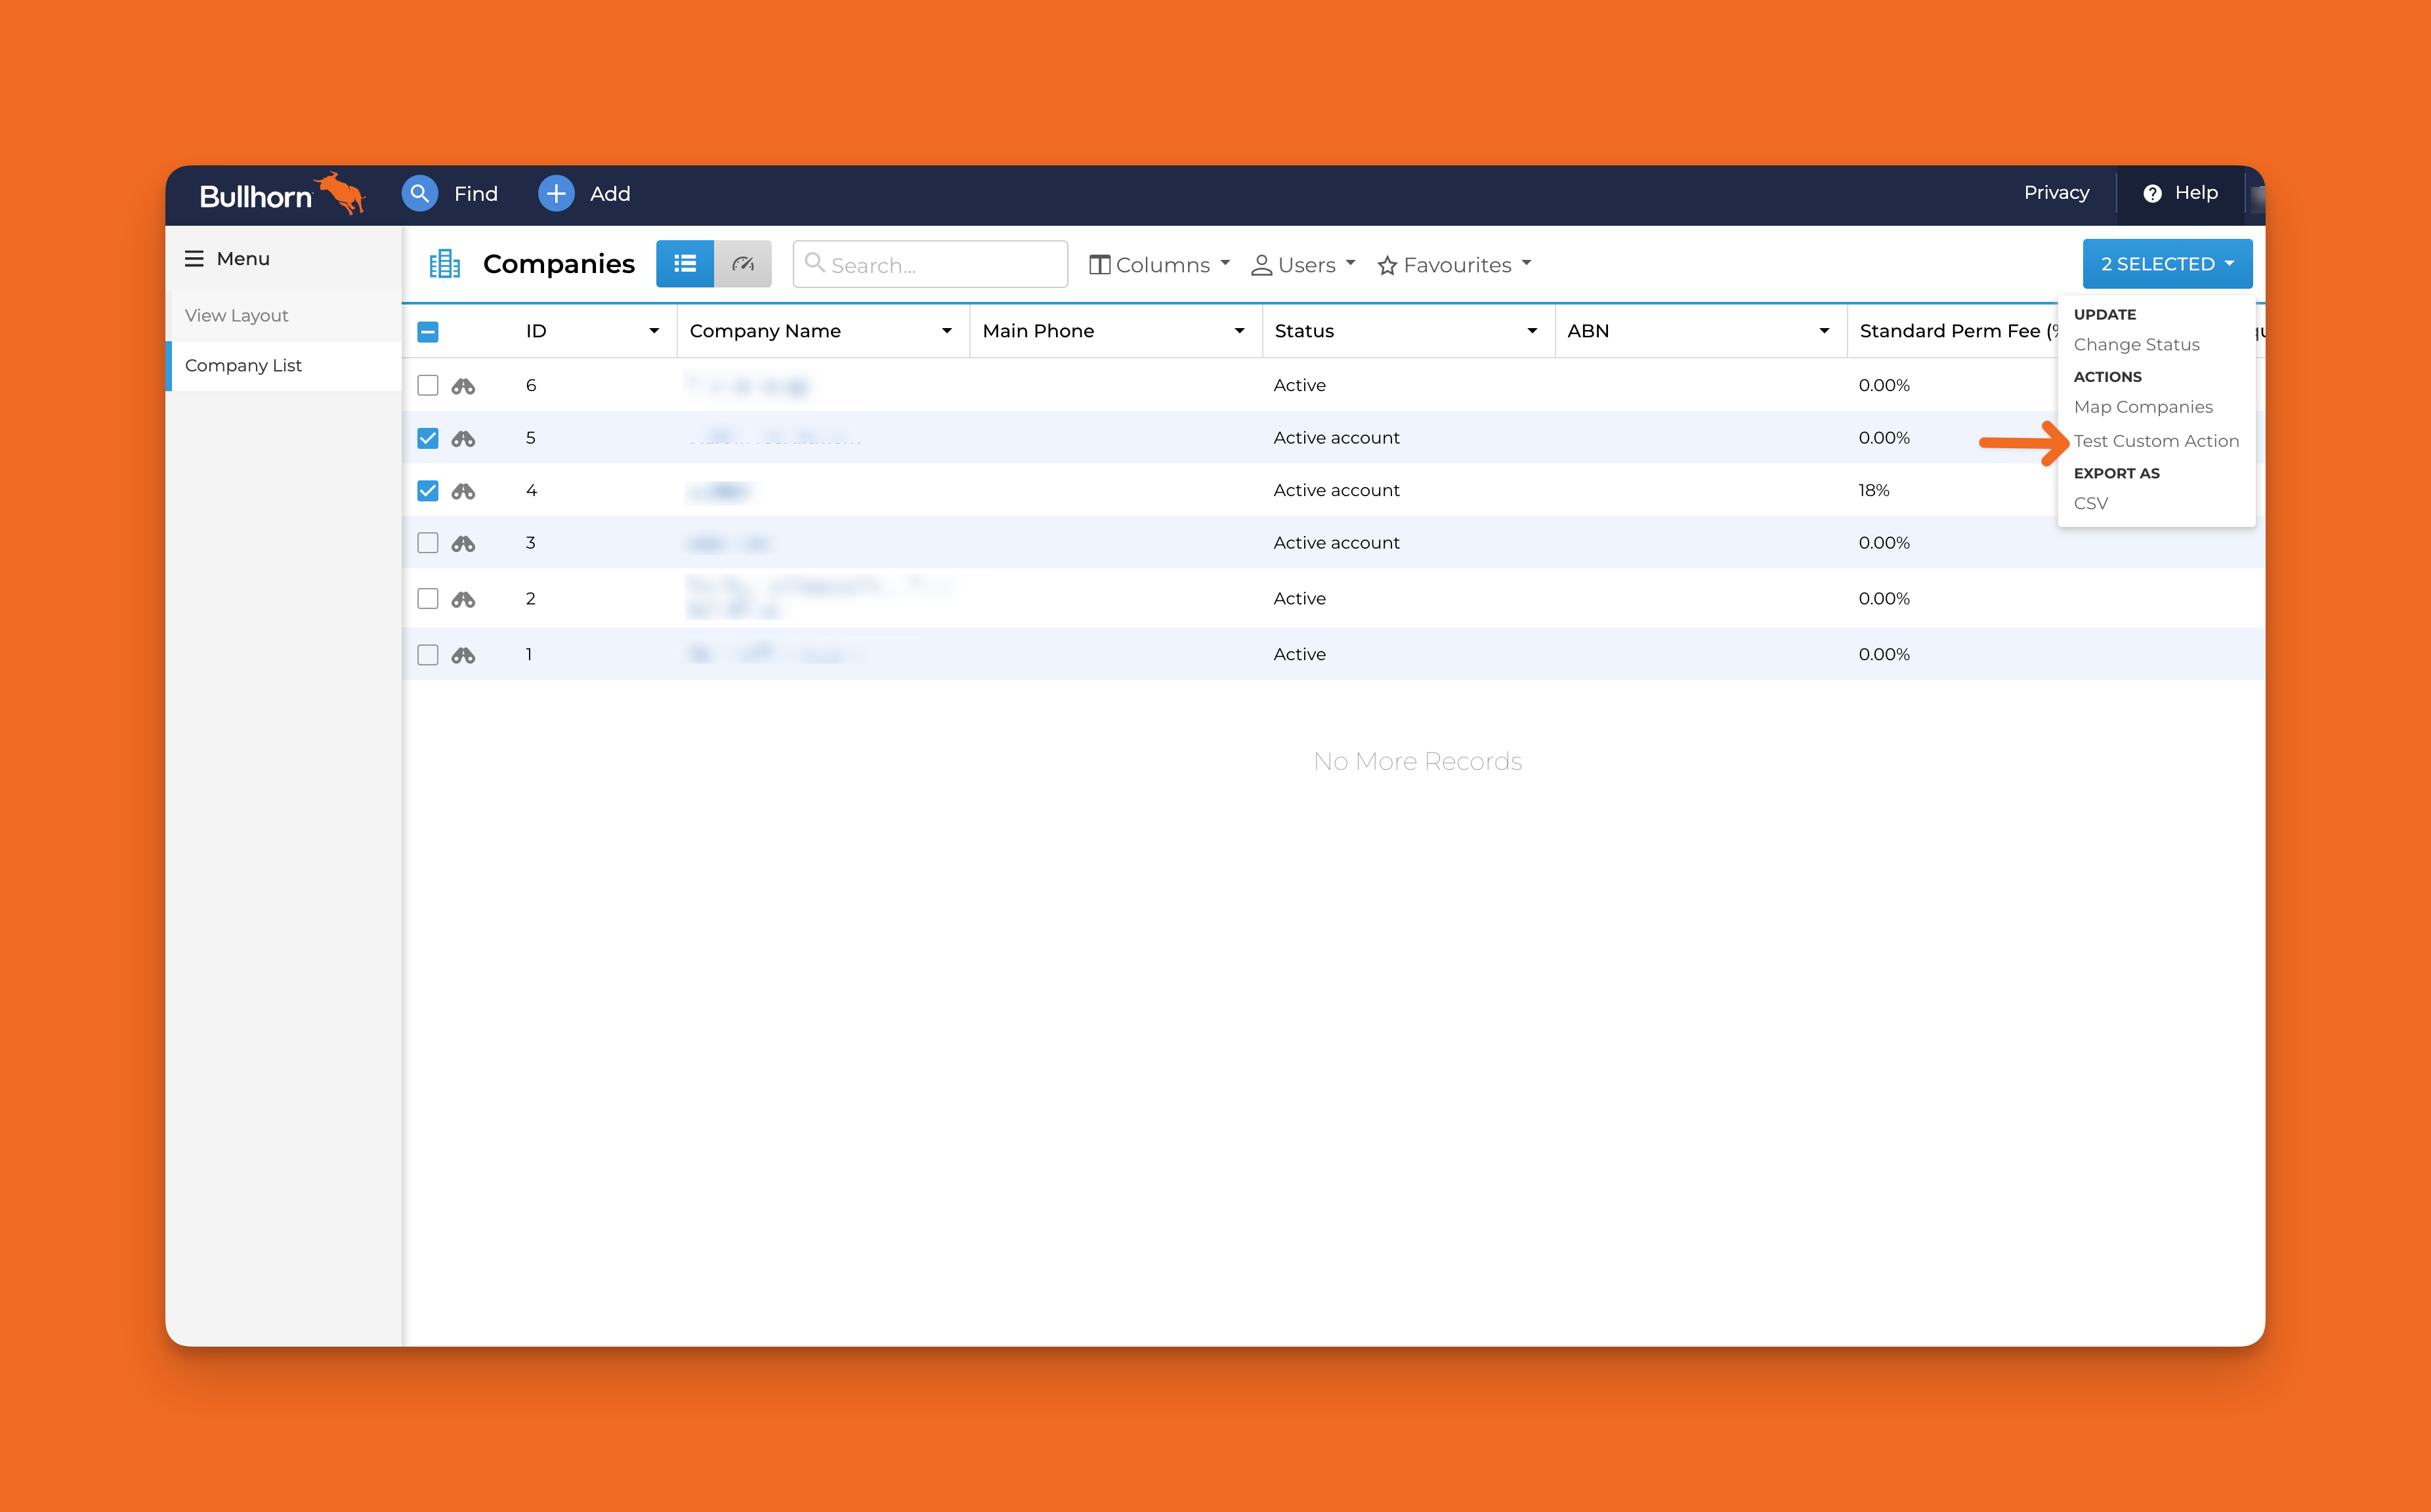
The benefit of the last two options is that you can select multiple records to post to the URL.
Fill out the rest of the form, including the Partner Name (this enables the auth code for further authorization), User Types (so the action appears for the correct users), and the URL, which should be your
ngrok URL with /webhook at the end. Once completed, click Save.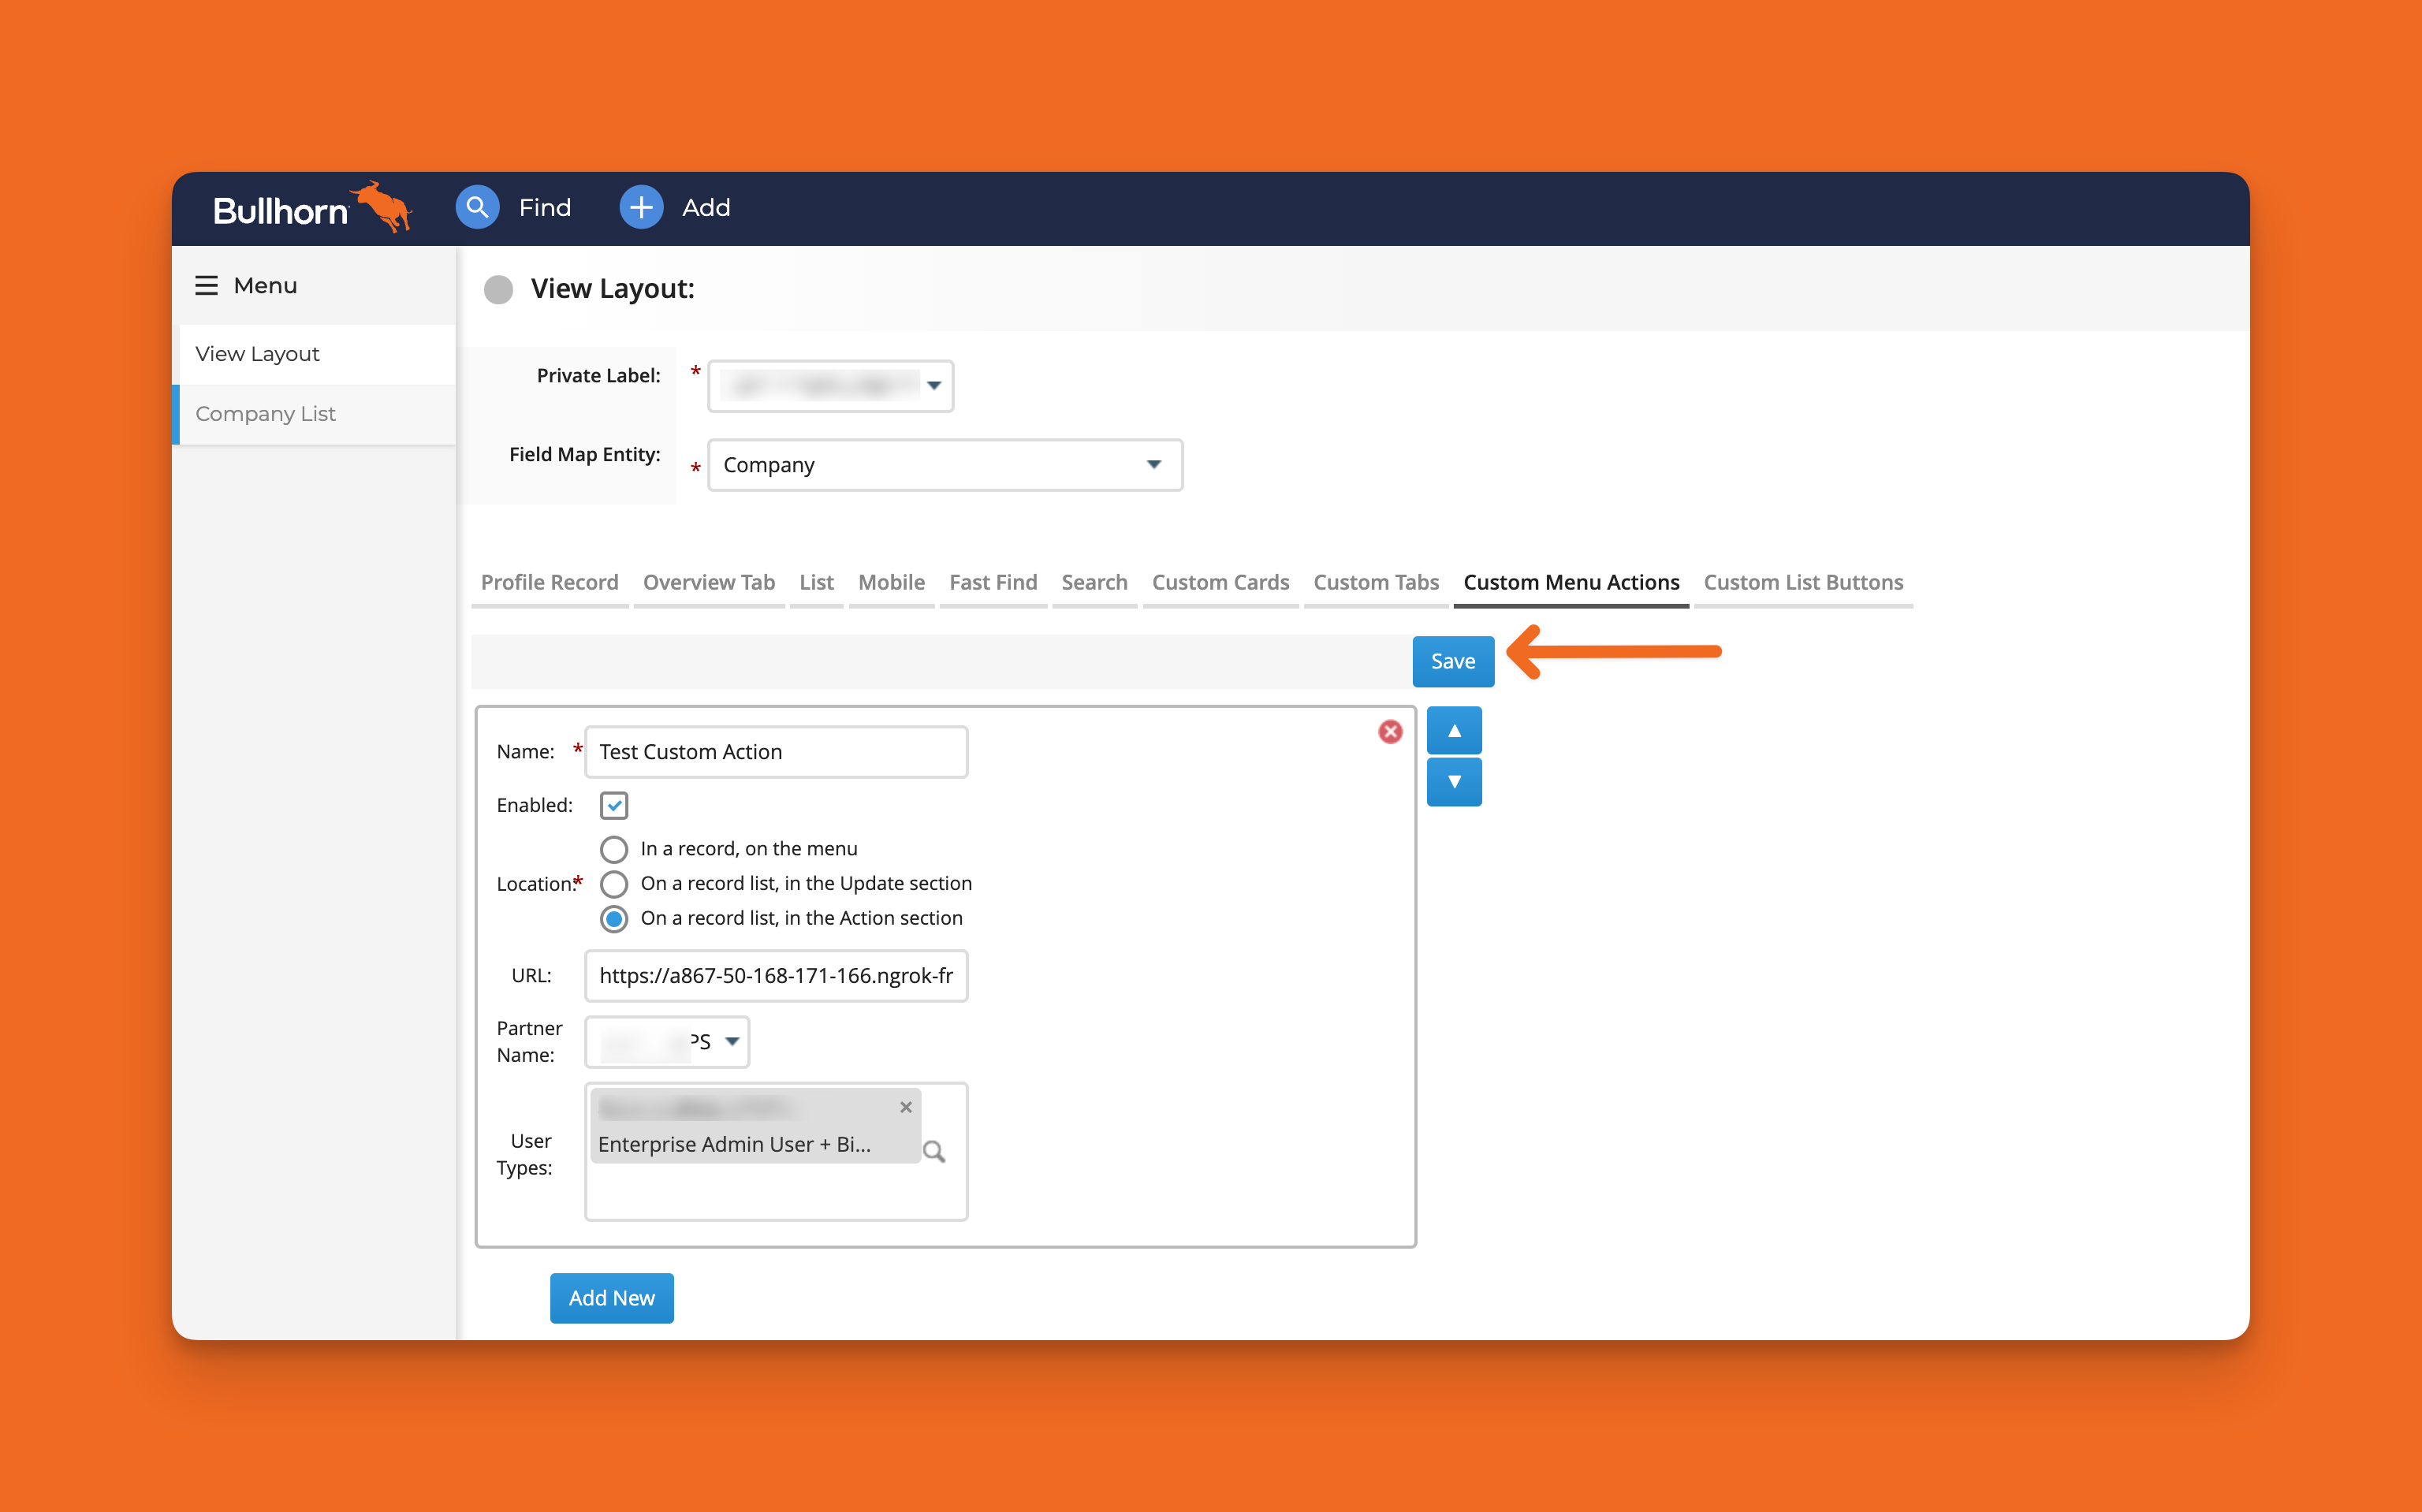
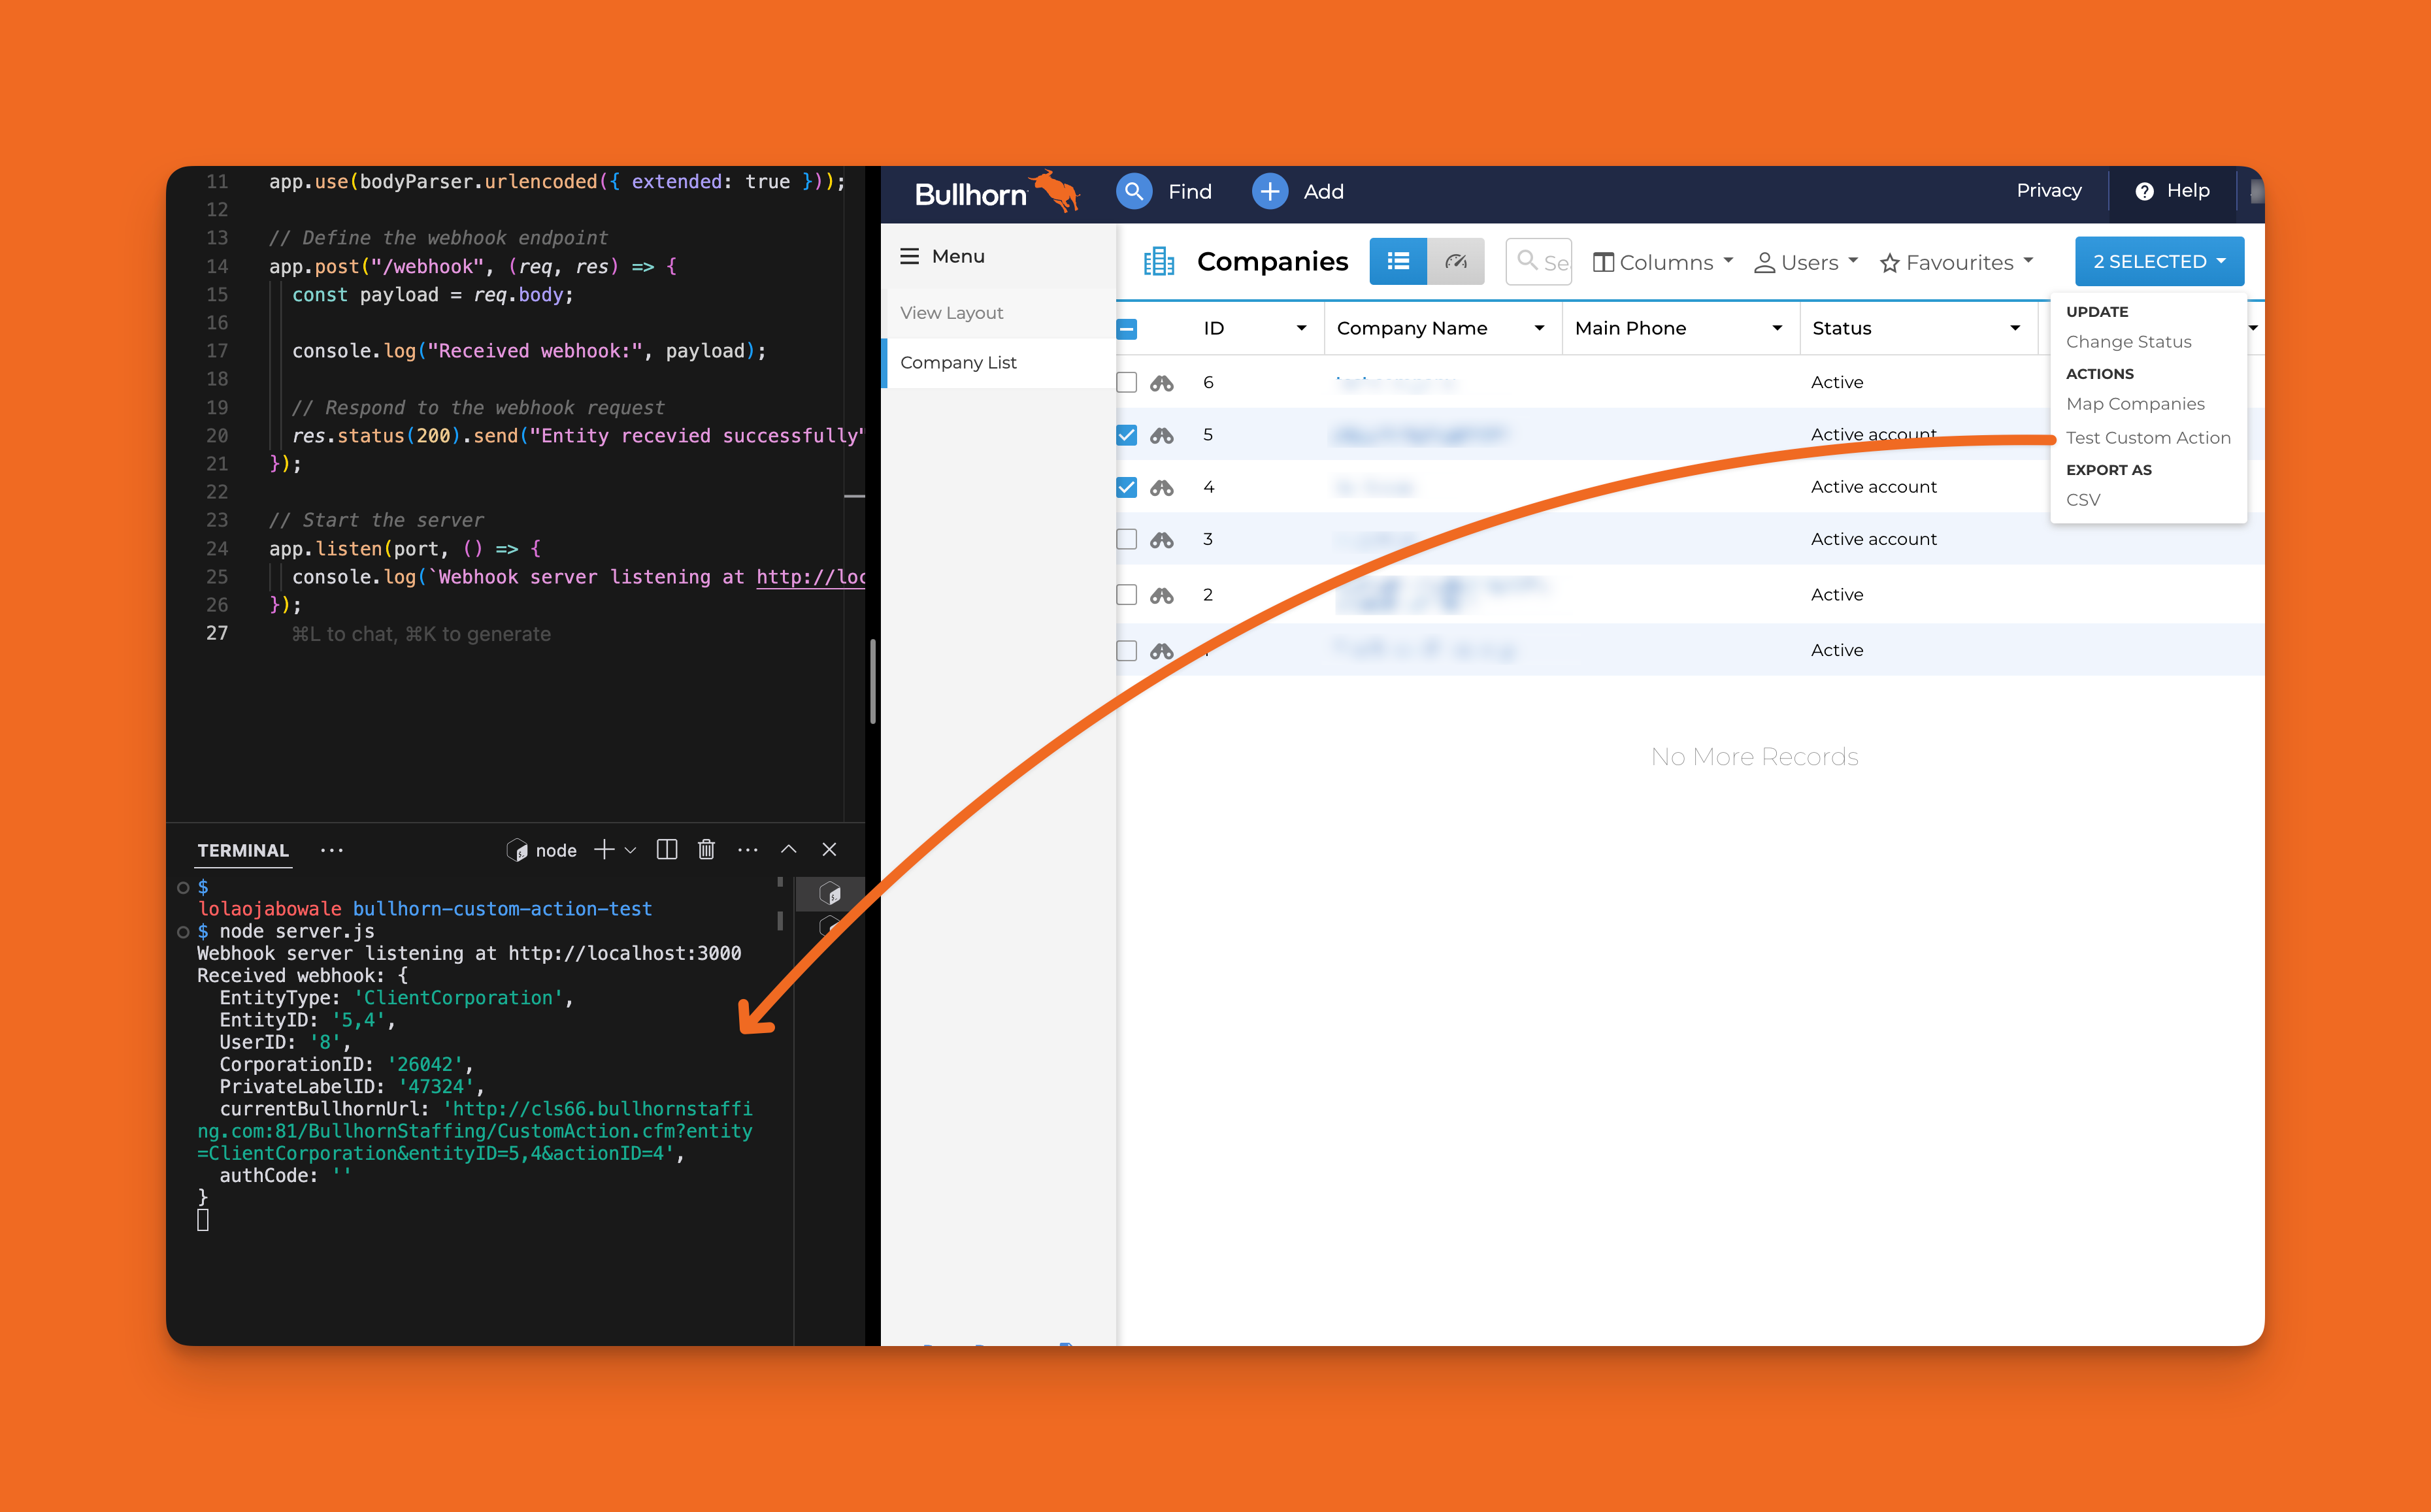
Once saved, whenever a user selects that action, the information will be posted to your URL. You can try it yourself and verify that the information posts in your terminal!
And that’s it! Have you used or are you interested in Bullhorn integration? Let’s swap notes!
.png?table=block&id=9ba33ac6-8e12-48f6-b980-4333b612ec56&cache=v2)
