Do not index
If you're looking to extend the Daily plugin for Bubble with additional API calls, particularly for meeting sessions, you're in the right place.
This guide is for advanced users; if you're new to the plugin, start with our basic implementation tutorial here.
For a video guide, watch the YouTube video. For written instructions, continue reading!

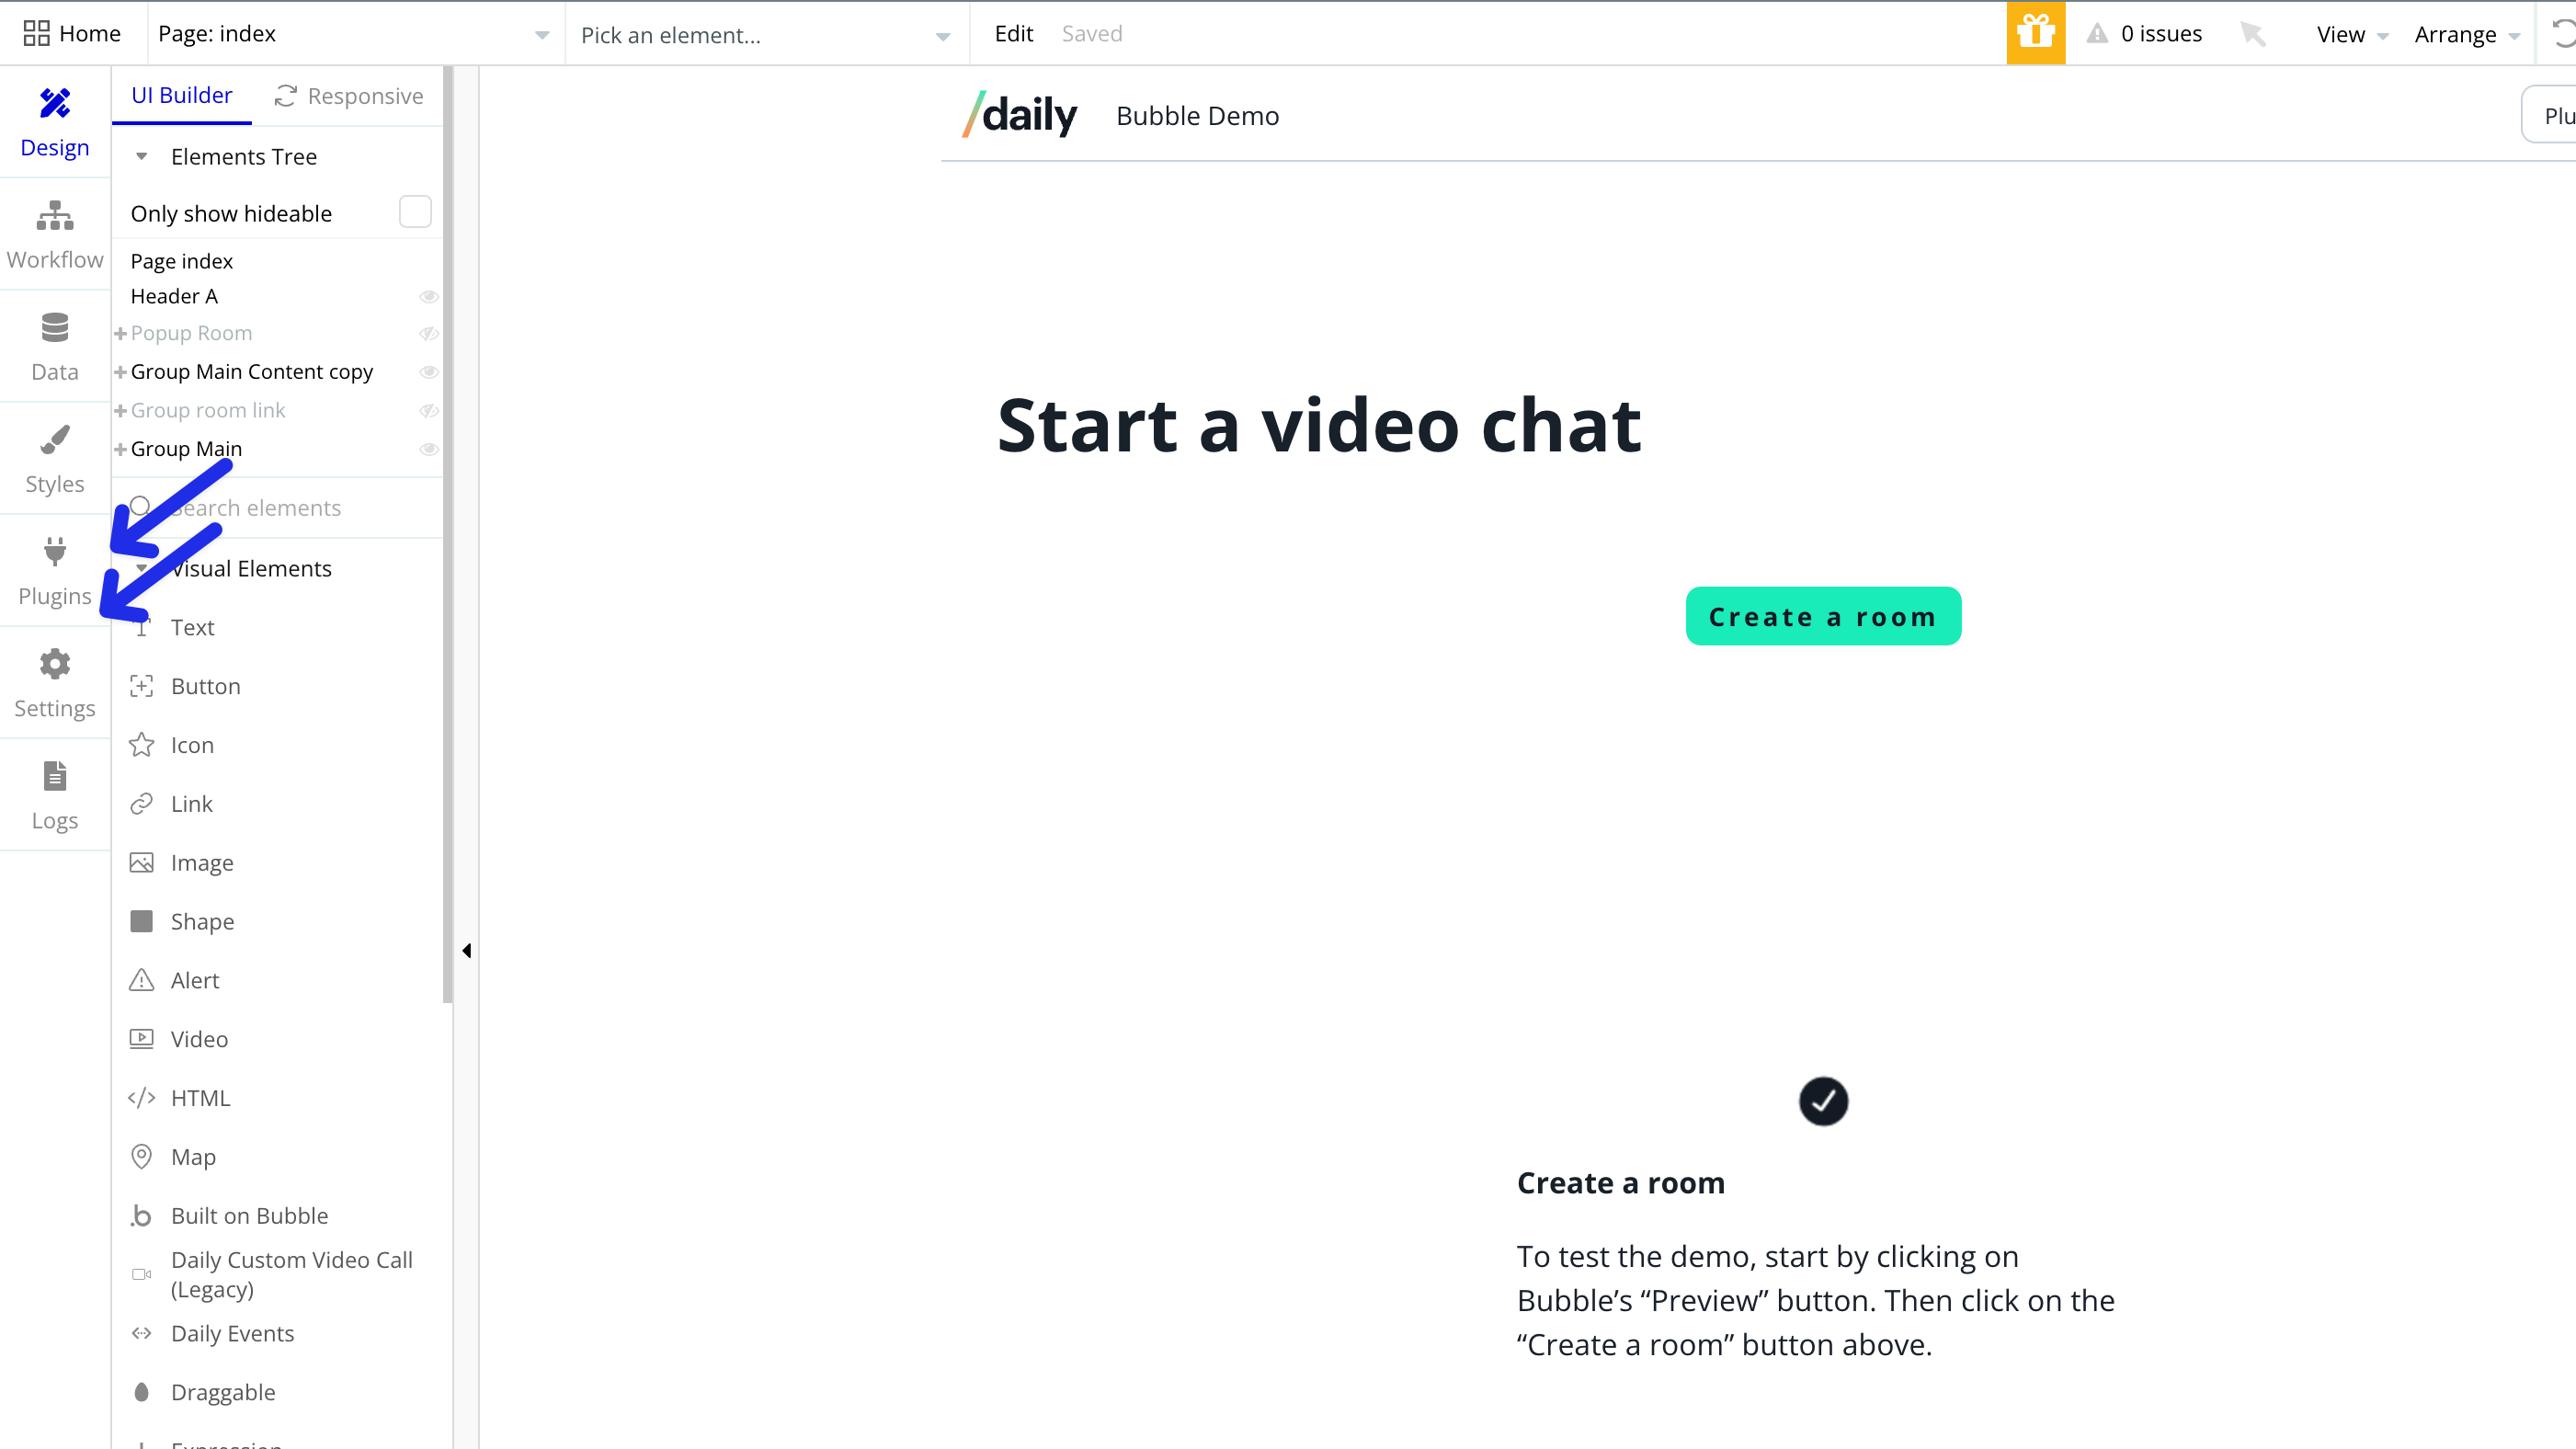
1. Access the Plugins Tab
First, navigate to the plugins tab in your Bubble app.
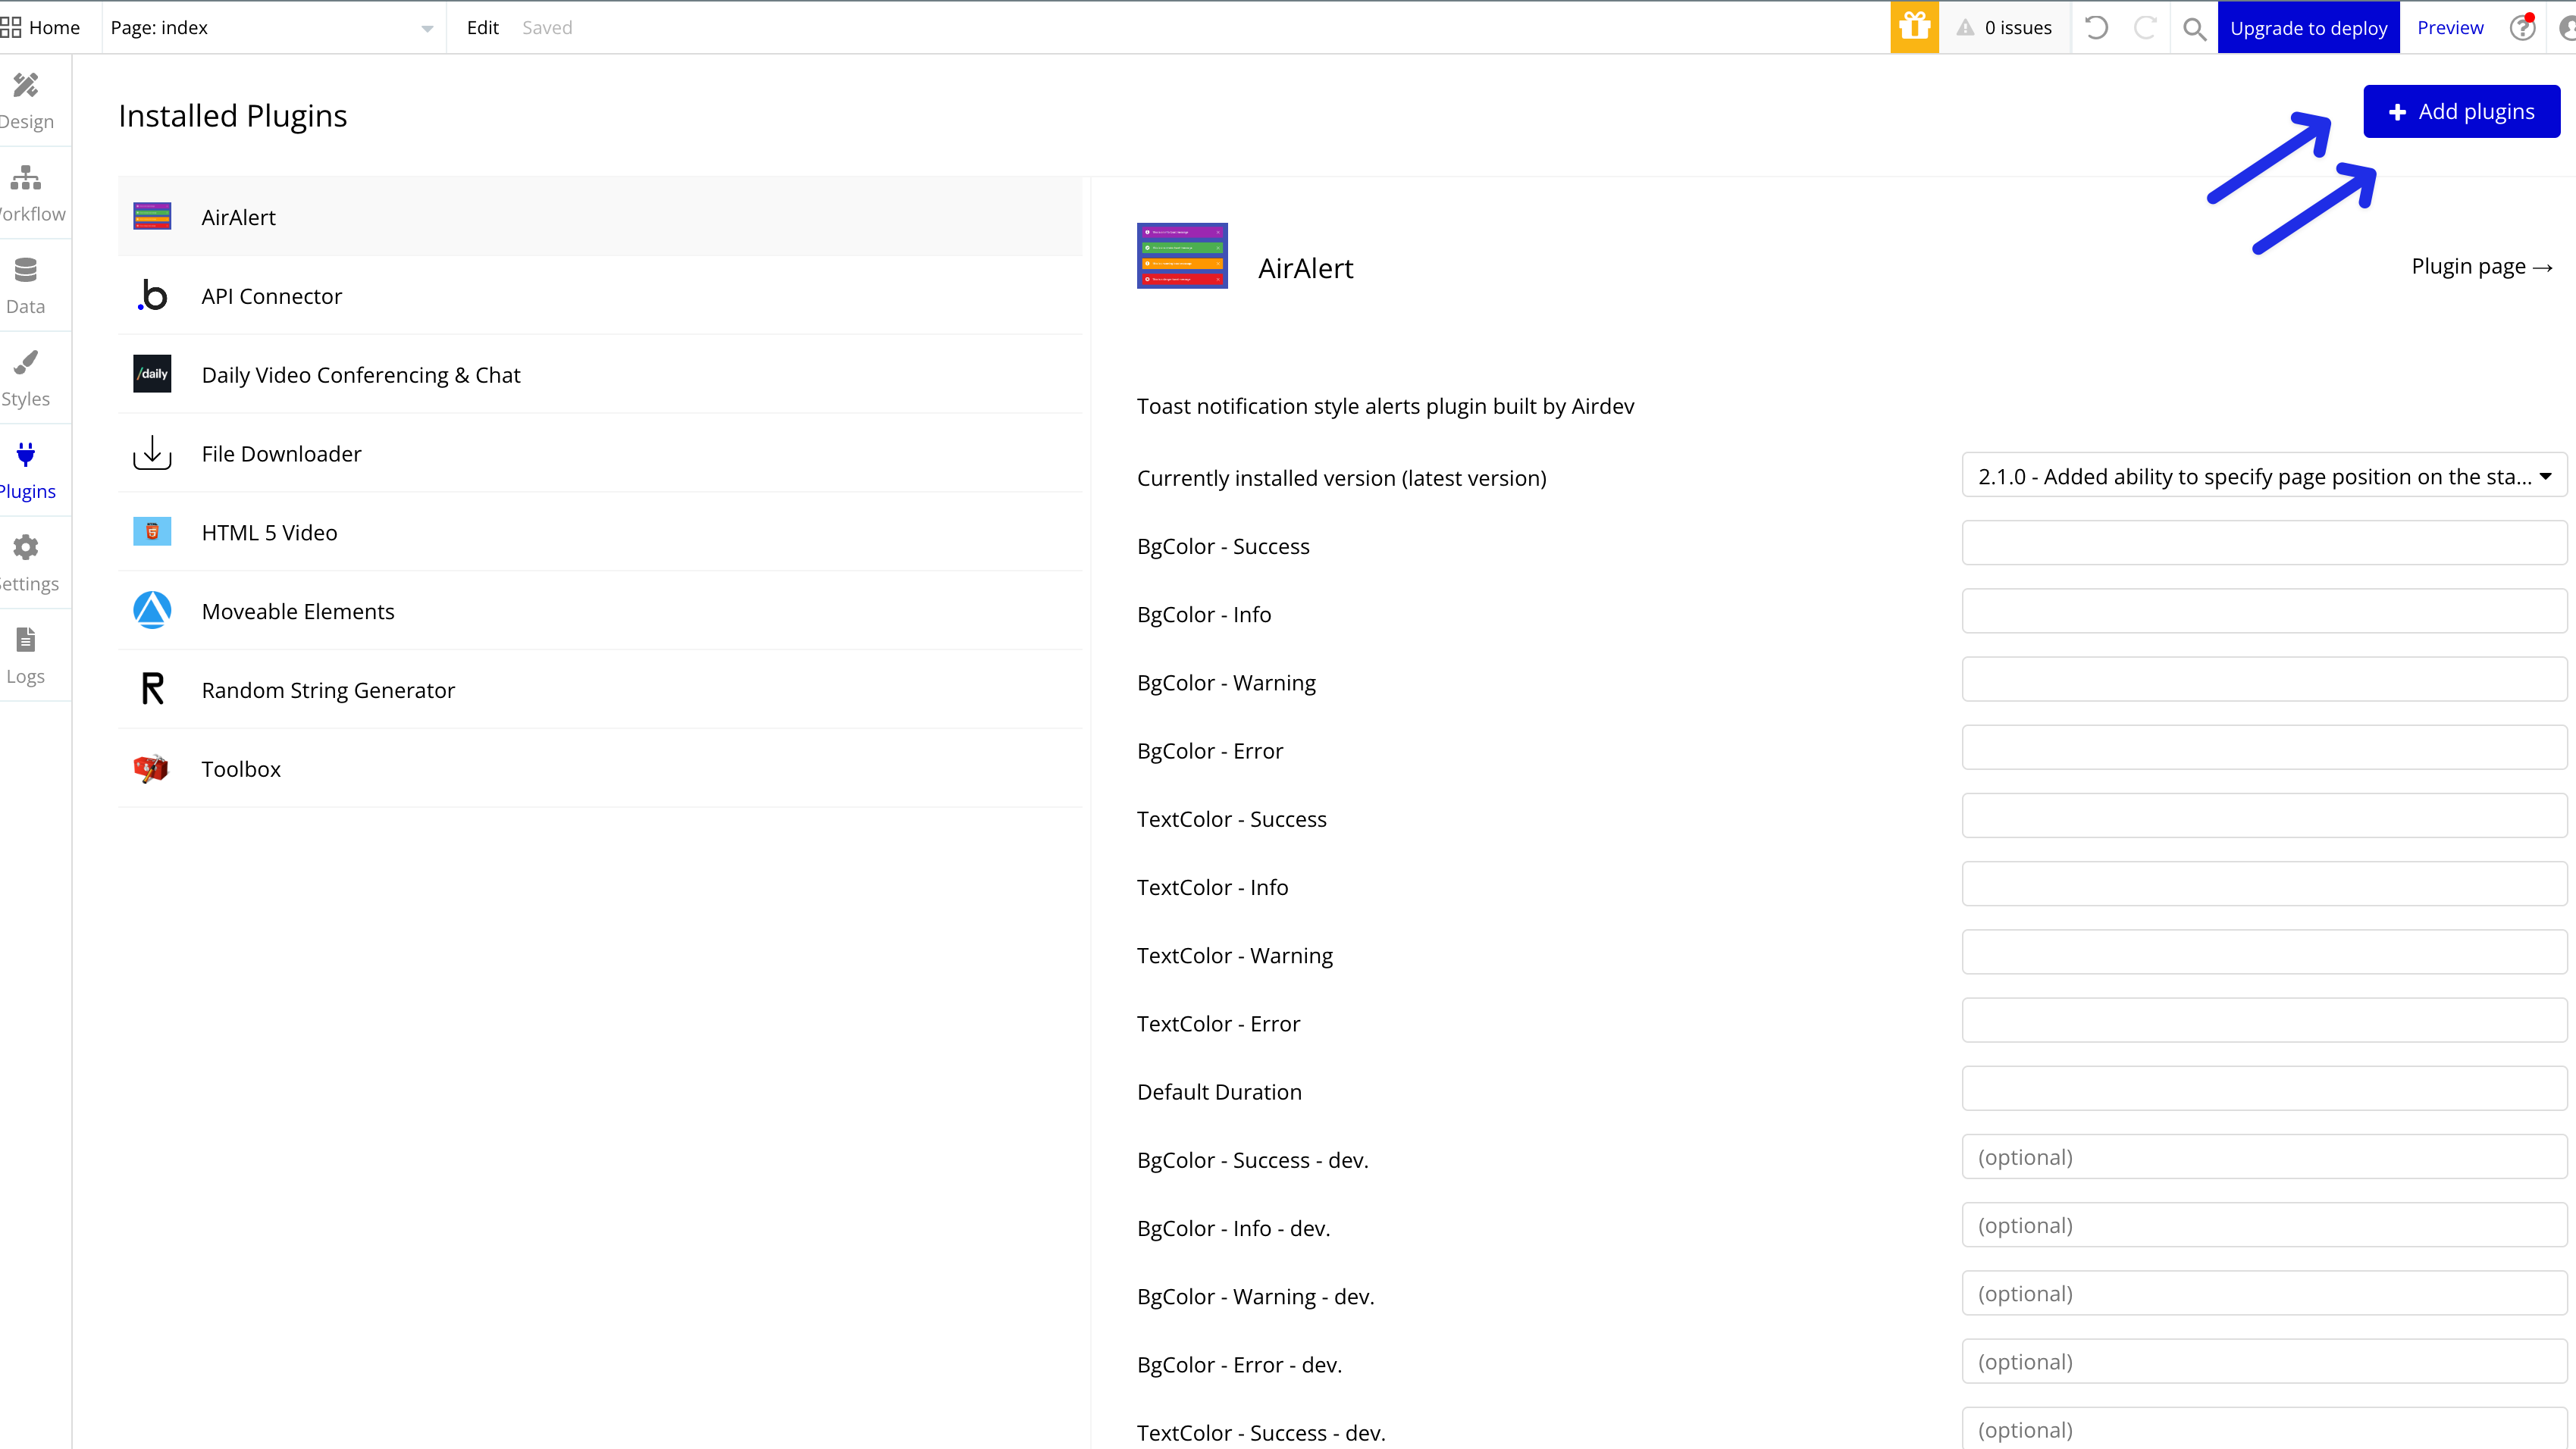
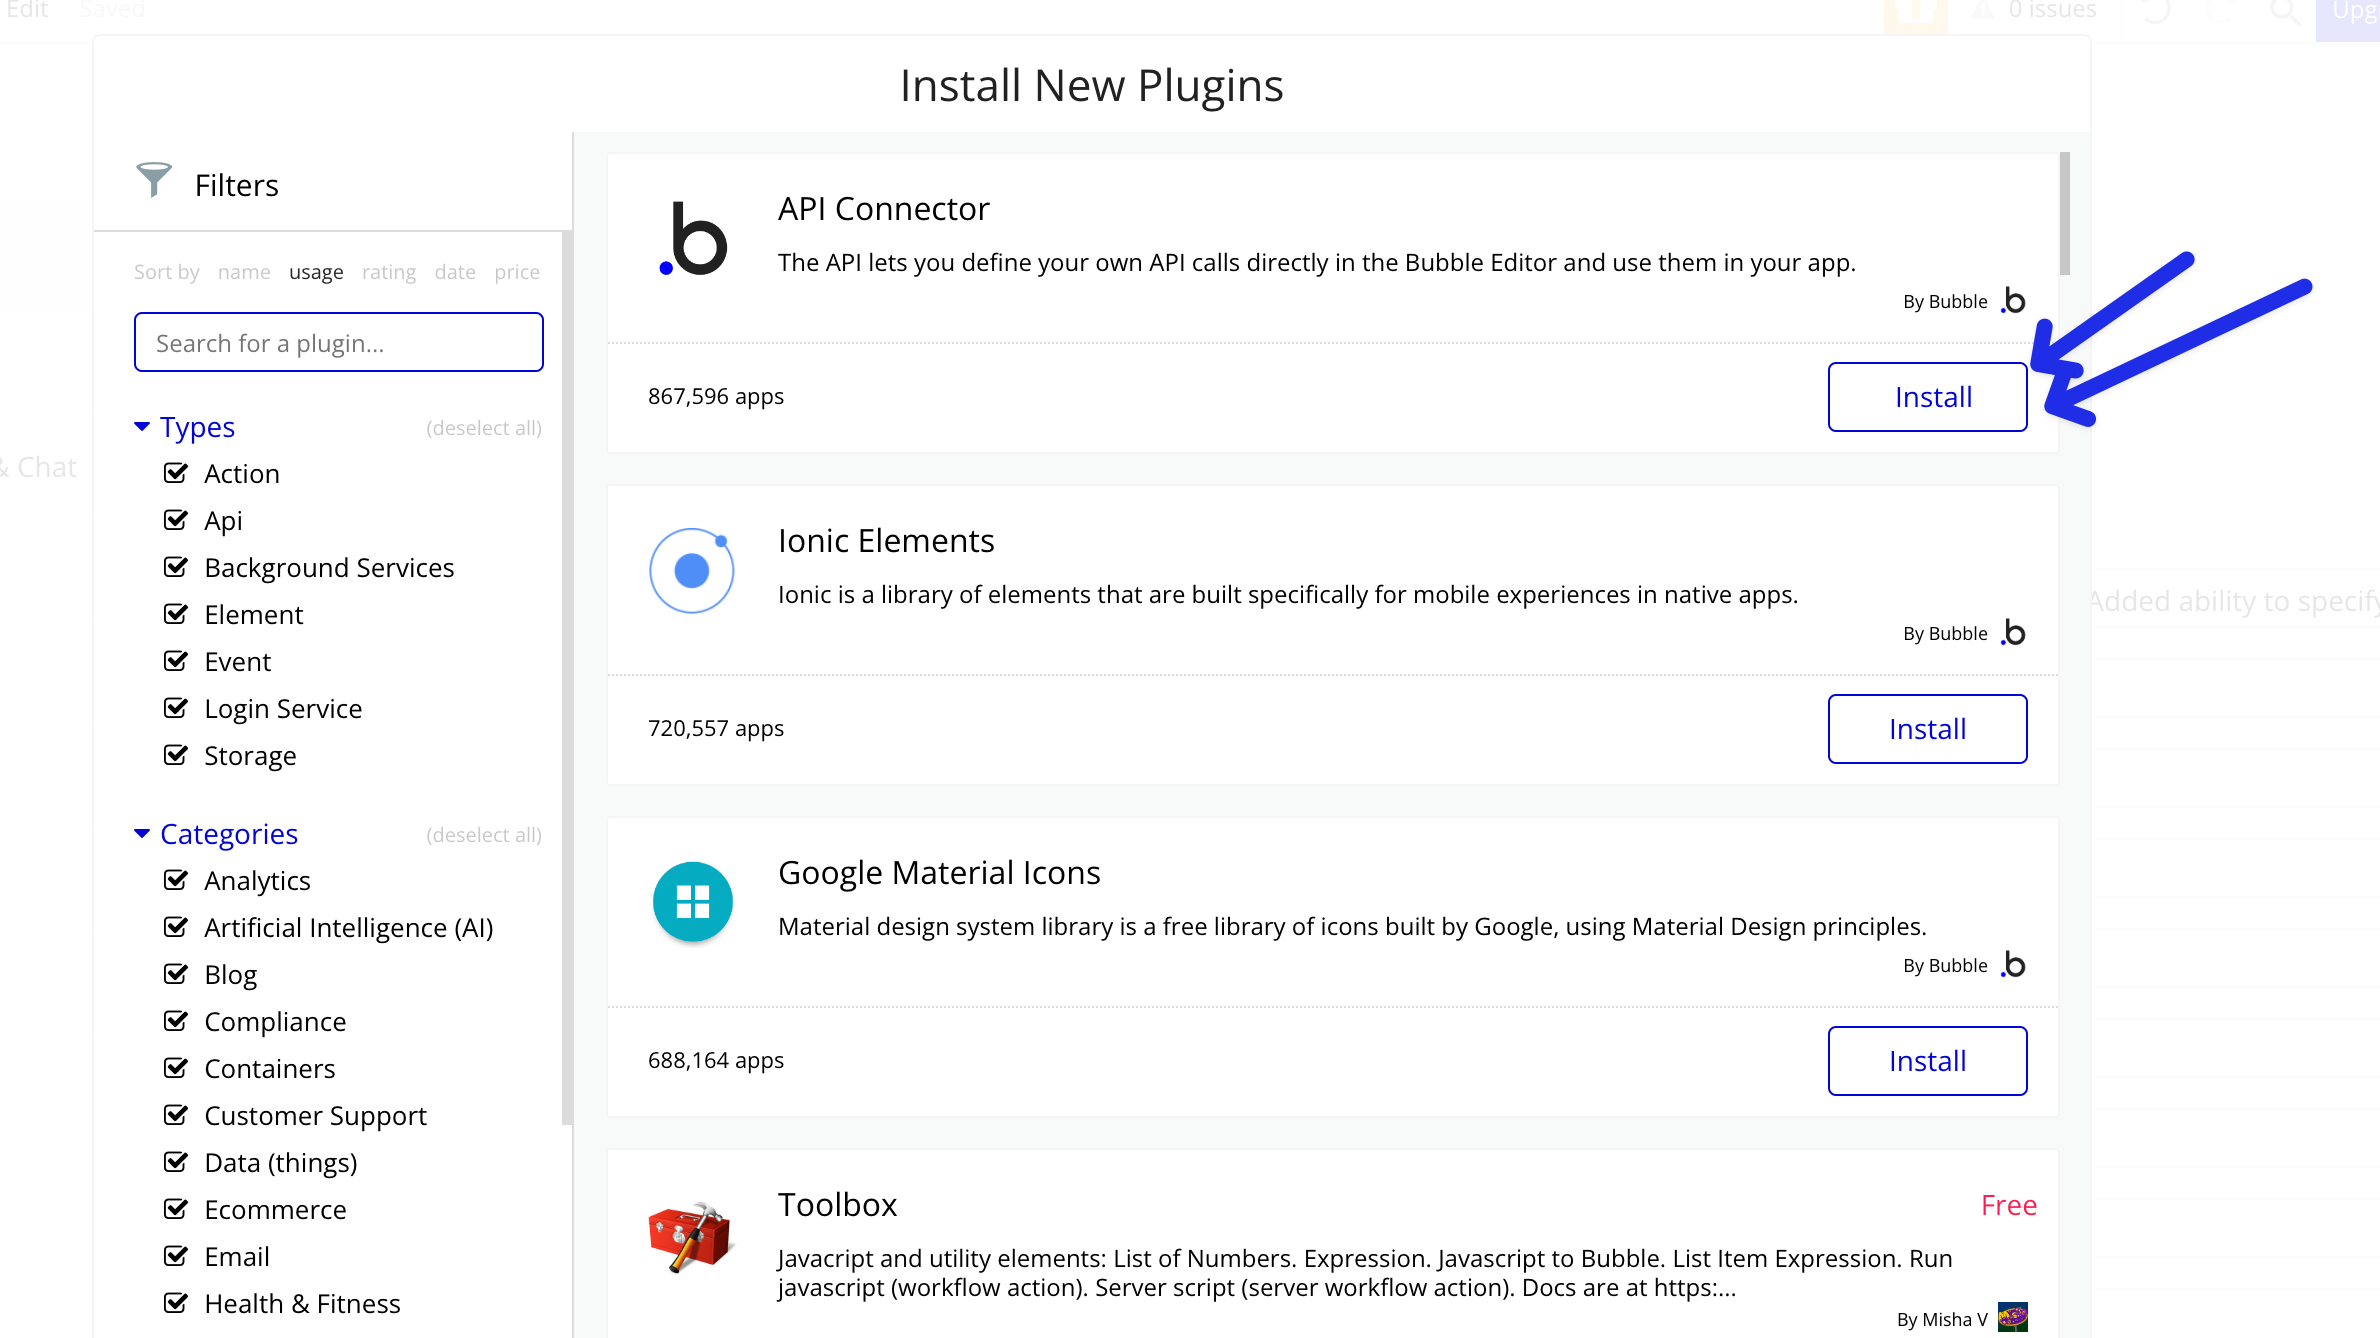
2. Install the API Connector Plugin
If you haven’t added the API connector yet, here’s how:
- Click 'Add plugins'.
- Search for 'API Connector'.
- Click 'Install'.
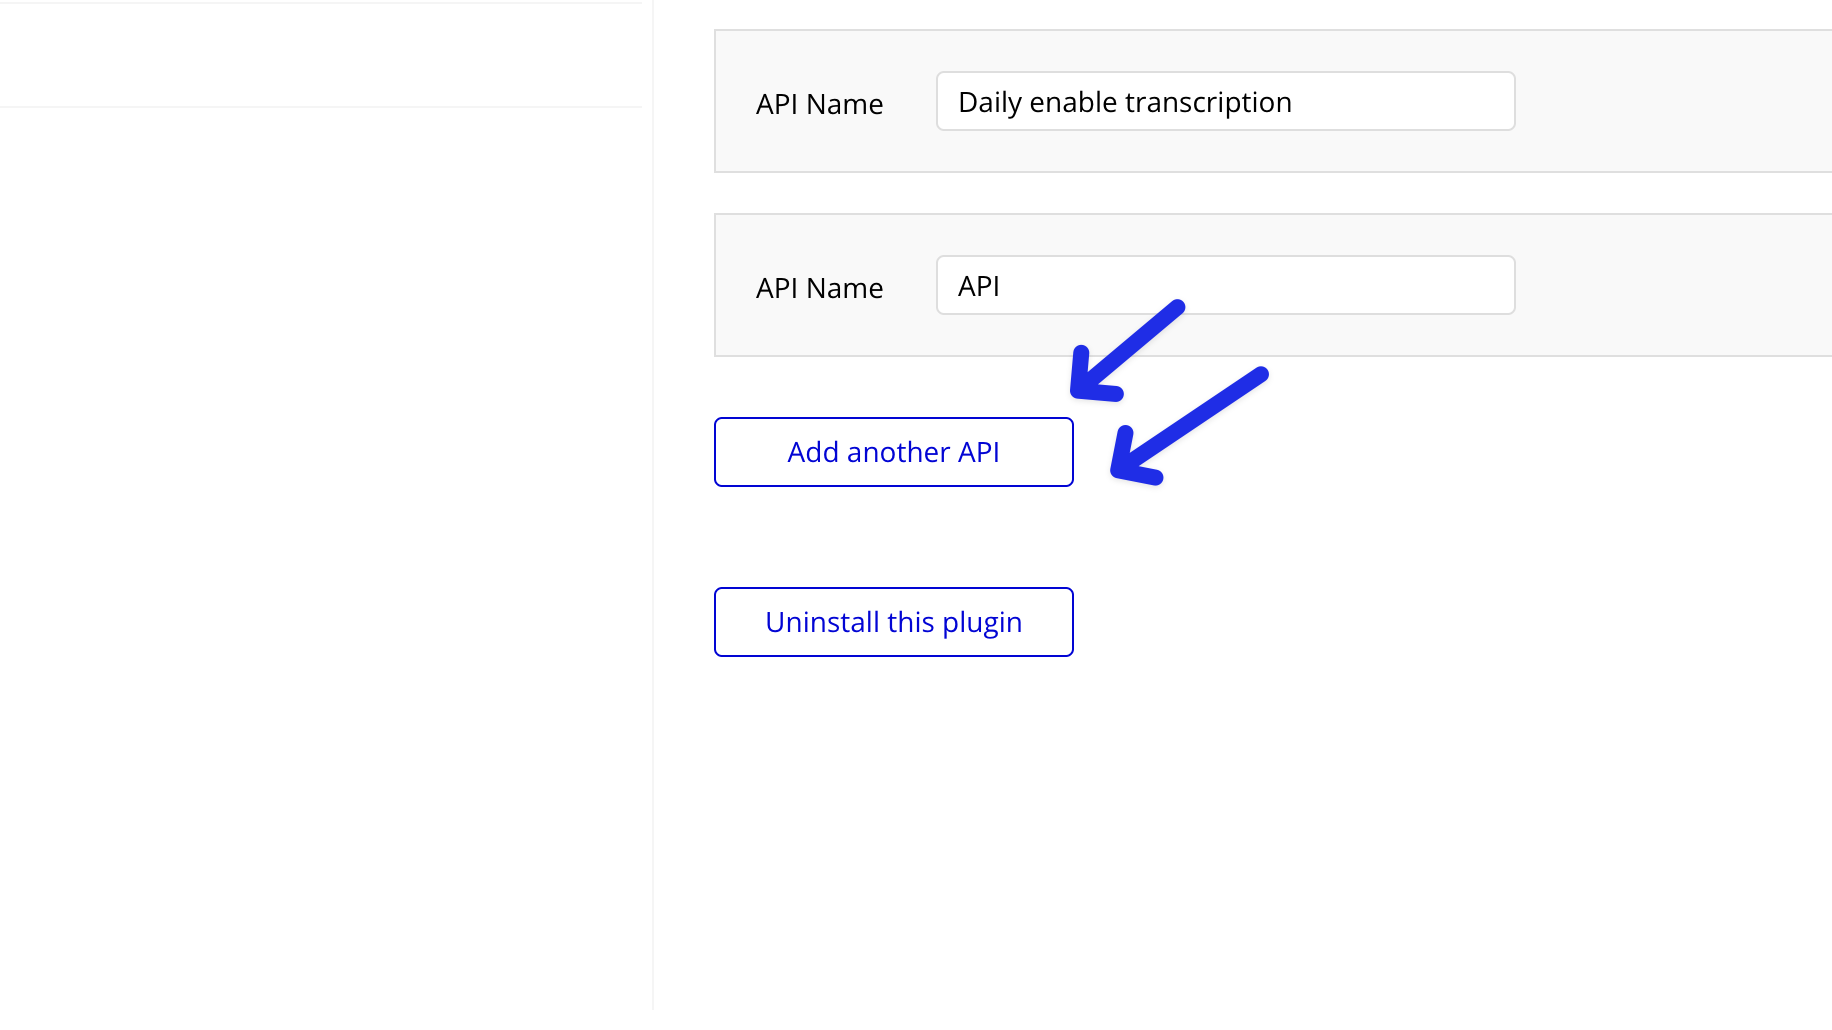
3. Configure a New API
Select 'Add another API' to start the configuration process.
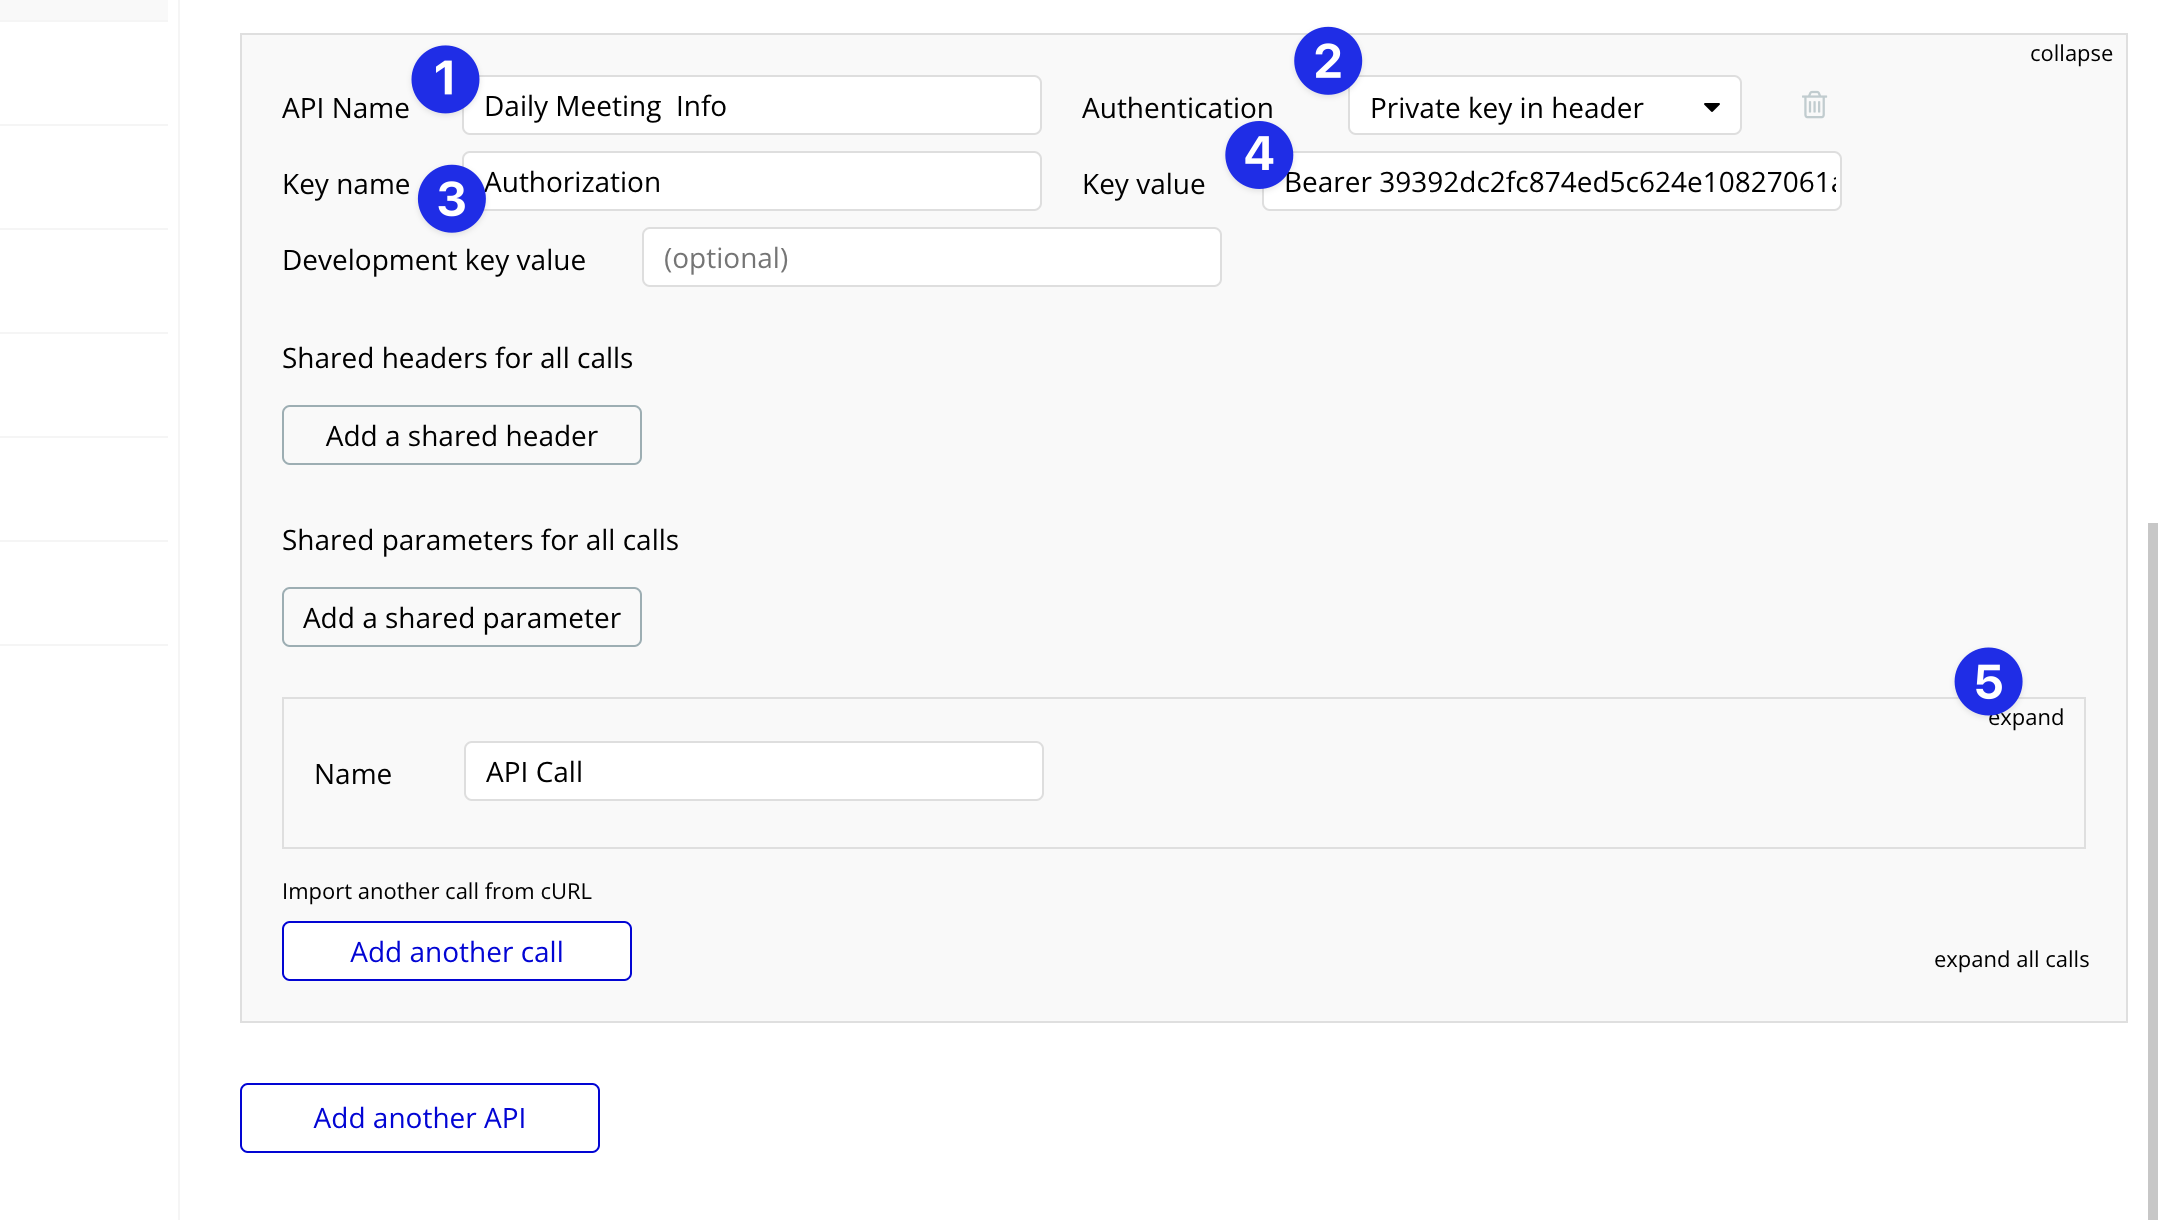
4. Fill Out API Header Details
Configure the API call header:
- API Name: Choose a memorable name.
- Authentication: Select 'Private key in header'.
- Key: Enter 'Authorization'.
- Key Value: Type 'Bearer [Your API Key]' (Find your API key on your Daily developer dashboard).
- Click 'Expand' to program the API call.
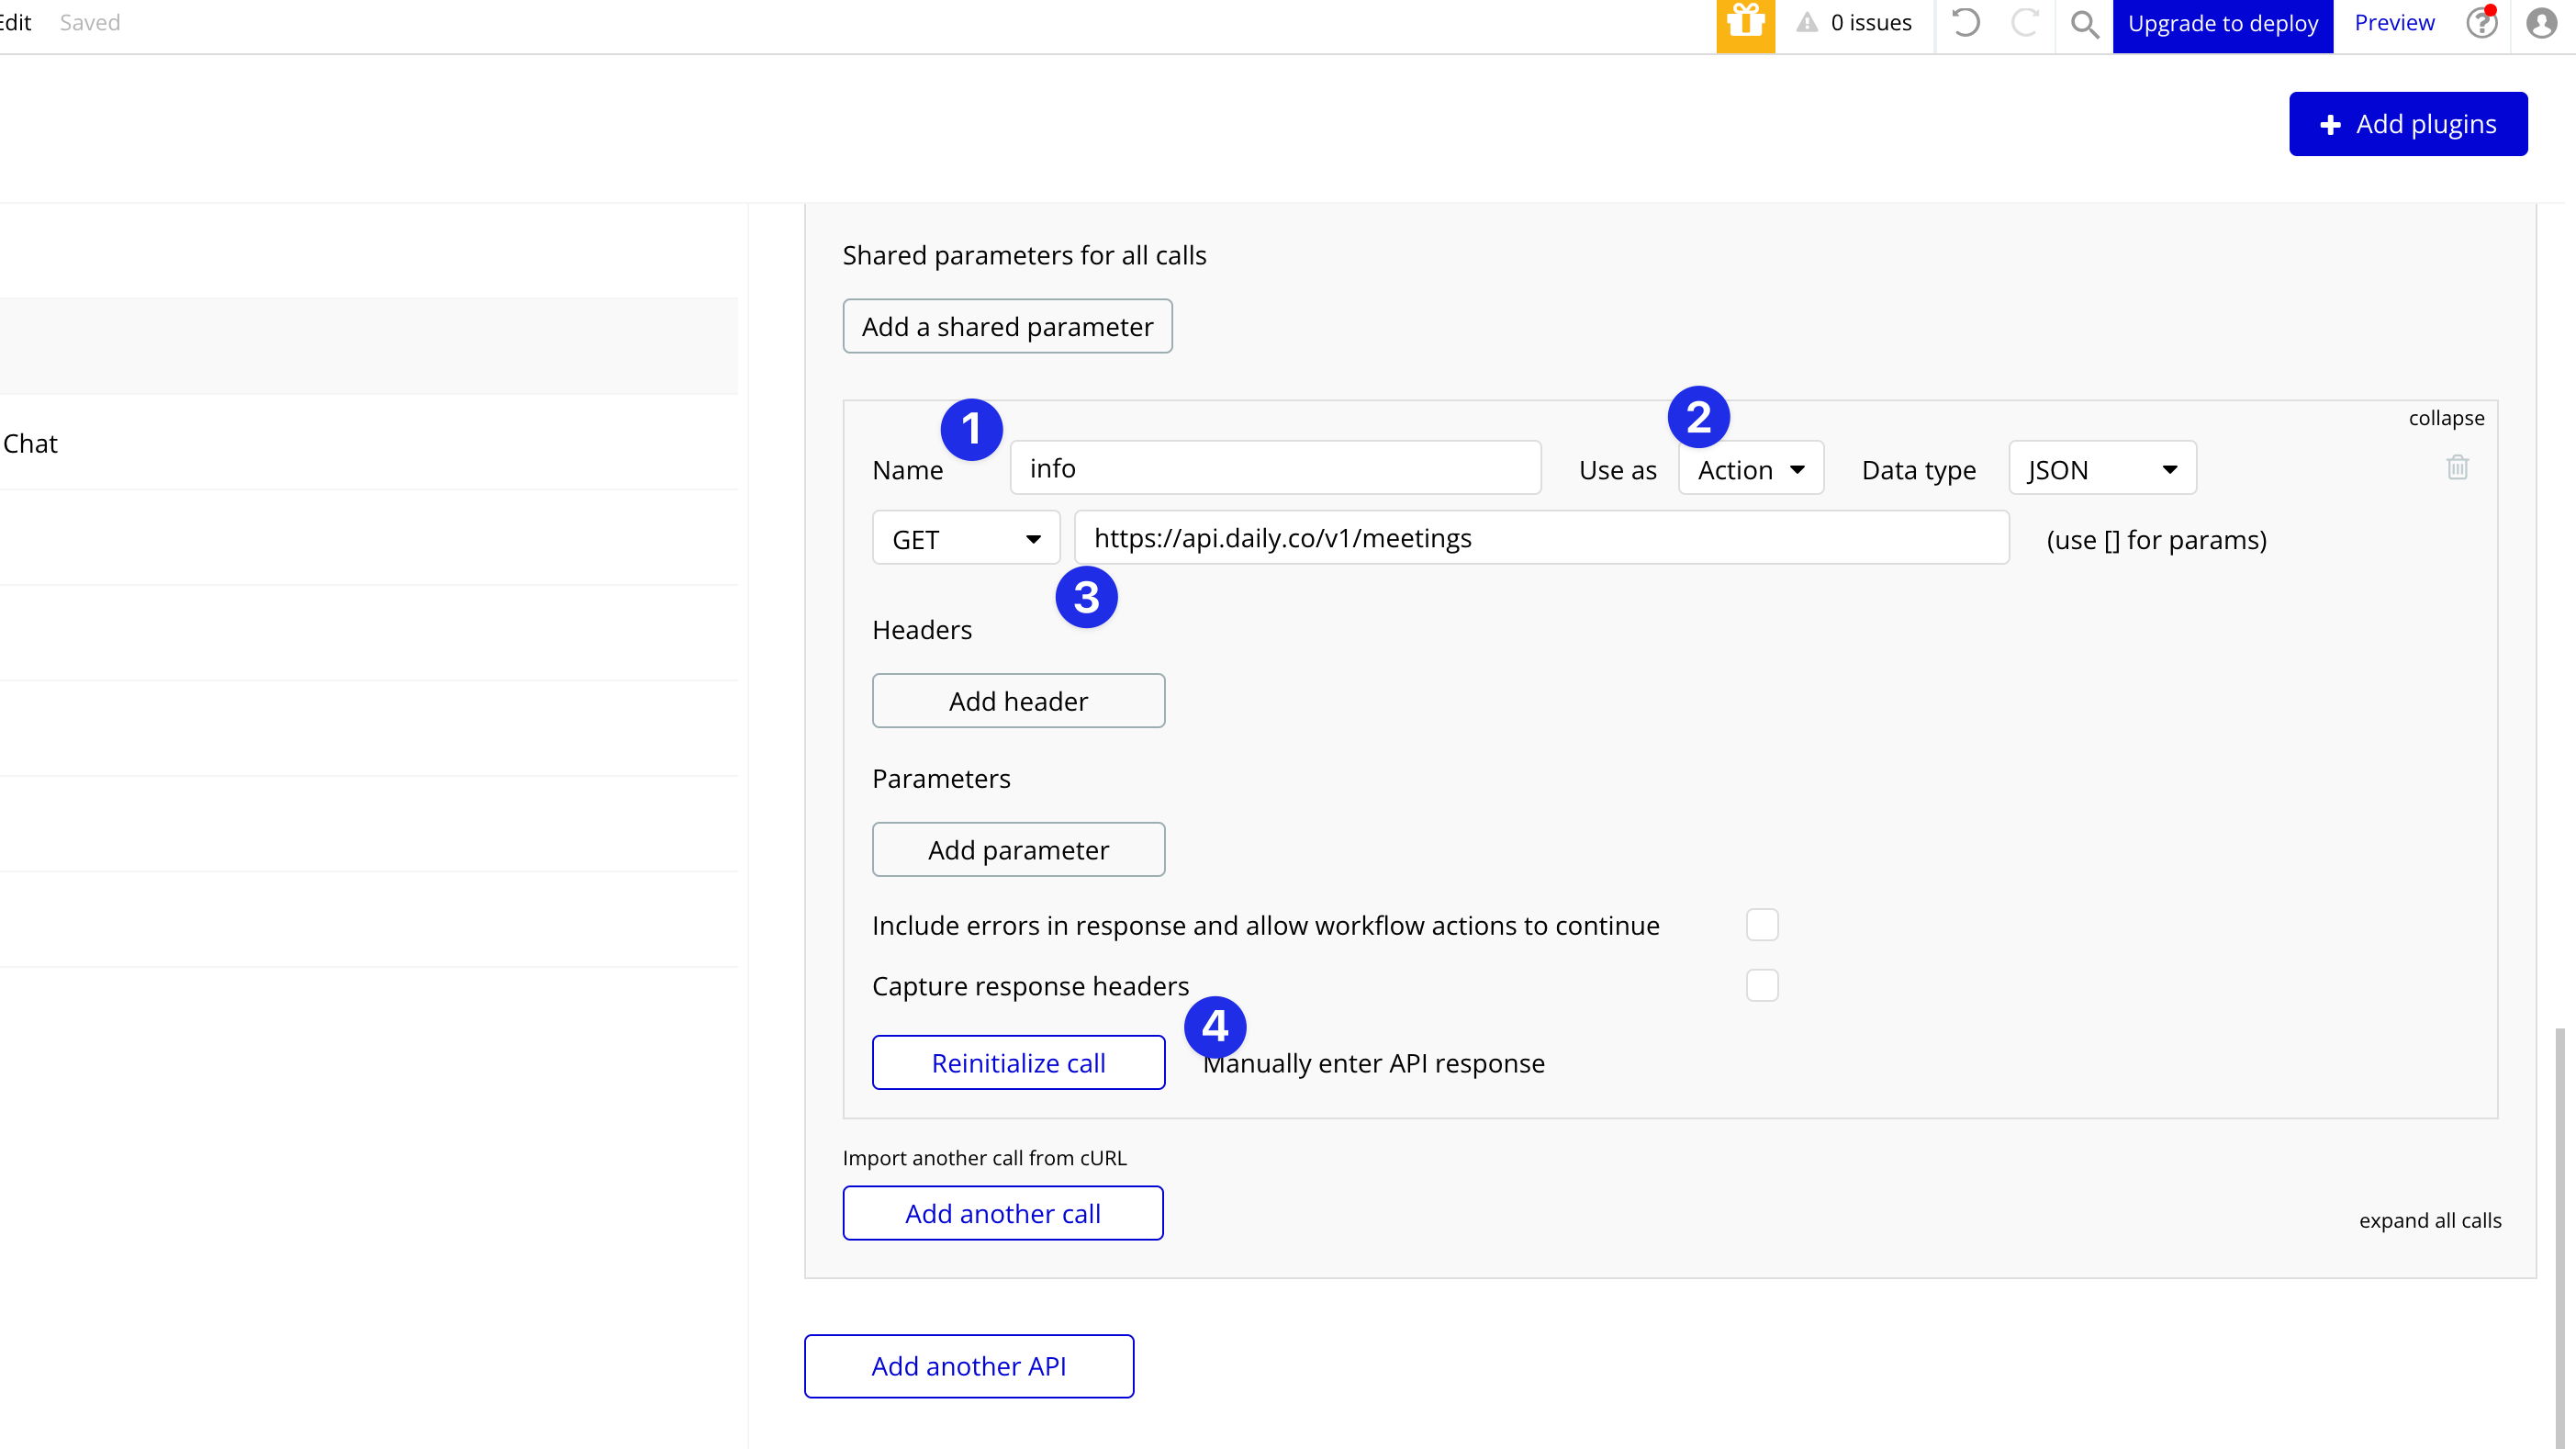
5. Set Up the API Call
Configure the API call settings:
- Name: Assign a name to your API call.
- Use as: Choose 'Action' for workflow usage or 'Data' to use as a data source.
- Method and Endpoint: For meeting information, use a Get method and
https://api.daily.co/v1/meetingsfor the endpoint
- Click 'Initialize call' to make the API available in your app.
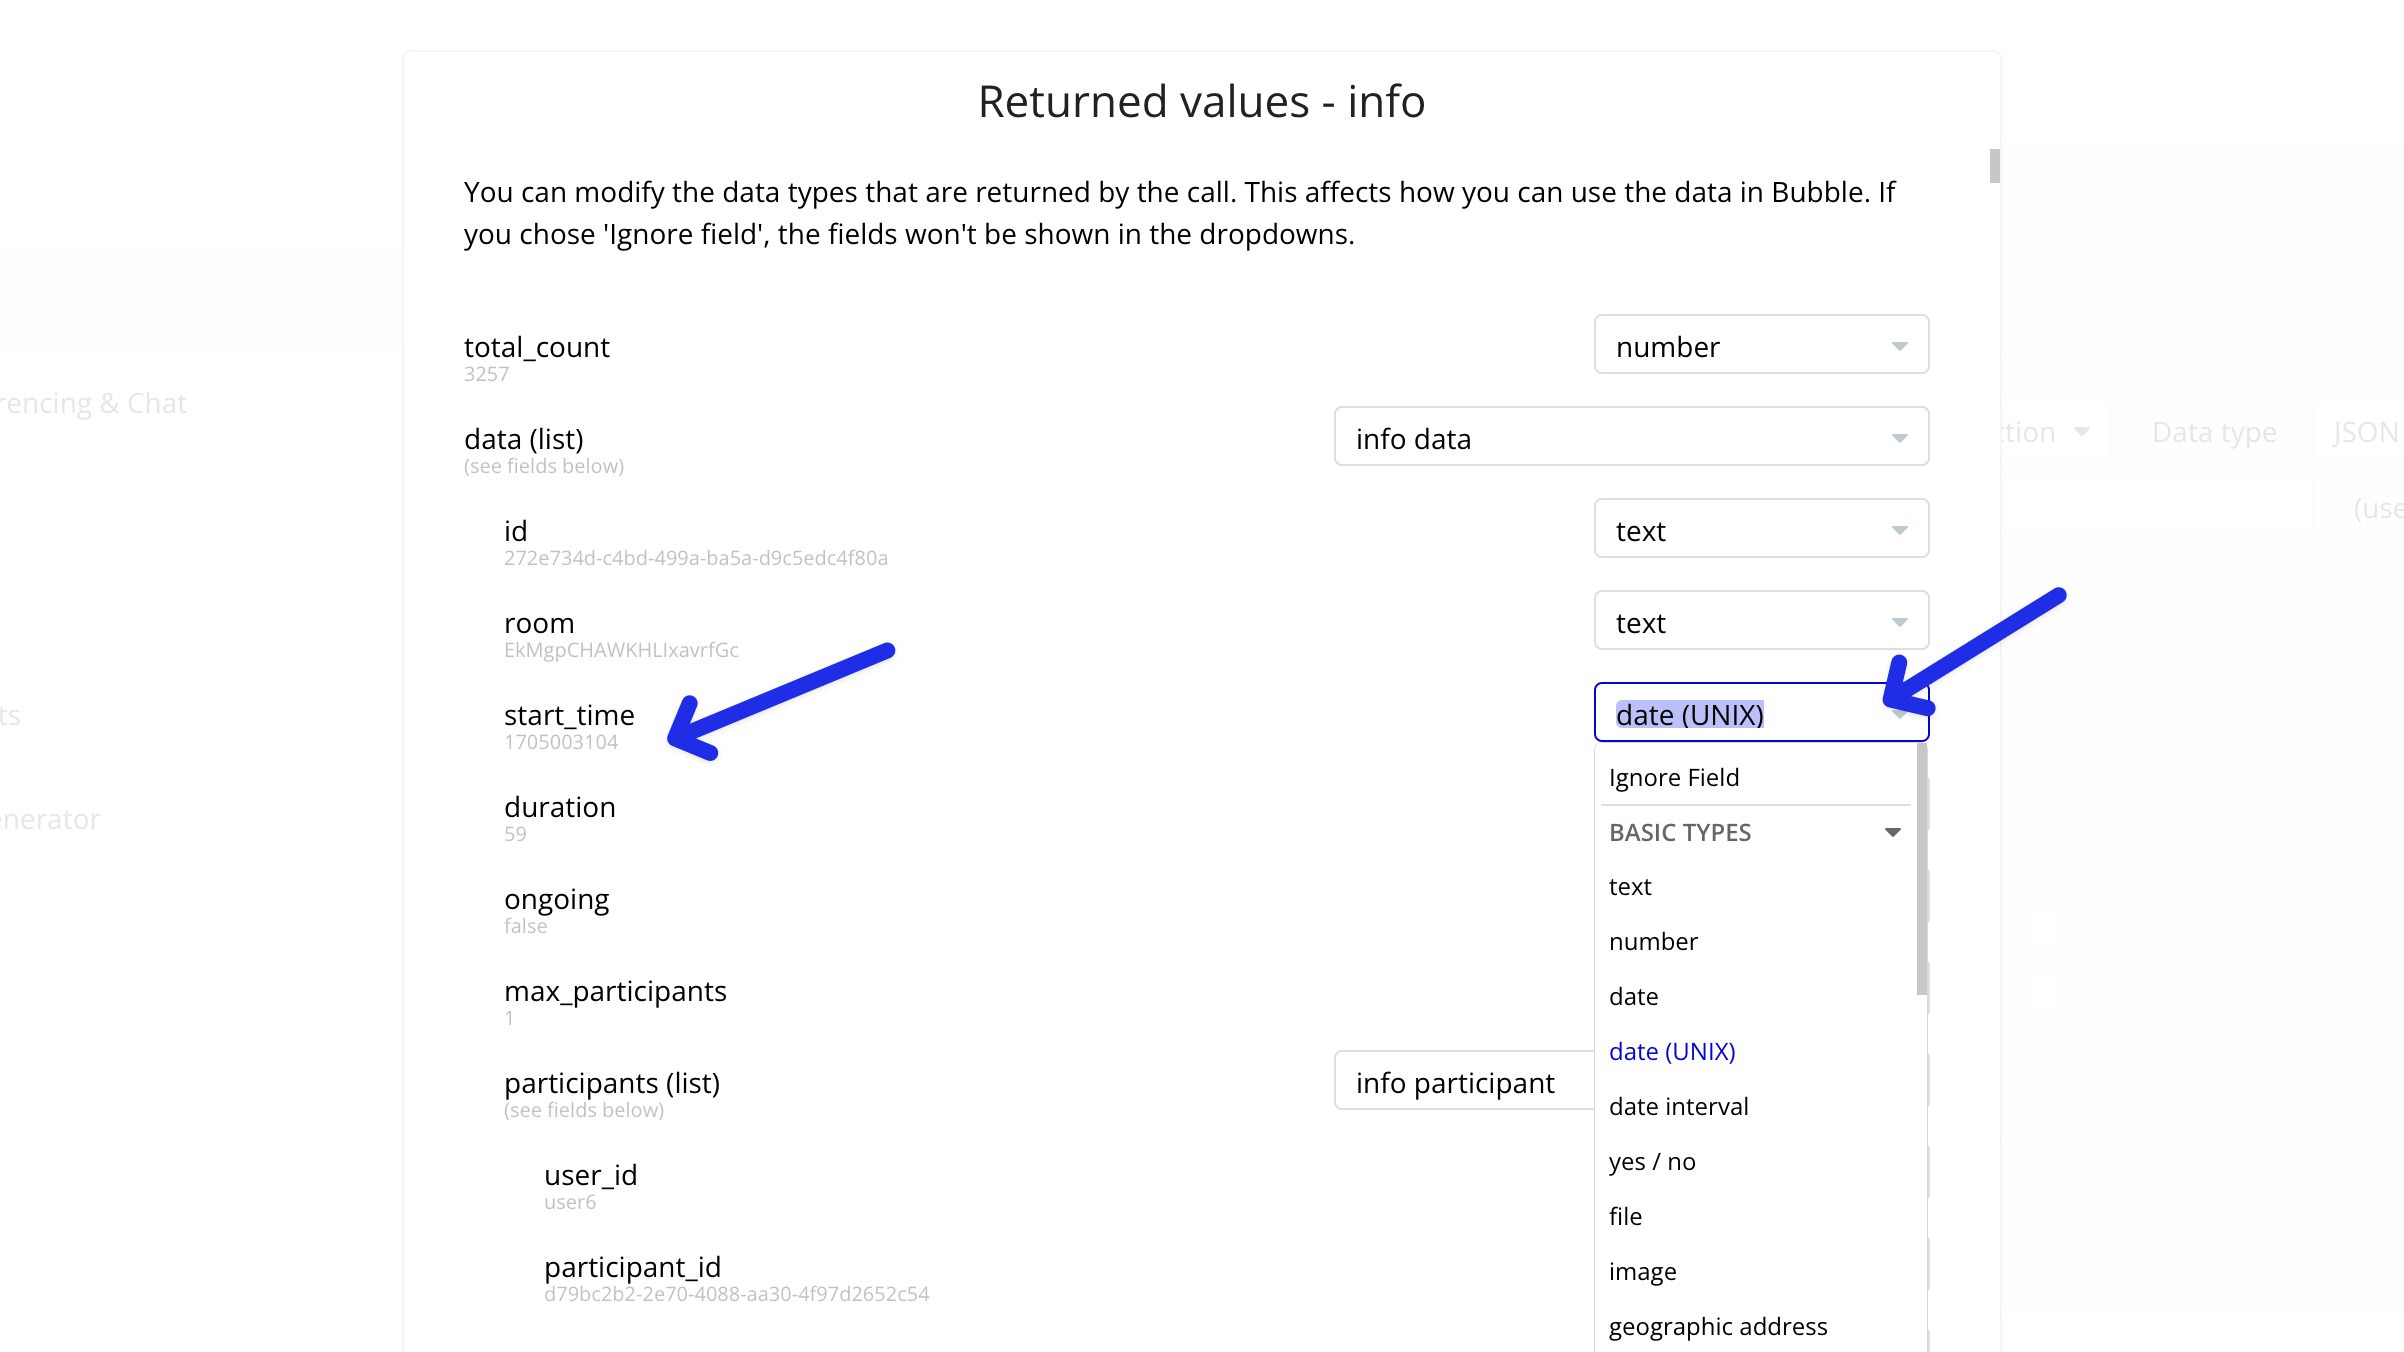
6. Format API Types
Ensure the join and start times are set as Unix timestamps for readability if you plan on displaying them in your app as dates.
7. Using the custom API call
Your API call is now set up and ready for use within your Bubble app. You can integrate it as an action in your workflows or as a data source, depending on your configuration.
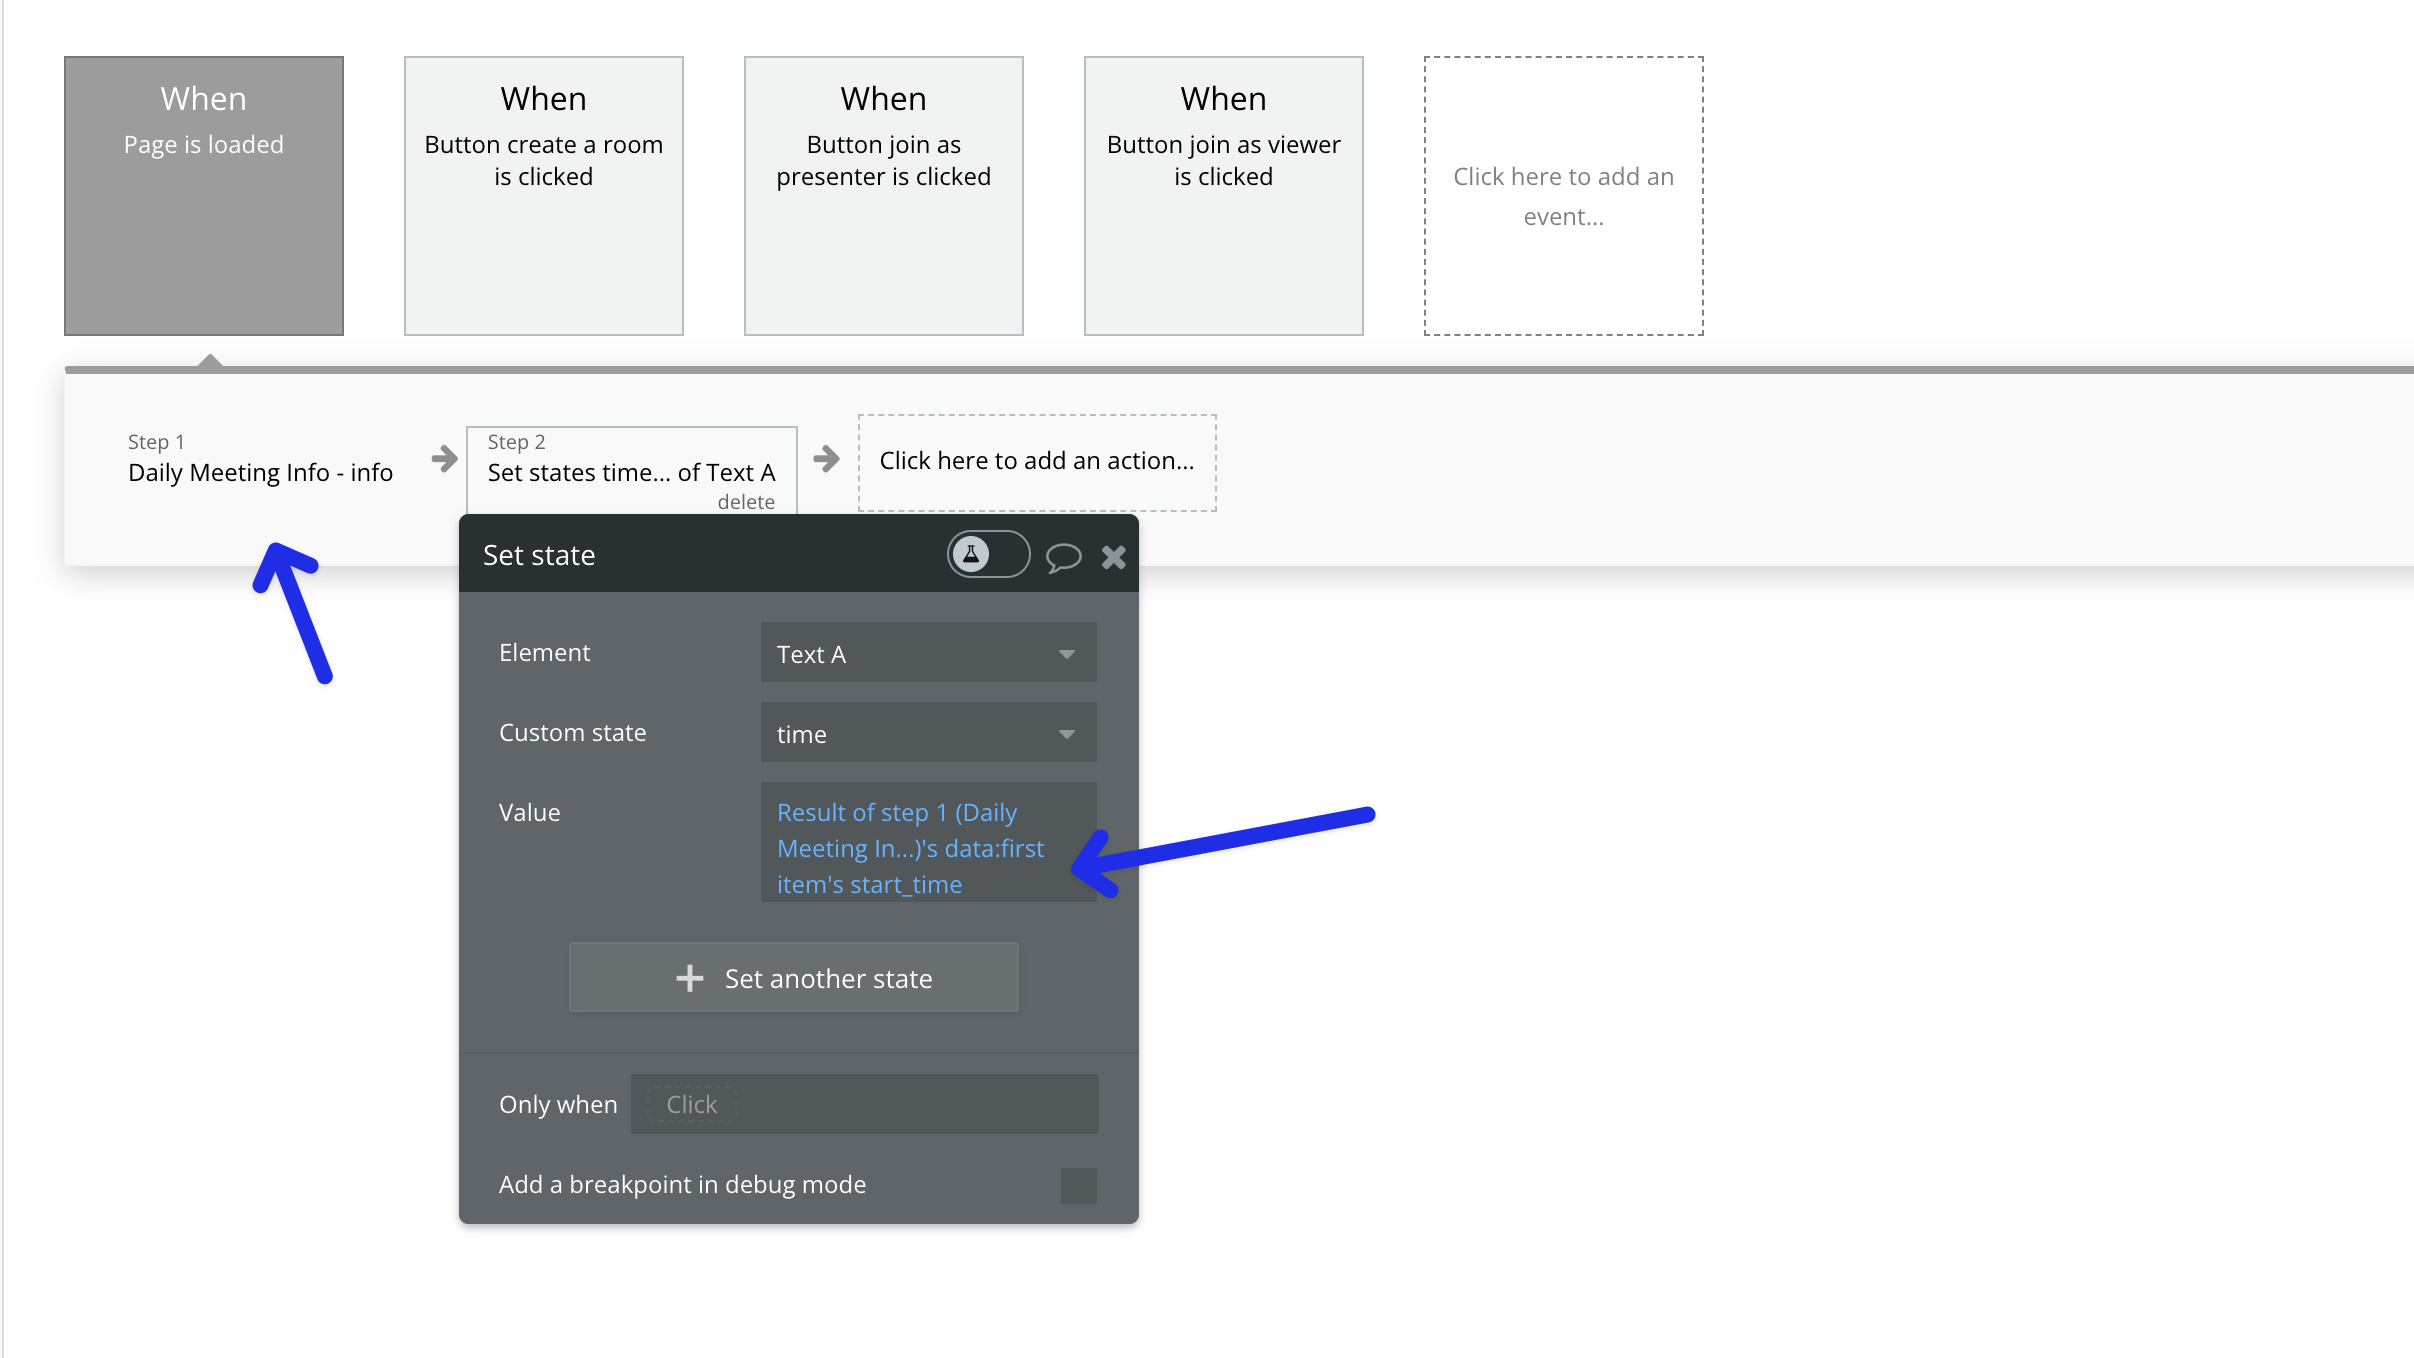
Use as action example
- Add the API Call: In your workflow, insert the API call by its name (the one you set during configuration).
- Utilize the Data: Apply the resulting data as needed in your workflow.
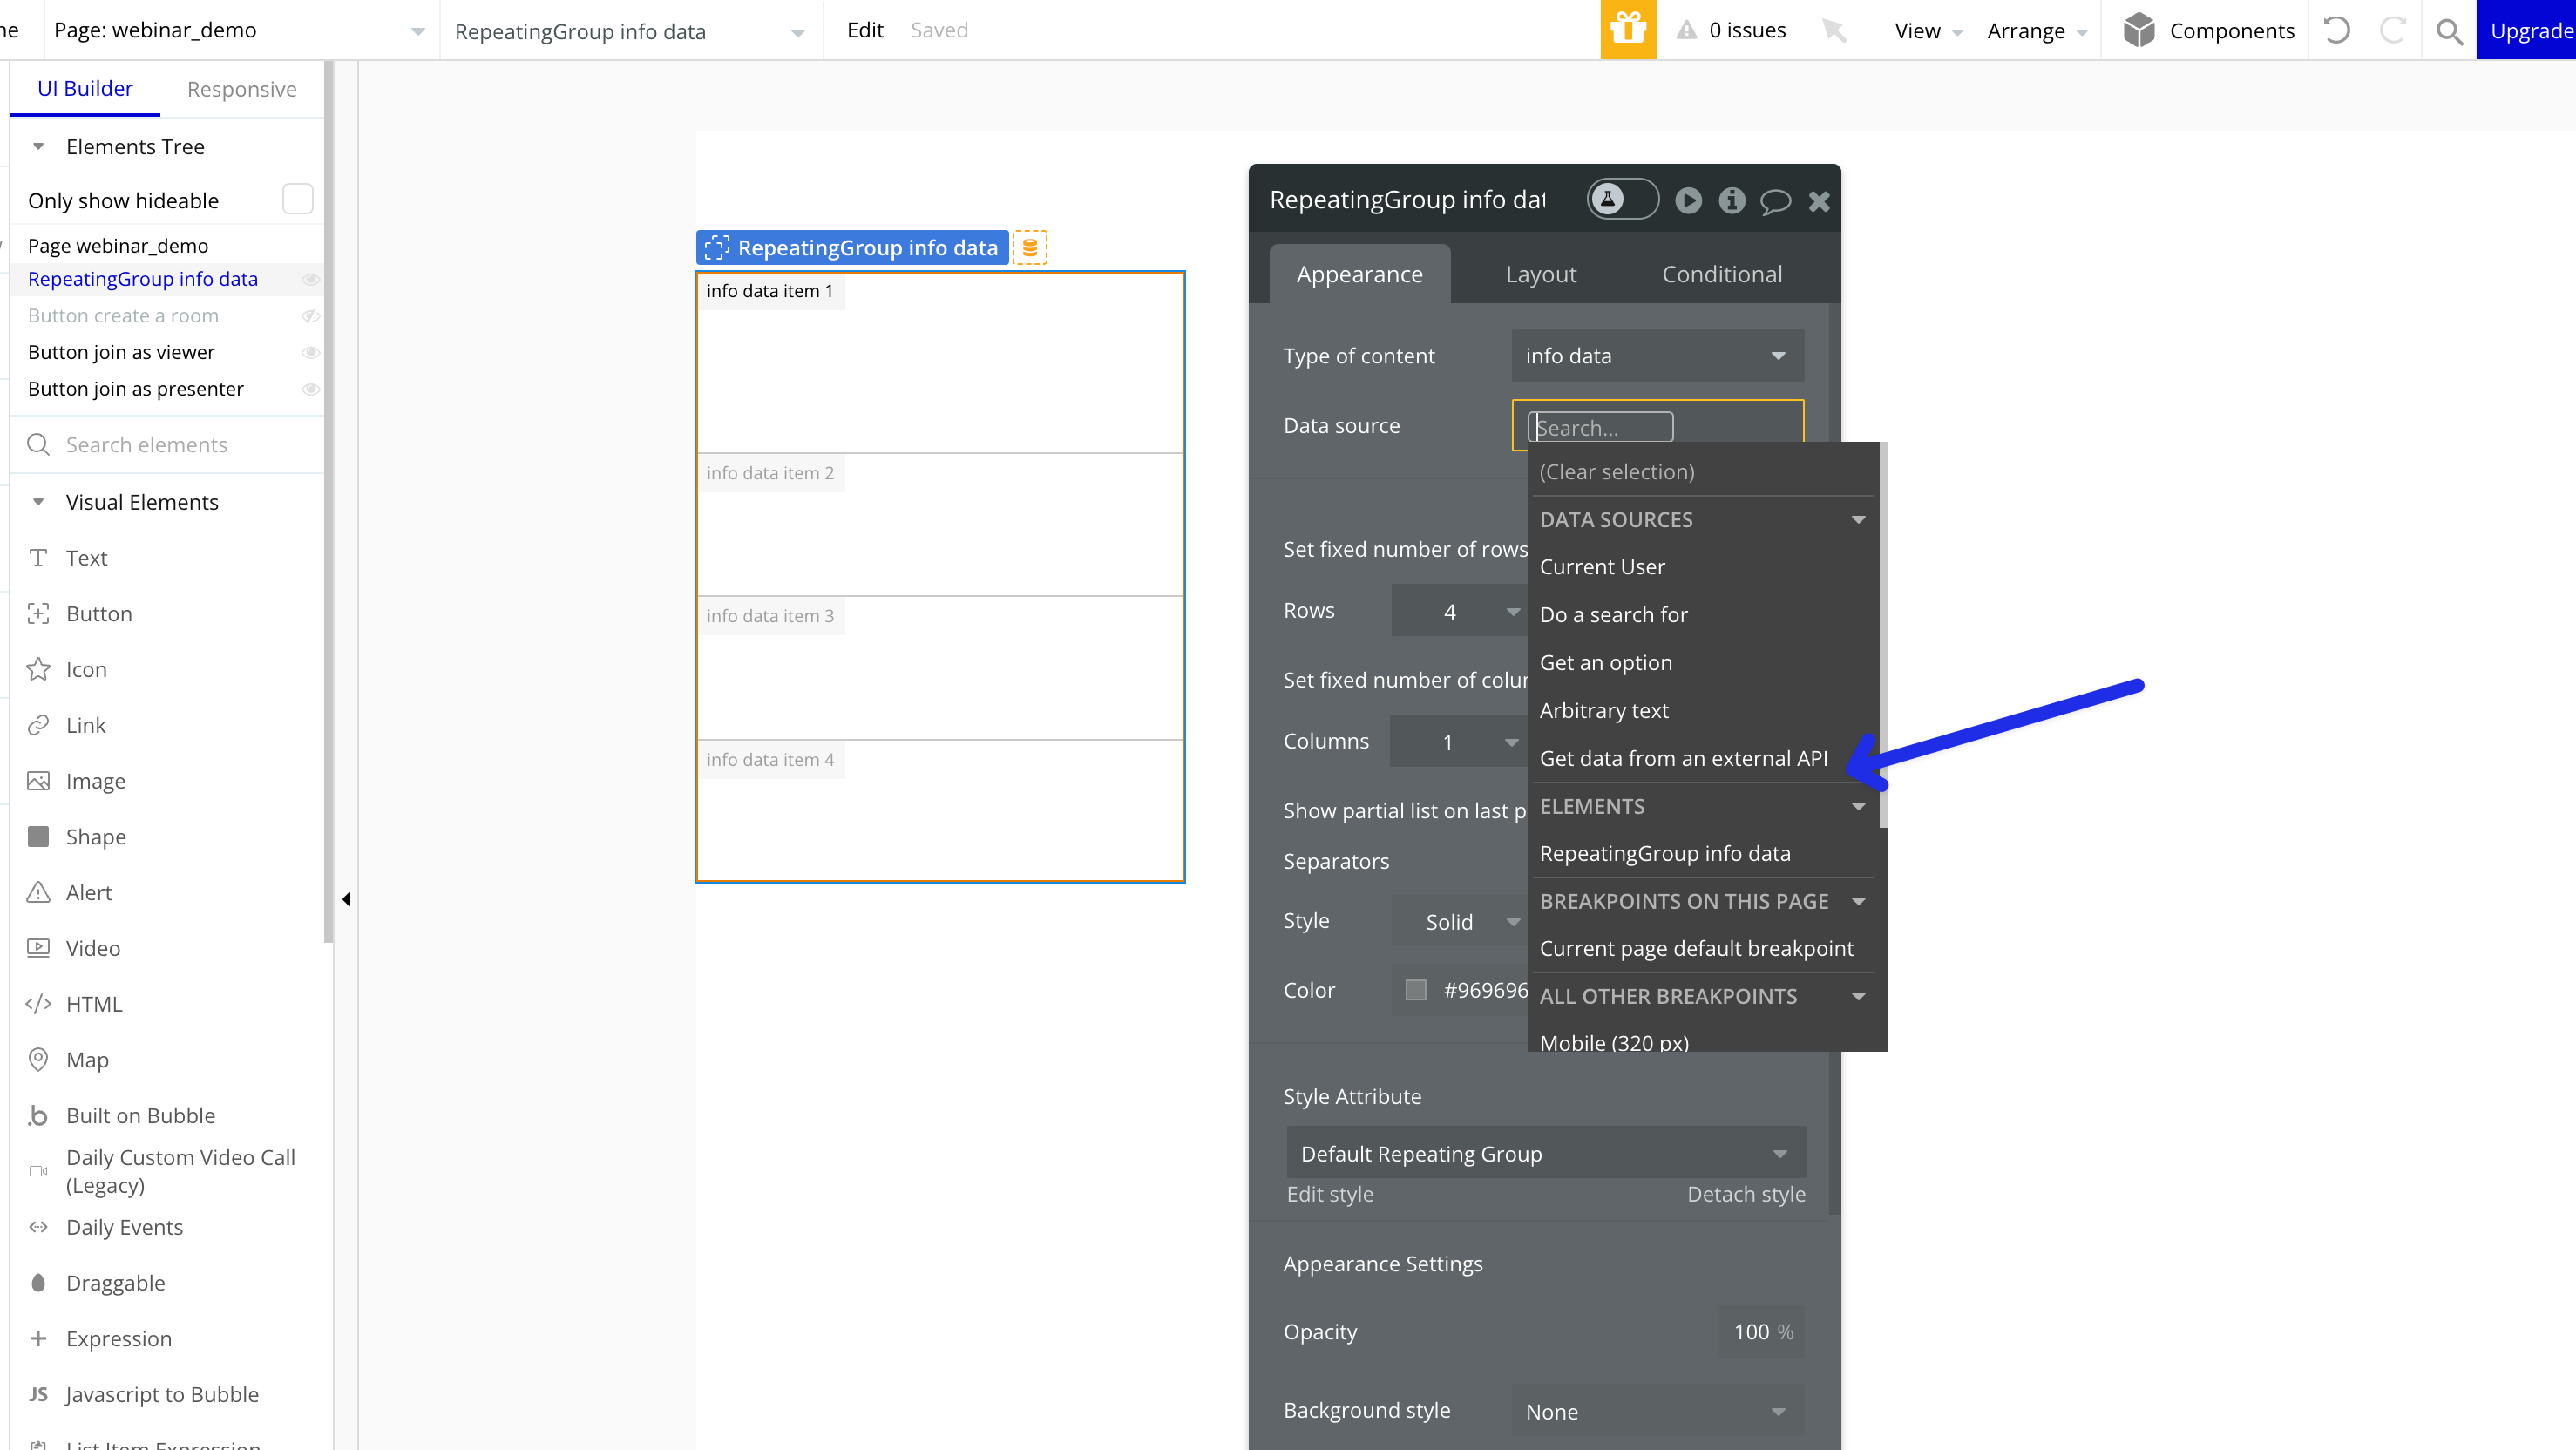
Use as Data example
A add a group that takes a data source the data type will be the name of the API call you set up in the previous steps

Then as the data source you’ll “get external data from API” and choose the custom API that you set up
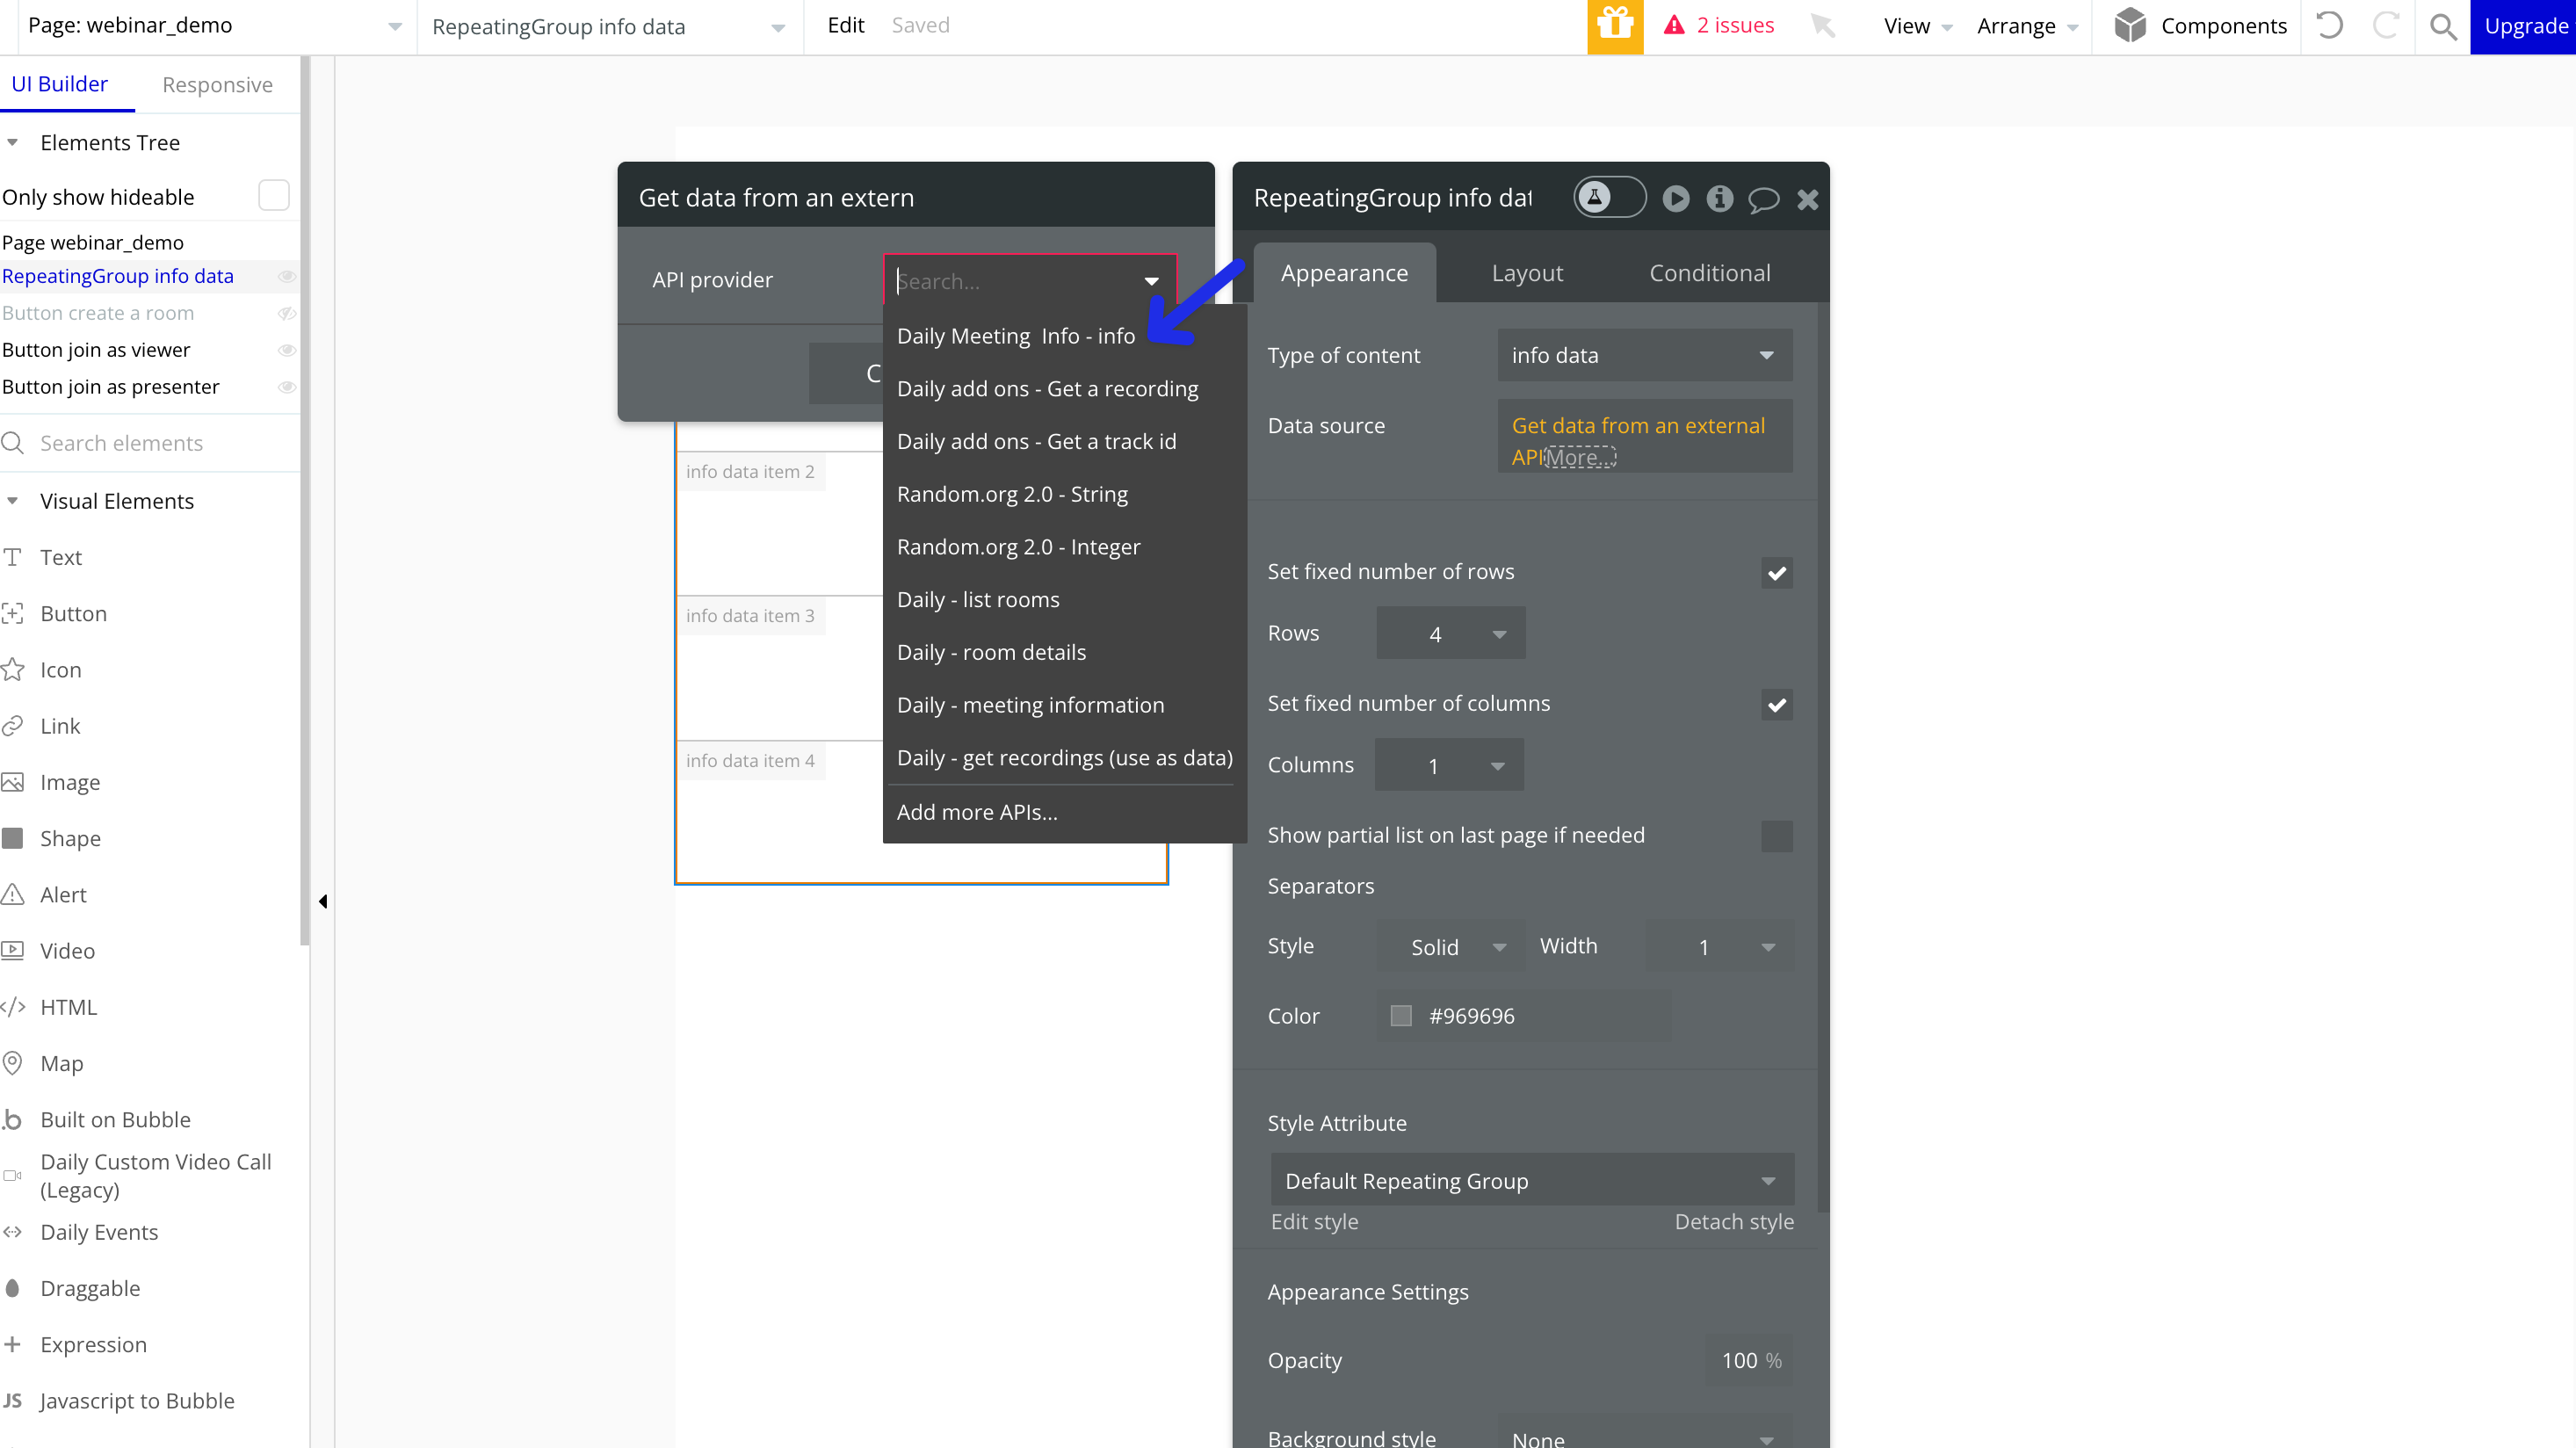
In the case where you want the source to be multiple objects you’ll typically add data to the source
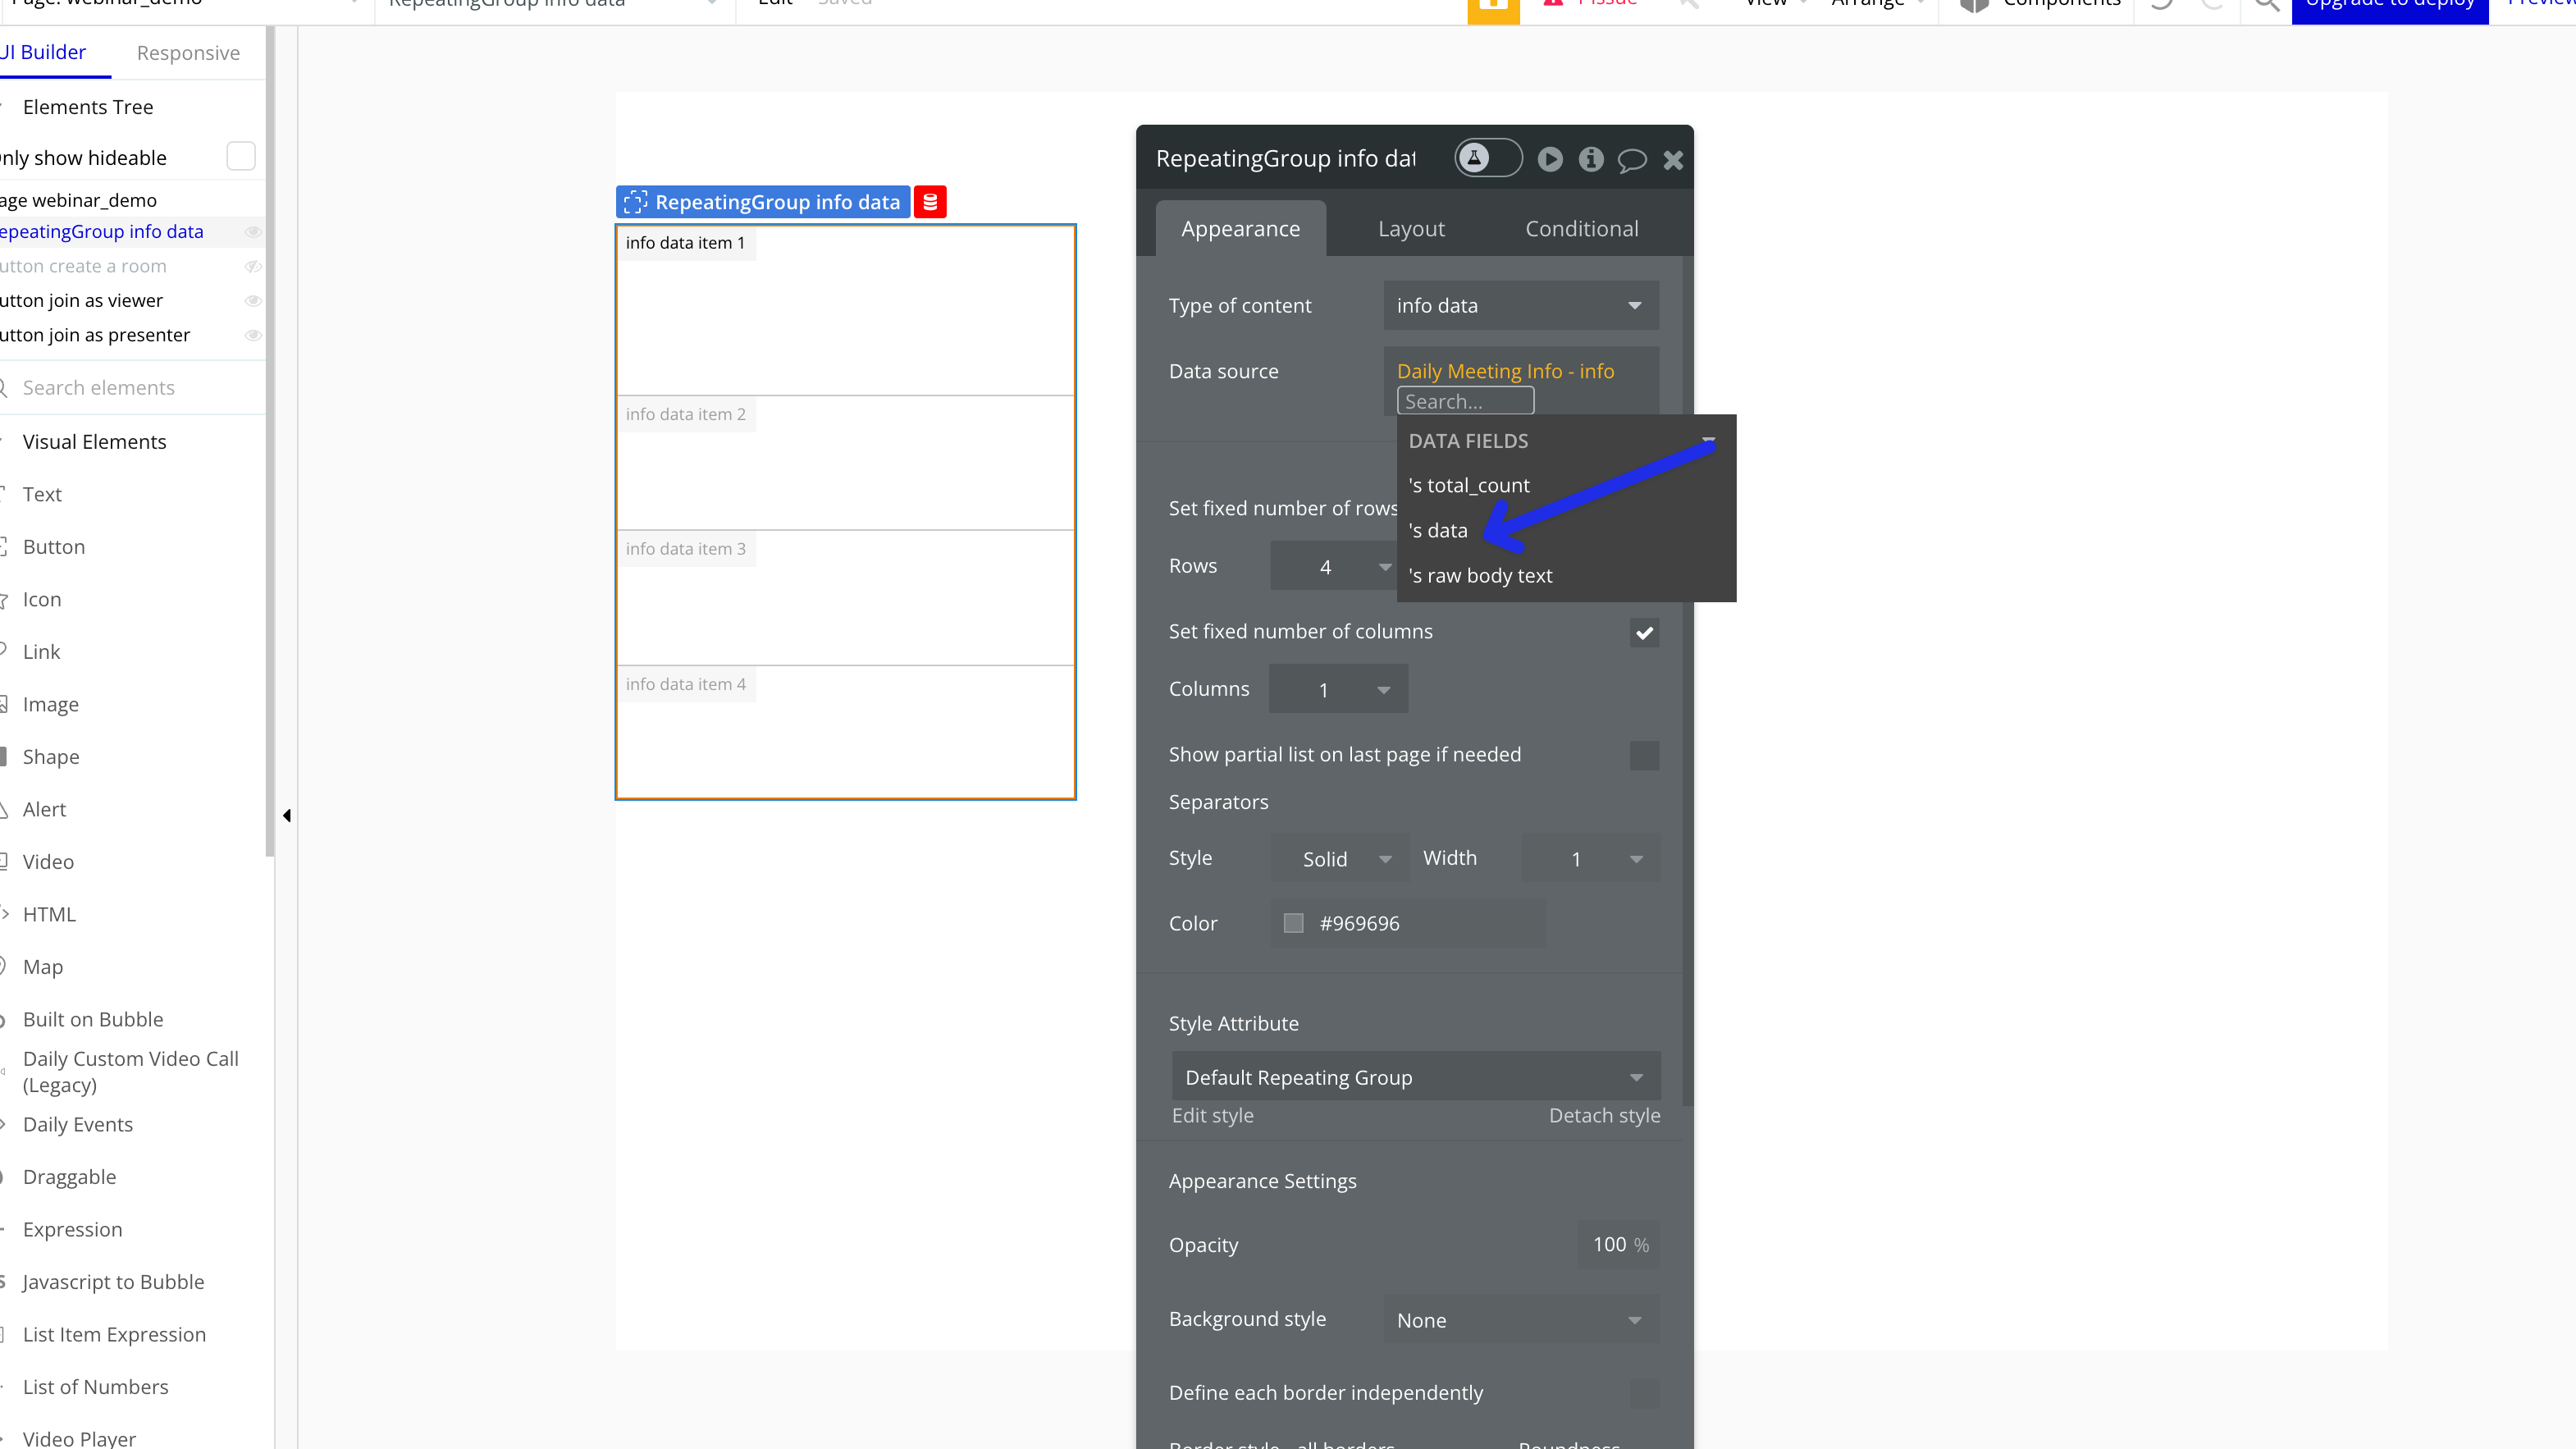
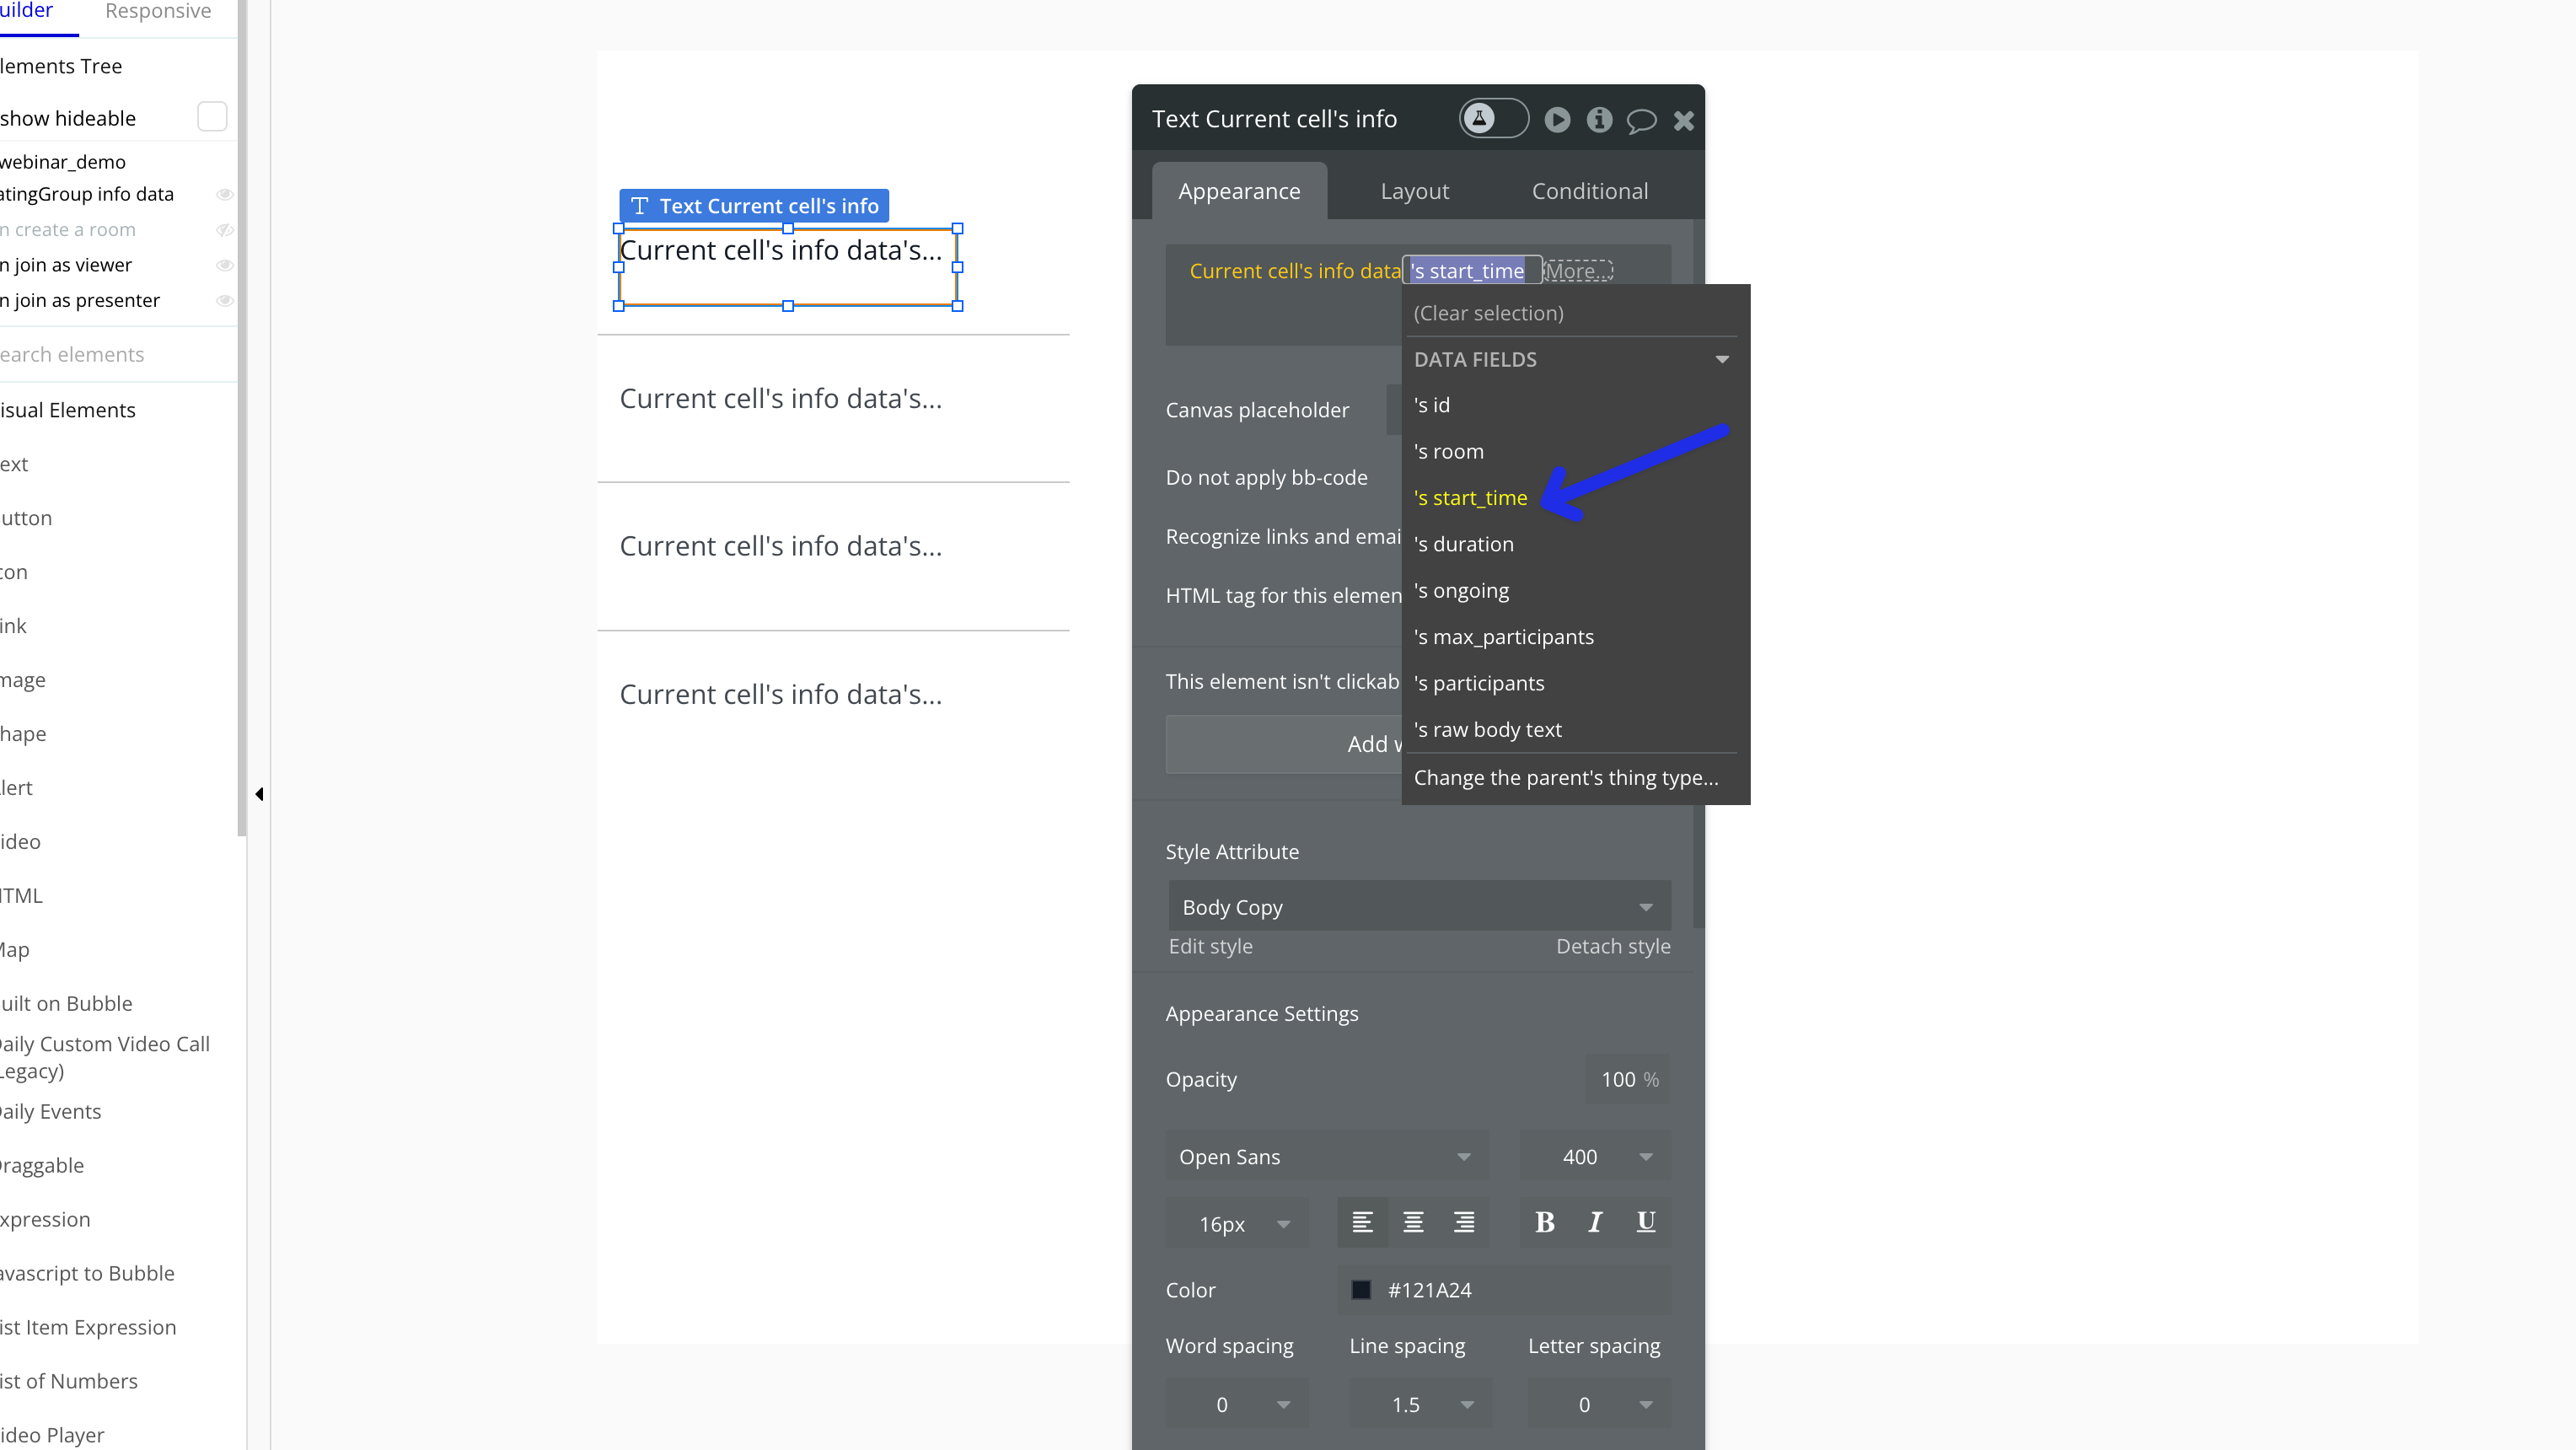
Then in your repeating group you’re free to add elements, here I add a text element and then I can make the data source for the text element “current cell’s info data”
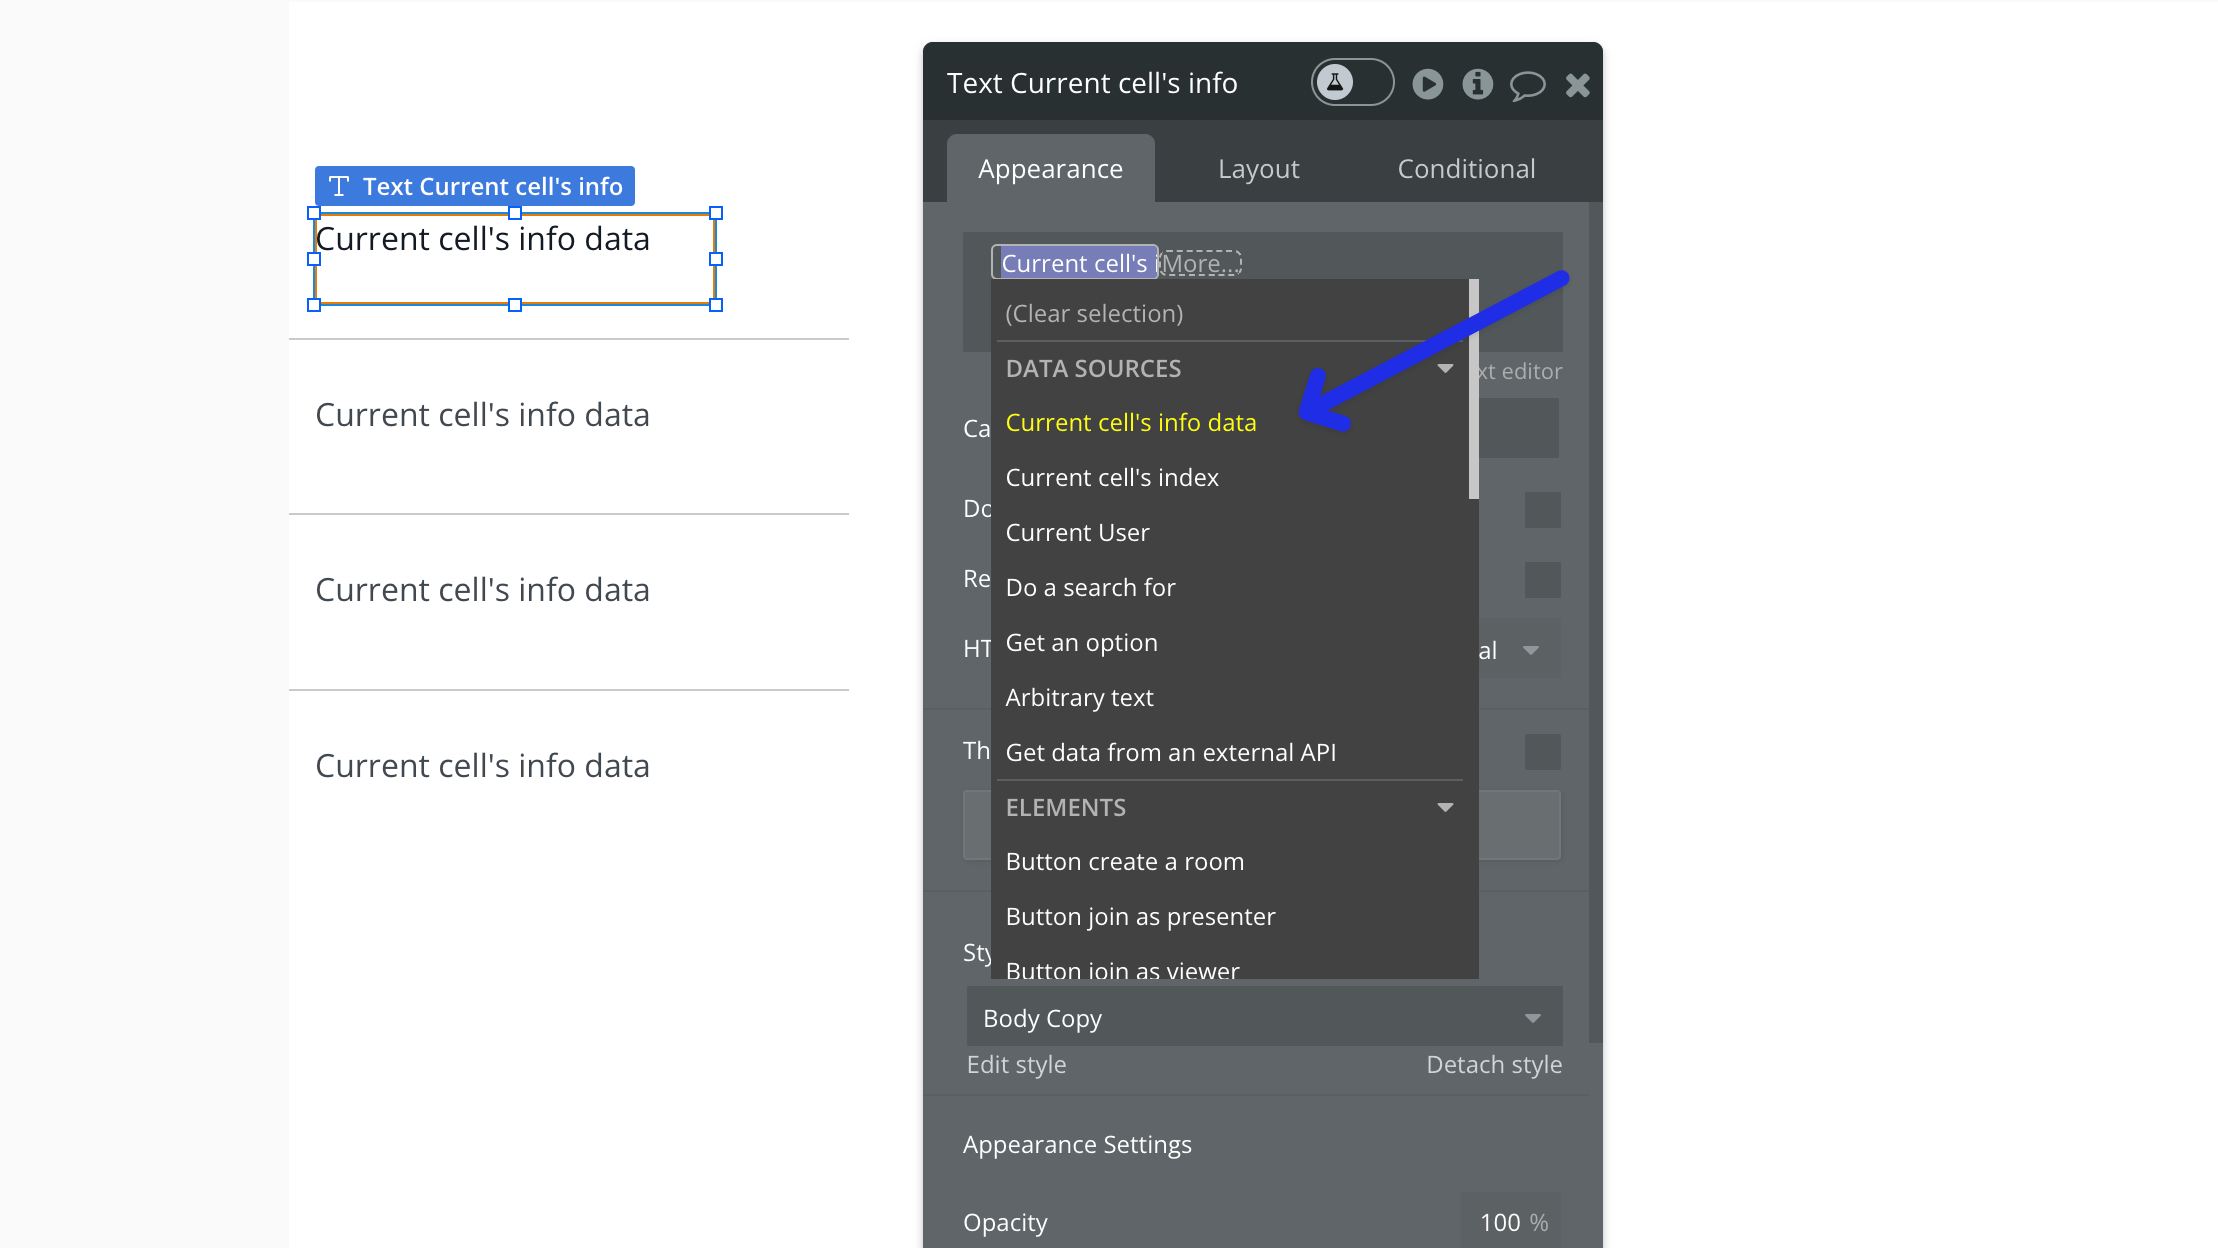
and display the “start time”
And there you have it. Should you have any questions or need further assistance, don't hesitate to reach out. We're here to help make your tech journey as smooth and enjoyable as possible. Happy building!
.png?table=block&id=9ba33ac6-8e12-48f6-b980-4333b612ec56&cache=v2)