.png?table=block&id=39093799-49ba-4e0b-9e1a-a038595e8ec4&cache=v2)
Do not index
Building a website with Webflow is a great way to engage with potential leads. Webflow excels at creating impressive websites without needing to code. But to keep the conversation going, you need a reliable email marketing tool, and that's where MailerLite comes in. It's a straightforward platform for managing your newsletters and email marketing.
This tutorial is designed to provide a practical guide on crafting Webflow apps, with a focus on creating a MailerLite integration. Throughout the tutorial, you'll find explanations of the code at a high level, and I’ve included markers (🤖 view code) at points where relevant code snippets are available. This format is intended to share key concepts and implementation details, with the option to dive deeper into the code using the provided links.
Whether you choose to use this app as a base and share it with the community or draw inspiration to build a completely different Webflow app, this guide has you covered. Let's get started on this journey!
What we’ll build
In this tutorial, I'm creating a Webflow hybrid app that sends Webflow form submissions to an email list in MailerLite. Here are the main features of this app:
- Choose a Webflow form from your site to link with MailerLite.
- Set up the email field for MailerLite and decide which group the form submissions should be sent to.
- Establish a Webflow webhook to handle form submissions.

This tutorial focuses on a lean version of this app, with the following advanced features earmarked for future updates:
- The app only connects the email field. It doesn't include integration with MailerLite's other custom fields.
- This version is for personal use with MailerLite and doesn't handle multiple user accounts. It can be adapted for future features like secure API key storage for multiple users.
To see the finished product, you can check out the completed code here: Completed MailerLite to Webflow Code. If you're ready to dive into the details, jump to the next section for a step-by-step guide.
1. Get started
Prerequisites
Before diving into this tutorial, make sure you have:
- A MailerLite account and an API key.
- A Webflow account and a site you want to connect with a form.
- A Webflow app configured (For instructions, see Step 1 of this tutorial).
- Ngrok or a similar service for URL forwarding during development. (Details in Step 3 of this tutorial).
A basic understanding of Next.js is helpful for any customizations. We'll be using this starter template to begin our project. Learn more about the starter here.
Initial setup of the starter
Start by following steps 1-4 for cloning the starter from this guide.
Next, customize the
.env.example. Since we're connecting to Mailerlite, include a MAILERLITE_API_KEY in your environment variables:CLIENT_ID=your_client_id
CLIENT_SECRET=your_client_secret
MAILERLITE_API_KEY=your_mailerlite_api_key
NEXT_PUBLIC_BACKEND_URL='your_NGROK_URL example <https://939c-136-33-253-184.ngrok.io/>'
Last, customize the
webflow.json. The webflow.json file is your app's manifest. Modify the name in the webflow.json file and choose a size setting. The available size options are 'default', 'comfortable', and 'large'.{
"name": "mailerLite-ext",
"publicDir": "out",
"size": "comfortable"
}2. Authorize Webflow users
When users who are not logged in visit our app's URL, they are directed to a Webflow login page for account authorization.

Post-authorization, they are redirected to a page where they can view and copy their access token, which they’ll later past in the designer extension
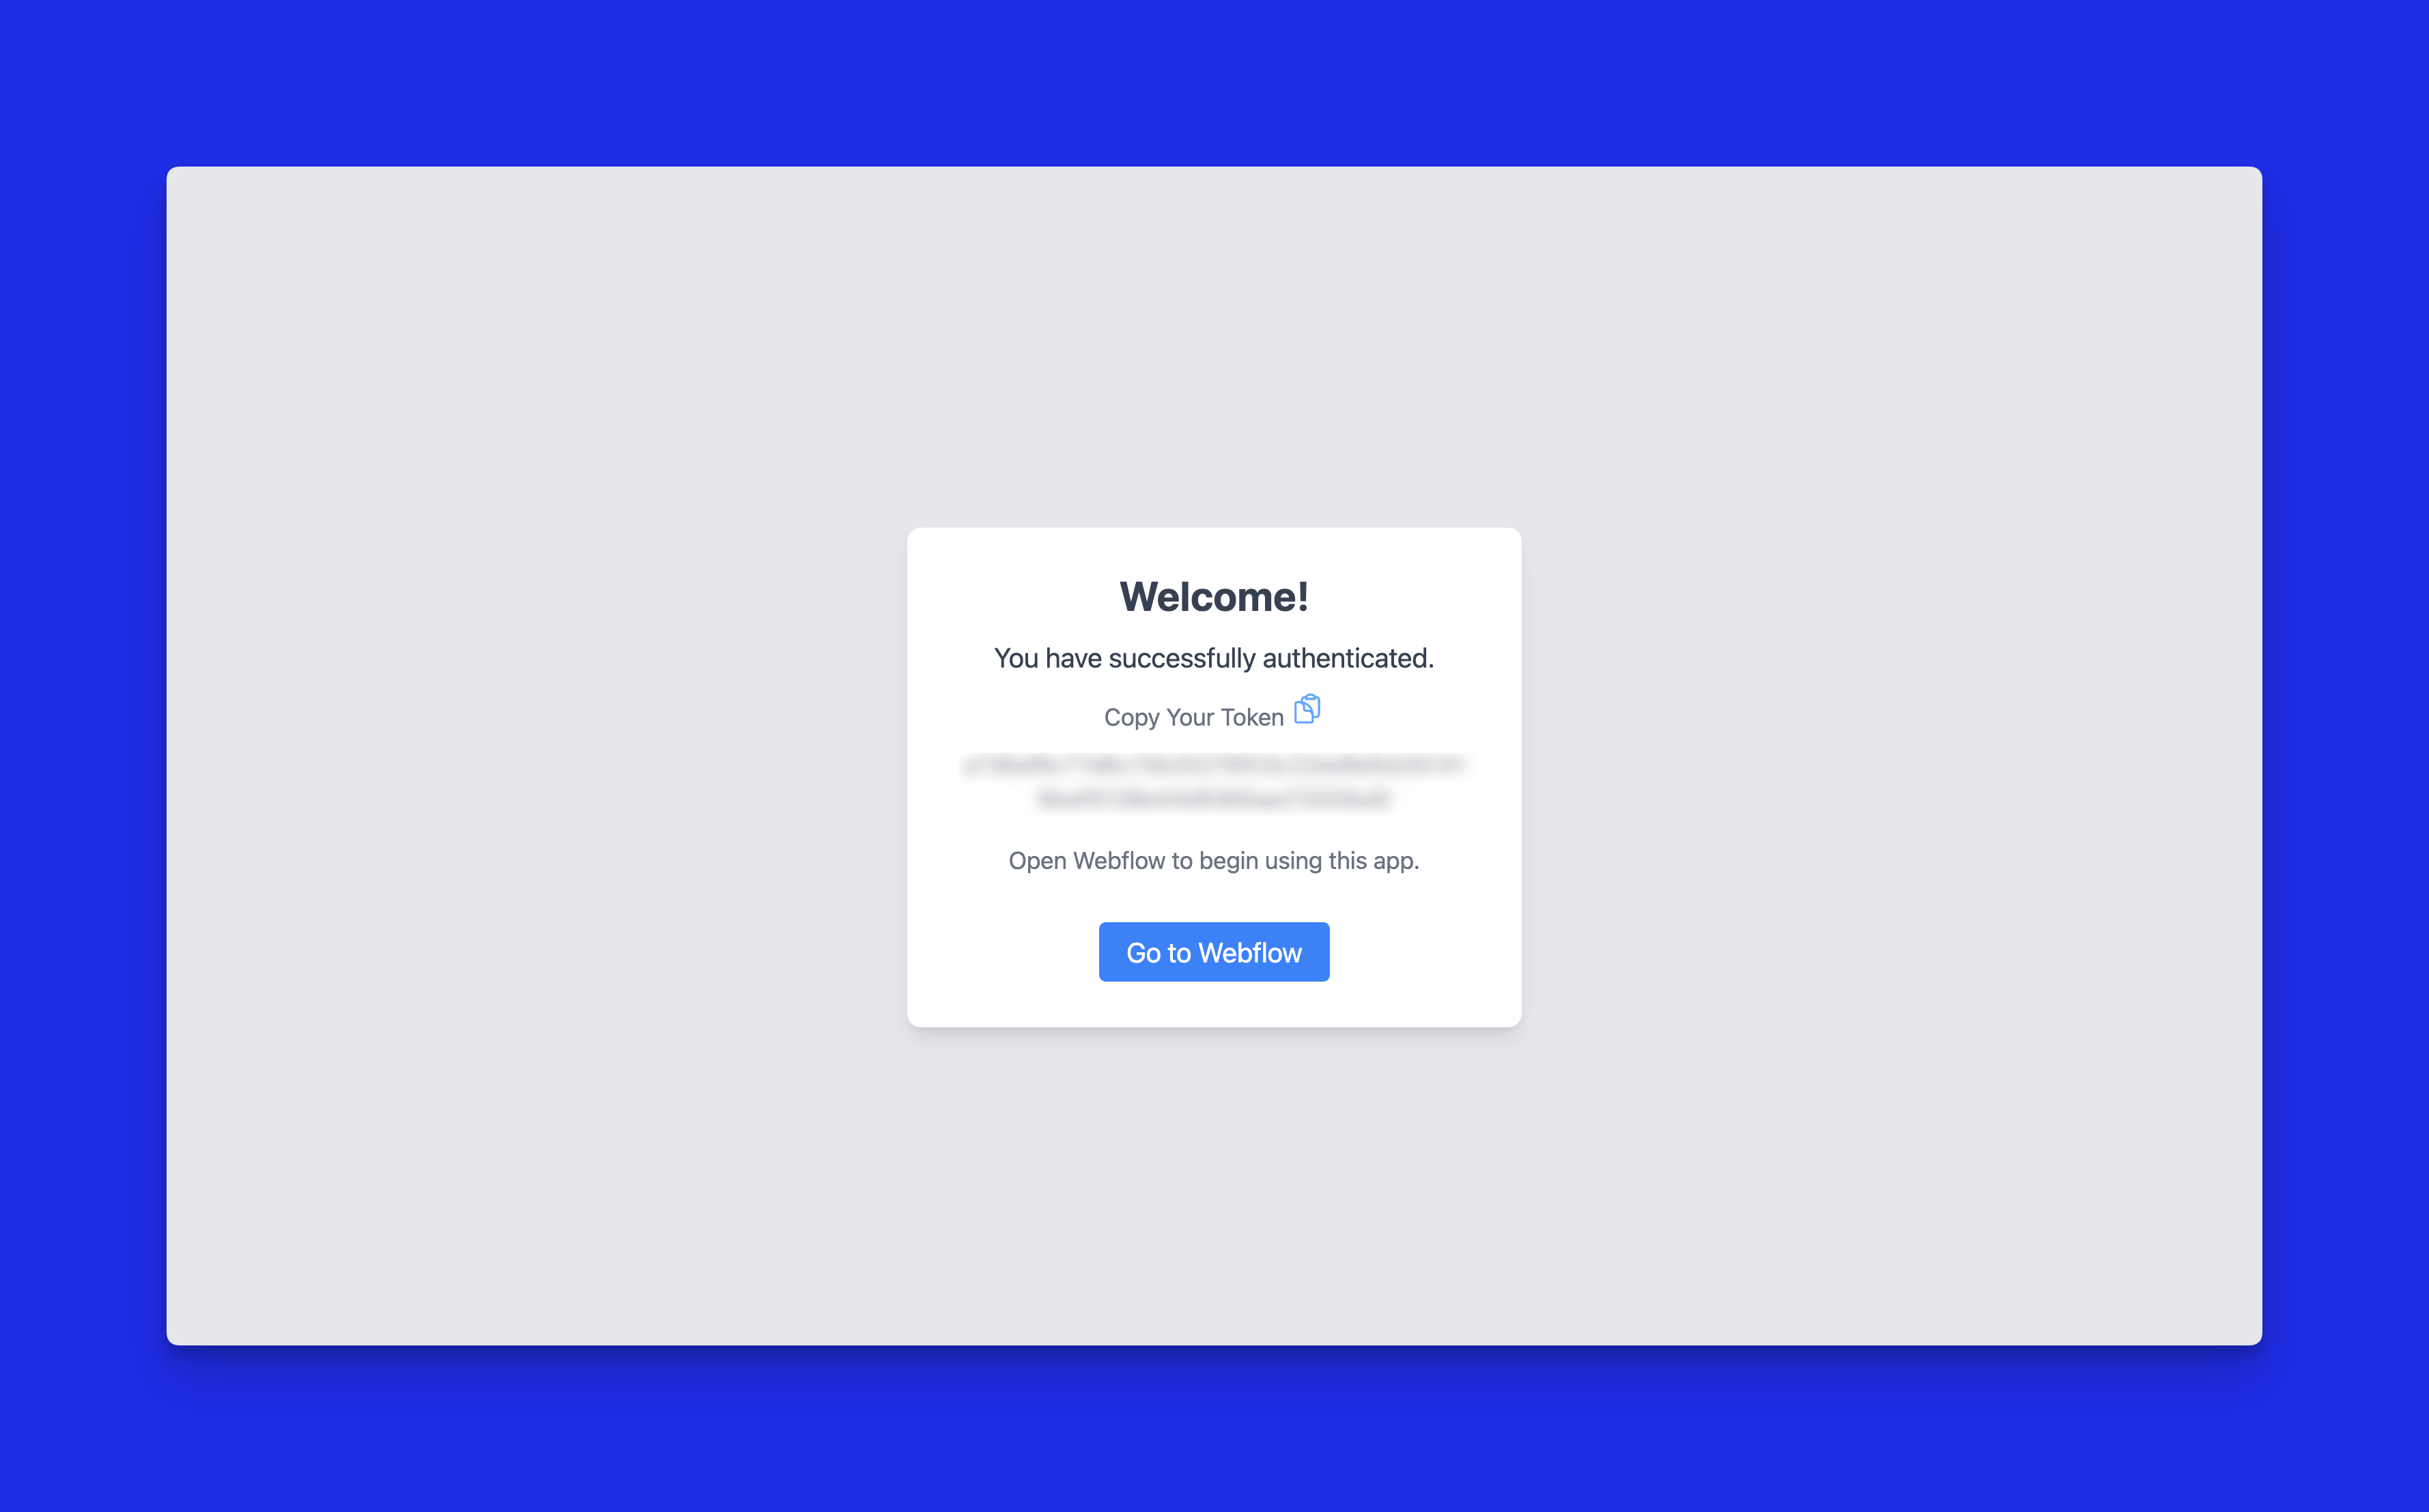
Manual token handling provides a simple method to connect our data-client and designer extension. For production apps, a secure, external database for authentication is recommended. Webflow's authentication demo offers a seamless alternative that avoids users needing to copy and paste.
.
The starter template includes the login, redirect, and authorization processes with token handling by default. If you wish to customize these aspects, you should primarily focus on the
/login, page.js, and the webflow-redirect for customizations.3. Configure the designer extension’s entry point
Webflow designer extensions function as single-page apps, meaning the entire interface dynamically updates from a single webpage, with
page.tsx as the application's main entry point.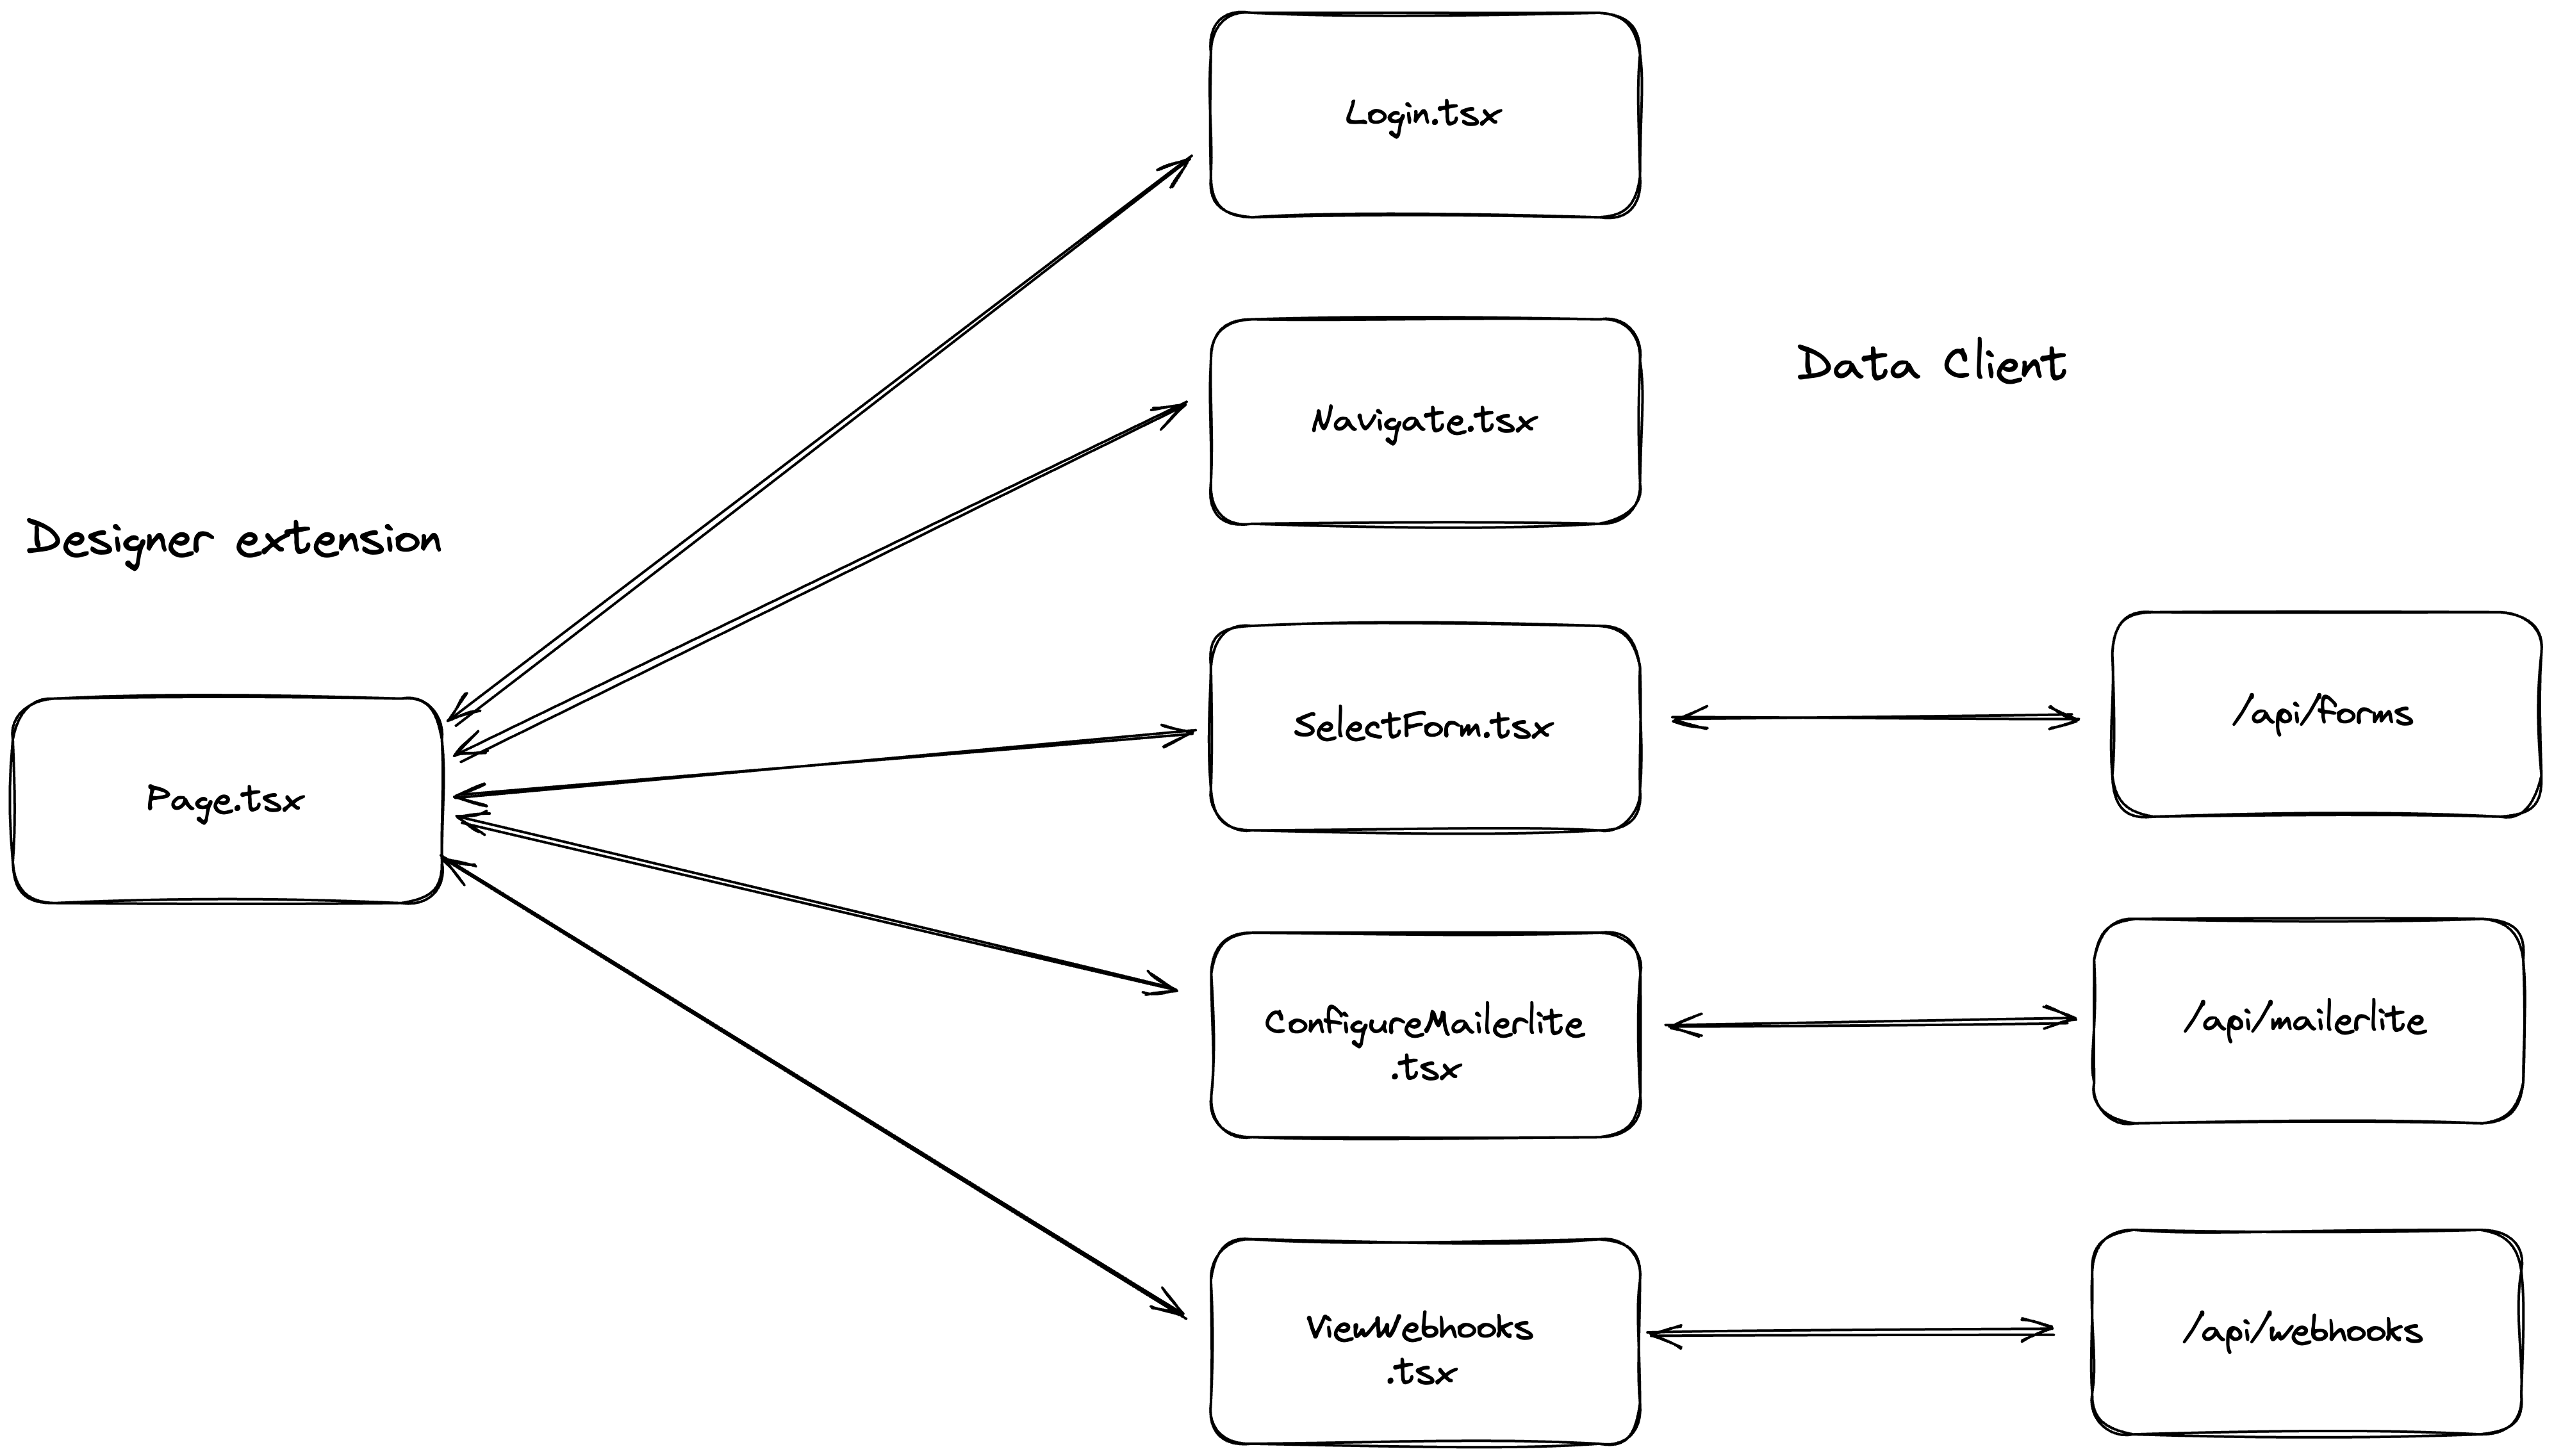
Here are the four key steps our extension will cover:
- Login: Users input their token.
- Navigate: Choose to connect a new form or view existing connections.
- Select Form: Pick a form to connect.
- Configure MailerLite: Specify the fields to connect and select the MailerLite group.
- Manage Connections: Review and remove existing connections.
The starter template includes functionalities for the login step for pasting the token. Should you wish to modify the login process, adjustments can be made in the respective Login component.
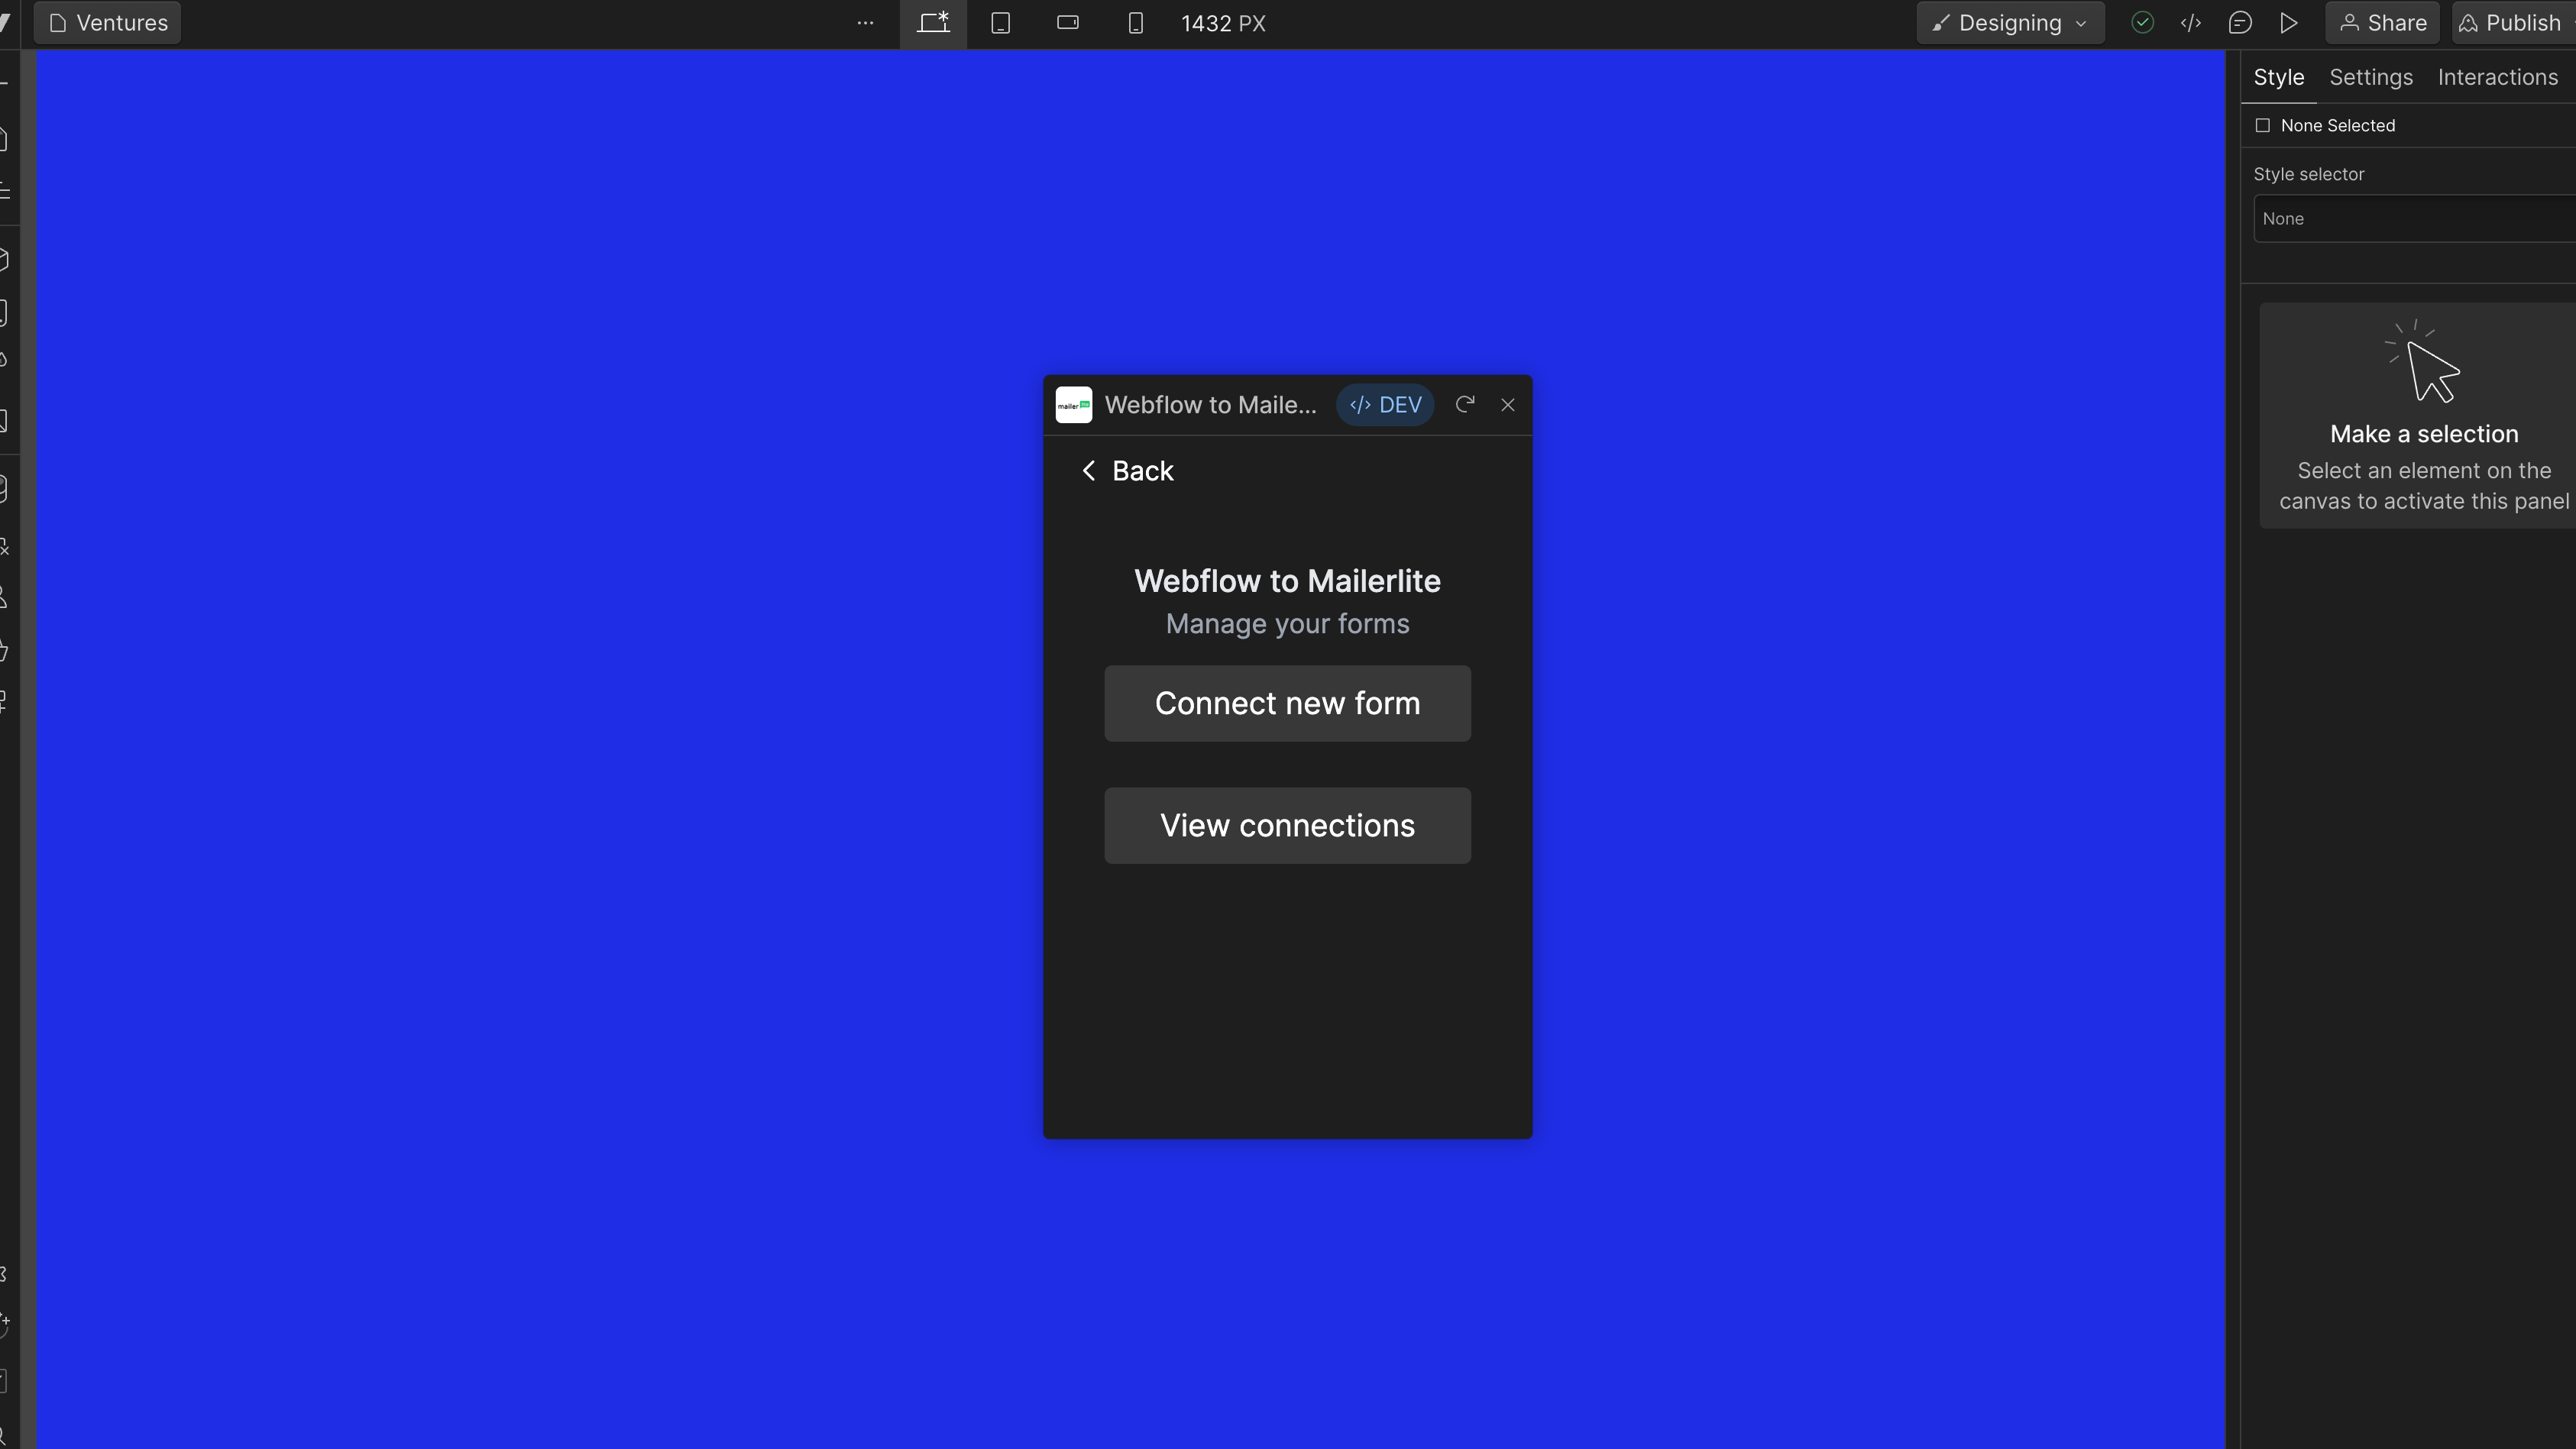
4. Modify the navigate screen
After users log in, they'll see the first page, which is a navigation hub. This screen allows users to choose what to do next.
We'll customize the template to offer two main choices on this screen:
- Connect New Form: If users select this option, it will take them to the 'Select Form' step, which is our next move in the process. We'll cover the setup for this in the next section of the tutorial (🤖 view code)
- View Connections: Choosing this option directs users to page 4, where they can view their existing connections.The details of this screen's setup will also be covered later in the tutorial. (🤖 view code)
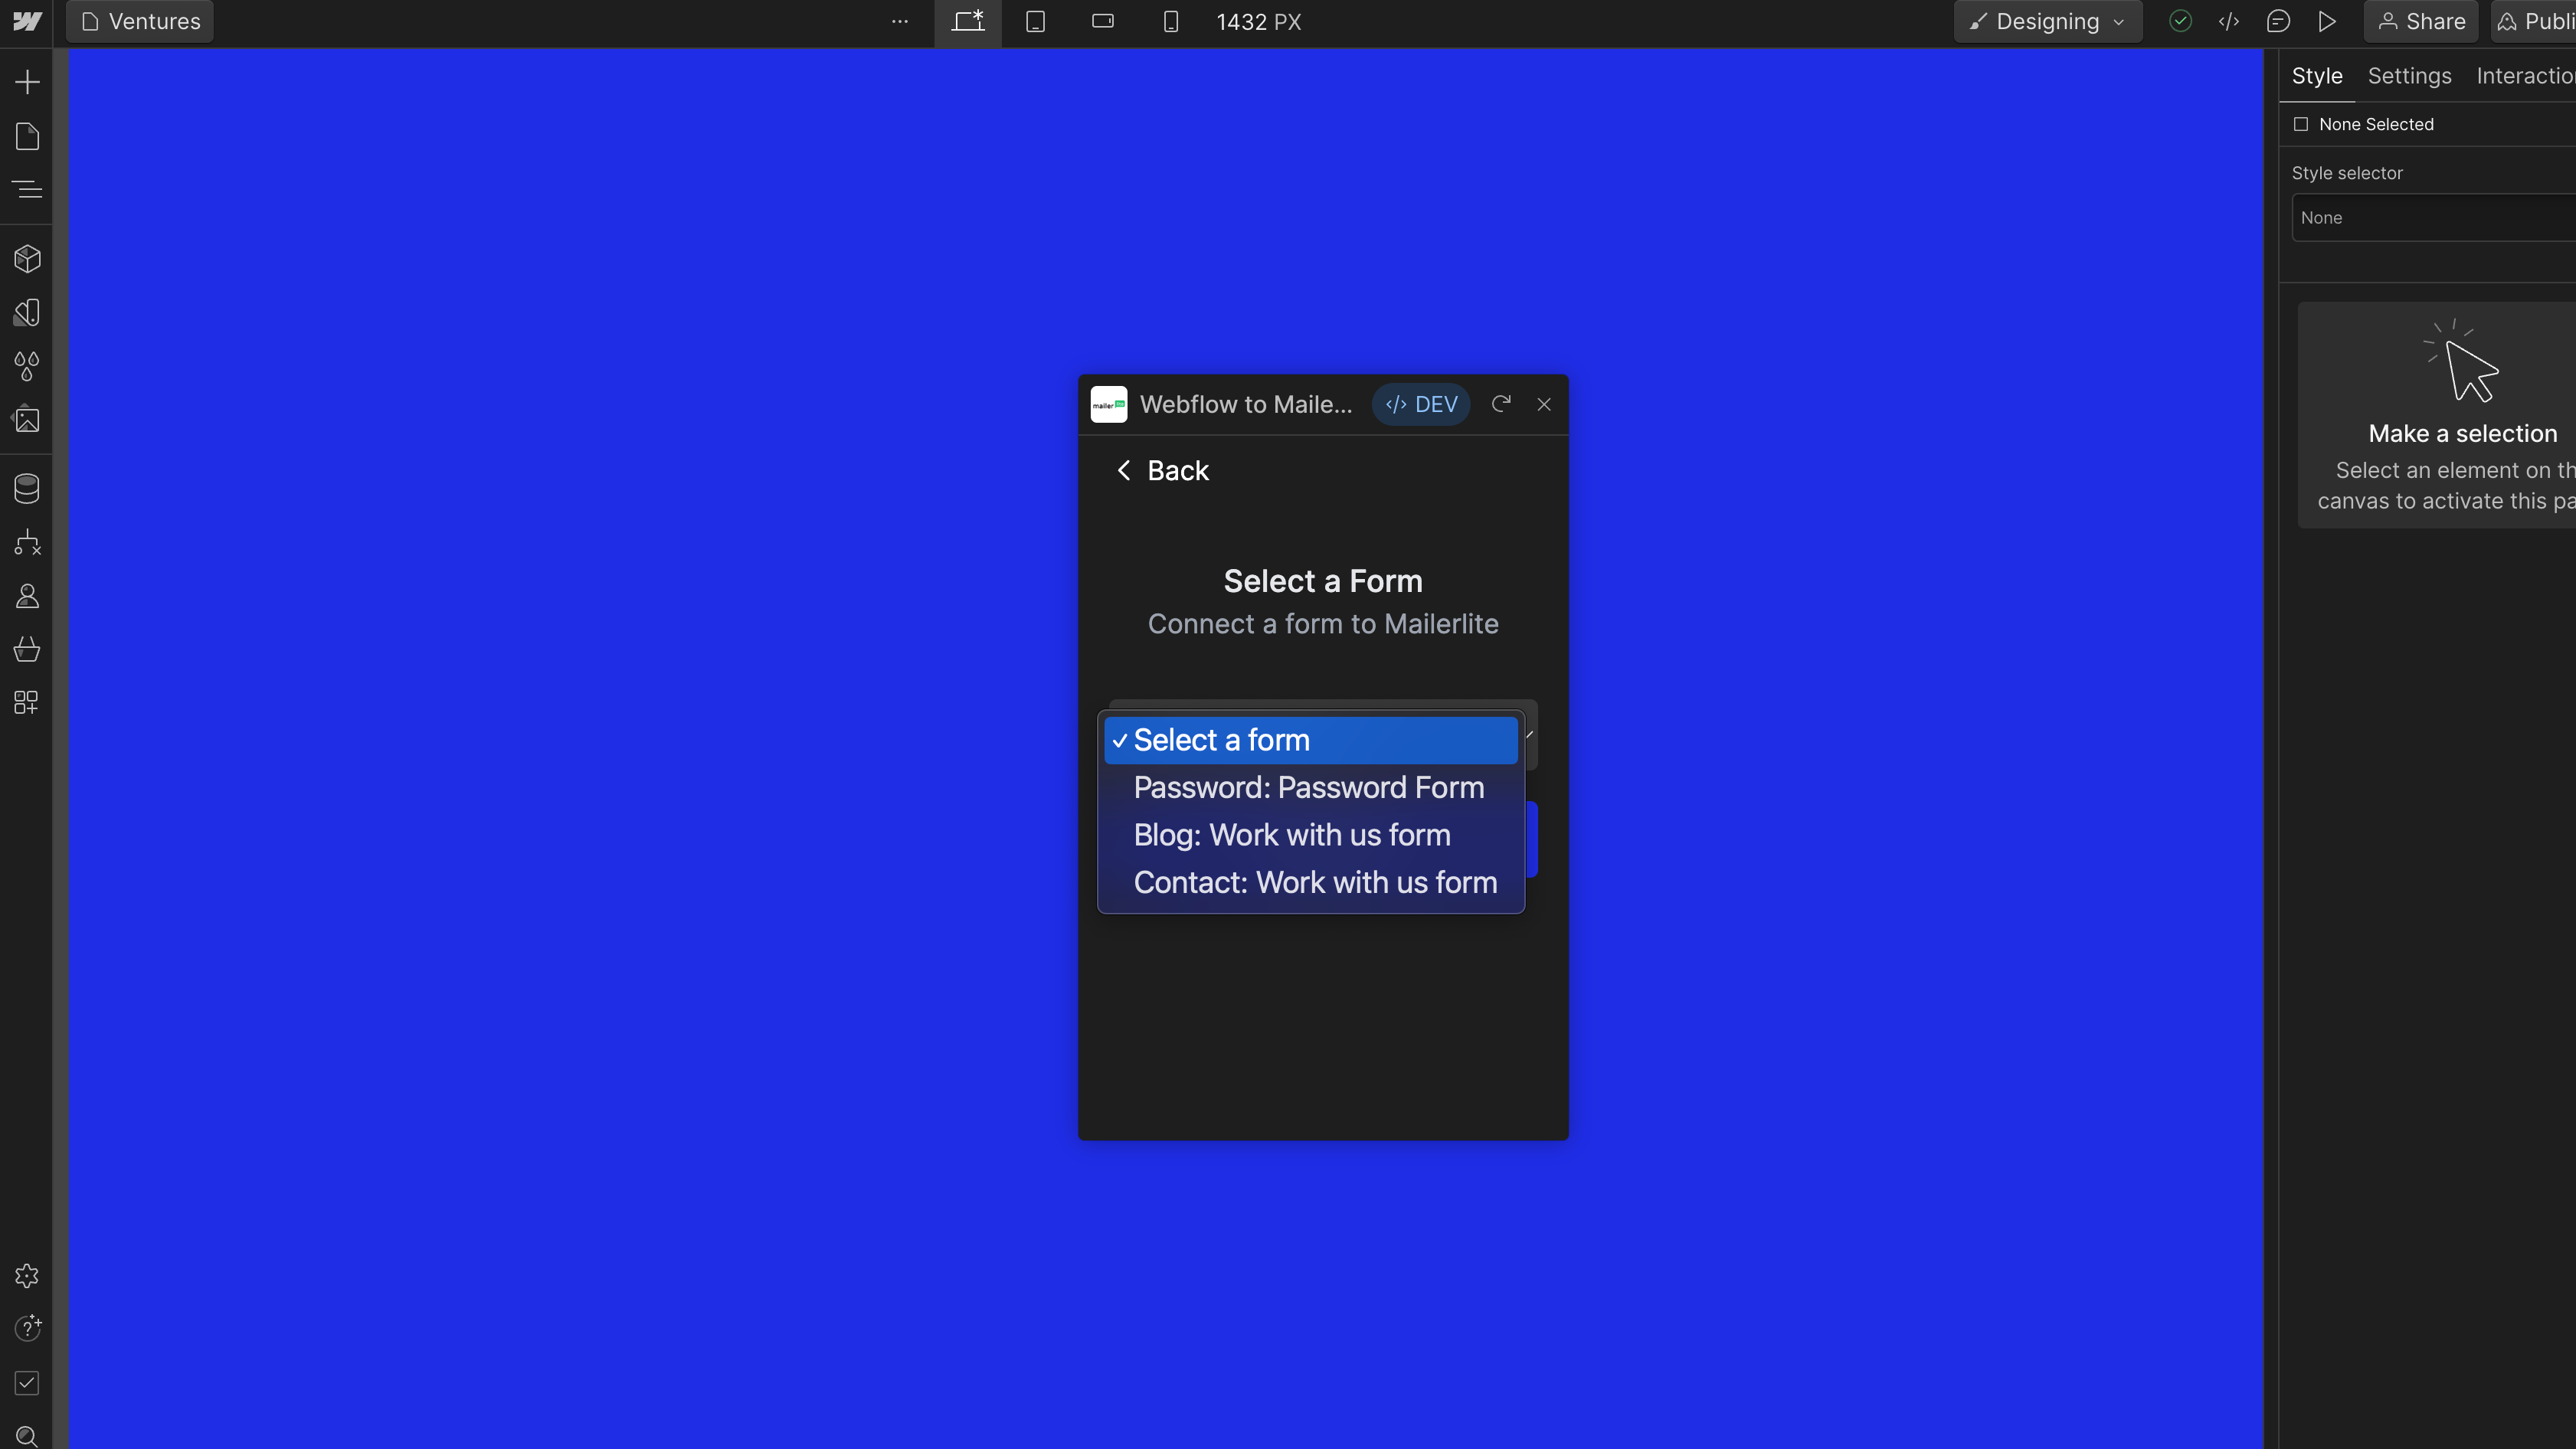
5. Select the Form
In the next step, users will choose a form to connect with MailerLite. The user interface will display a dropdown containing all the forms associated with the account. Each form will be labeled with its respective page name.
We'll establish this feature by developing an API route named
/forms, dedicated to fetching the forms. In our client-side form component we send the authentication token and siteId as parameters (🤖 view code).Inside the forms route, we'll retrieve the search parameters (🤖 view code)and then send a GET request to the Webflow API to fetch the forms (🤖 view code).
Within the
SelectForm component, we'll filter these forms for uniqueness. After this, we update the component's state to store these distinct forms, enabling us to display them in the dropdown menu. (🤖 view code)For forms on different domains (like yourdomain.com, www.yourdomain.com, and yourdomain.webflow.io), each has a unique form ID, even for identical forms. To simplify, we treat forms with the same page ID and name across various domains as the same.
While this method is more straightforward, it's potentially less stable if form names are altered. Future updates could improve handling of such changes for greater flexibility.
Finally, in the
page.tsx, we'll import the SelectForm component (🤖 view code) along with the necessary types (🤖 view code). We'll then update our return statement to ensure SelectForm is visible when the component is on page 2 (🤖 view code).6. Configure MailerLite
In this step, we'll dive into configuring MailerLite. Here's what users can do:
- Set the email field from their Webflow form.
- Choose a MailerLite group to add the subscriber to
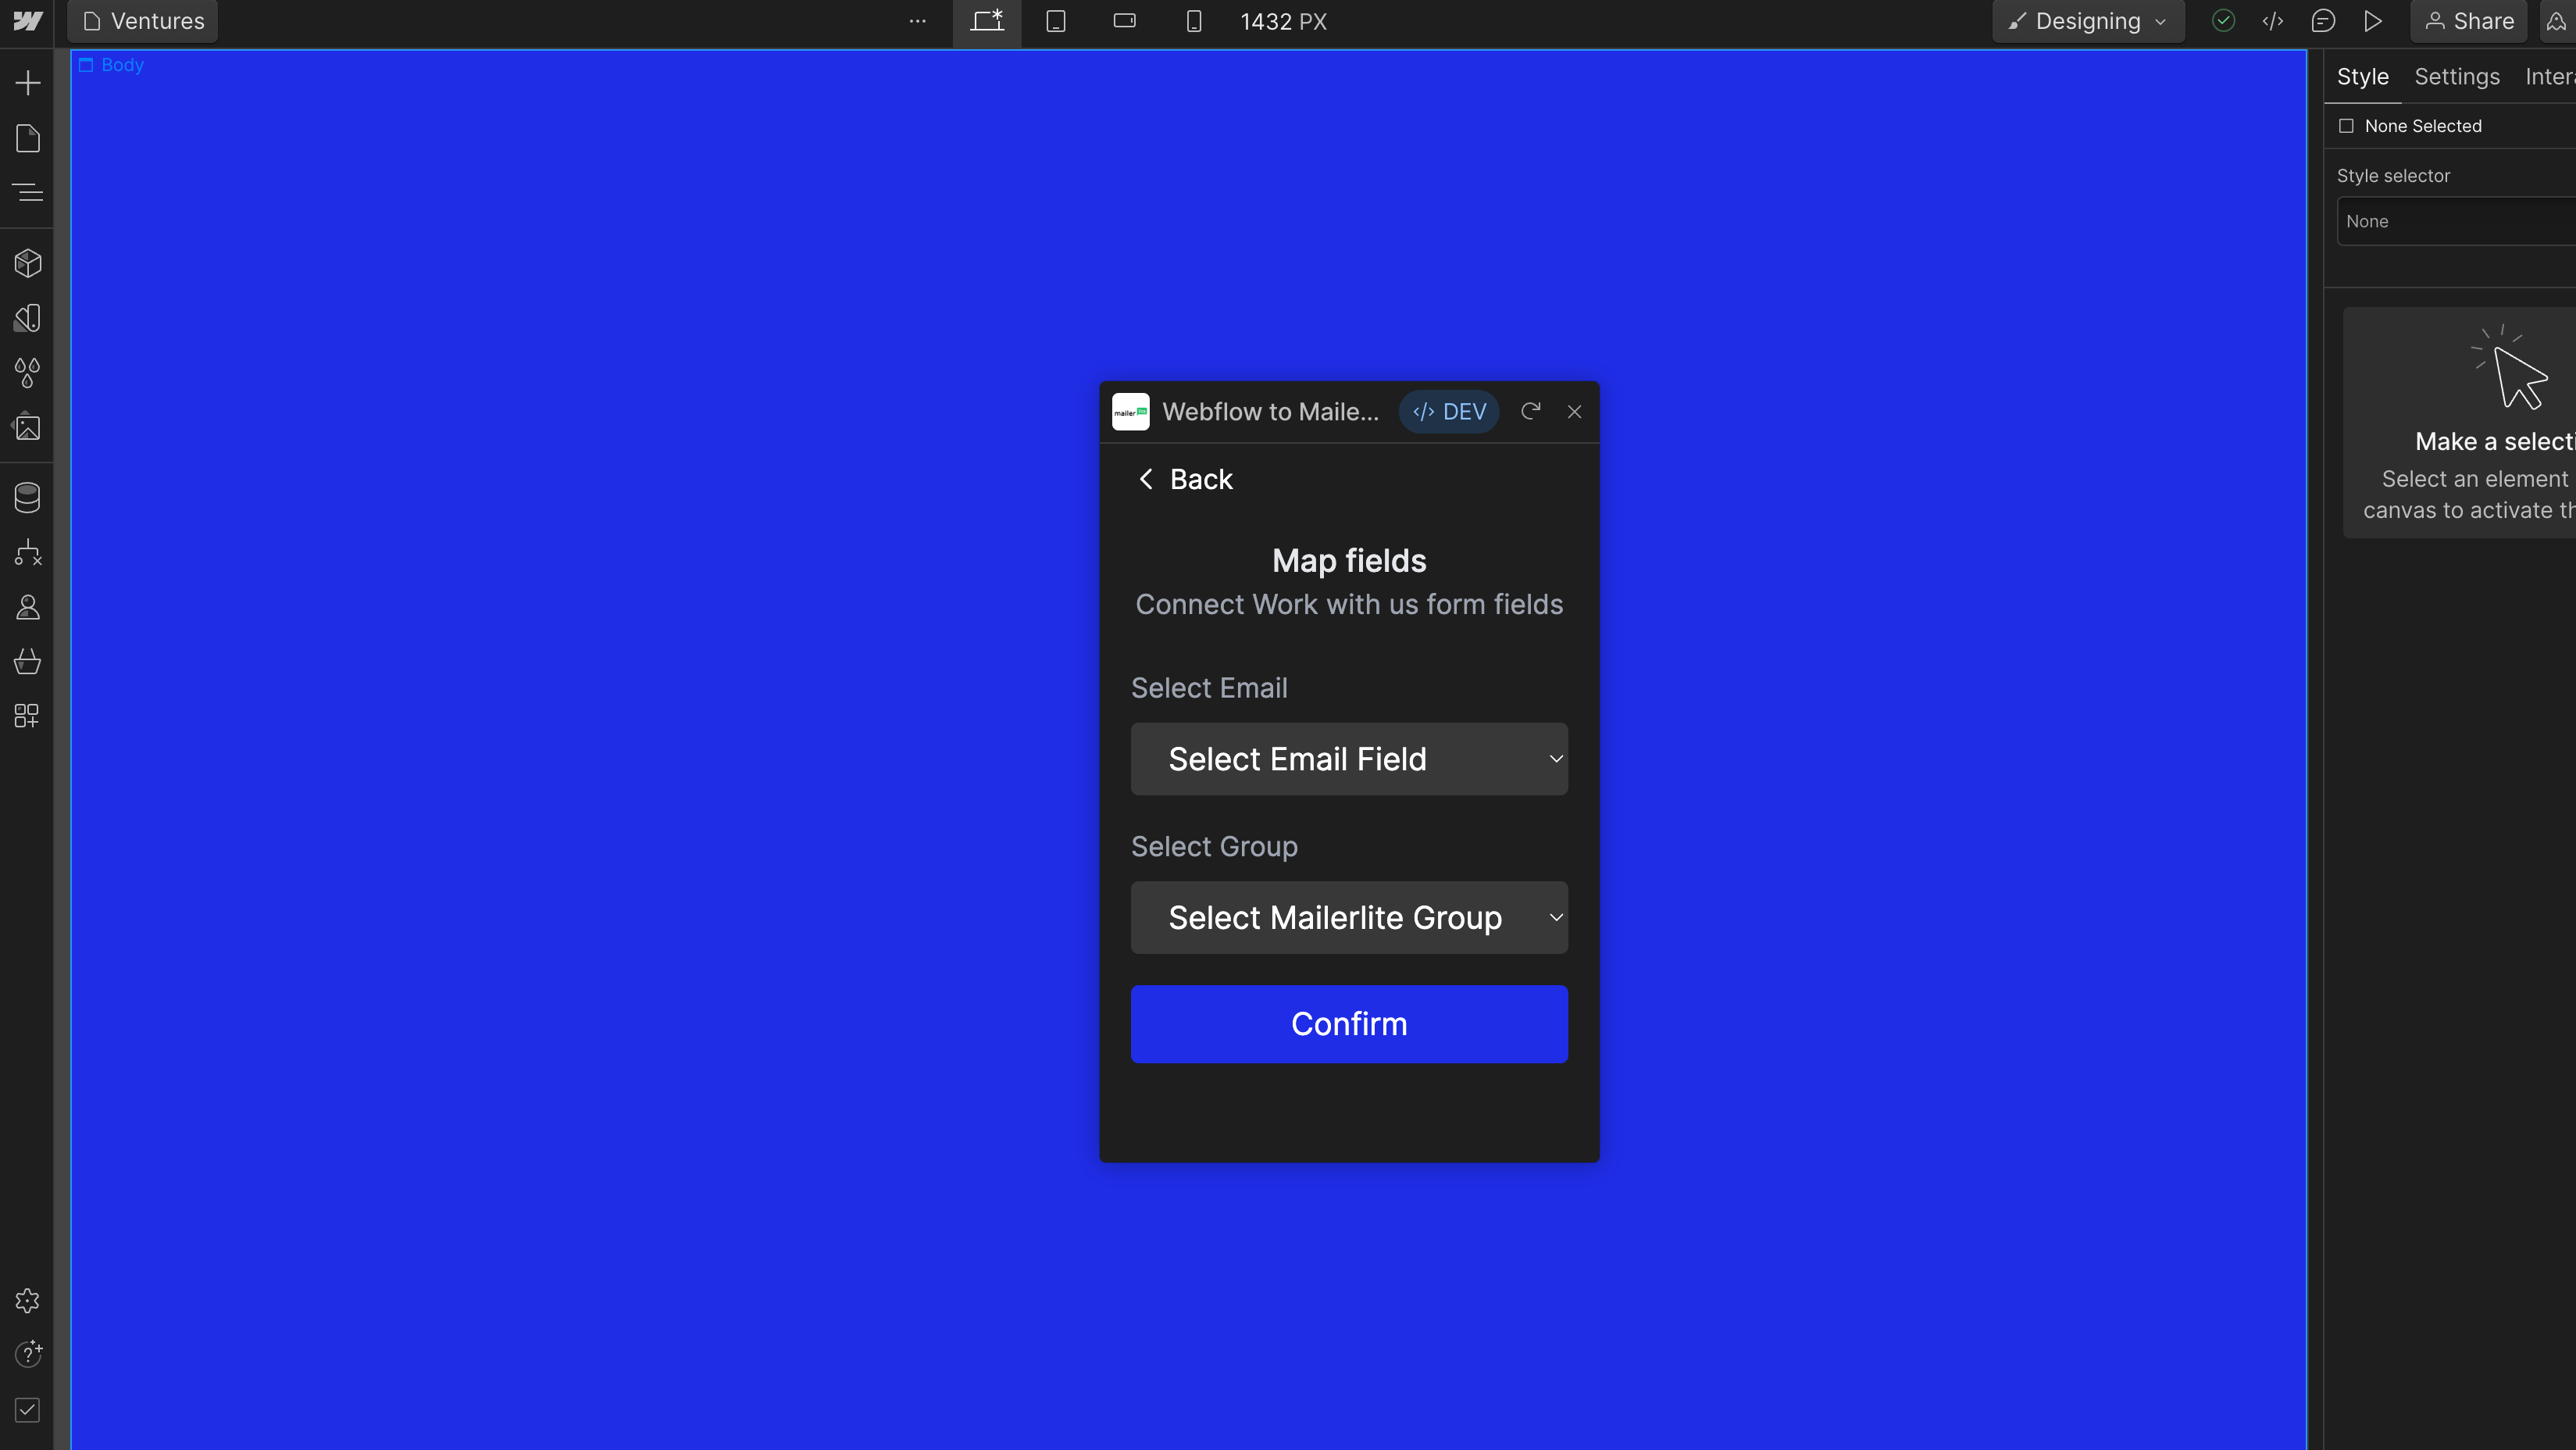
Upon confirmation, we'll establish the connection through a Webflow webhook, ensuring that all form submissions flow into MailerLite.
To kick things off, we fetch the available MailerLite groups from a
mailerlite route(🤖 view code).Inside the MailerLite route we create a GET request to retrieve the groups and pass the data to the
ConfigureMailerlite component (🤖 view code).Within the
ConfigureMailerlite component, we transform the response data and populate the dropdown with the Webflow form fields (🤖 view code).Once the user confirms the configurations, we create a Webflow webhook and send the selected inputs to a
webhooks route (🤖 view code).Please note that at this setup doesn't prevent duplicate connections but something to consider for future updates
In the webhooks route, we gather essential parameters like the email field and group, appending them to the webhook URL for Webflow. This ensures we have all the needed information to send form submissions to MailerLite
We extract site ID, auth, page details, and form name from the request URL, then parse the field connections for email and group. These are used to construct a new URL for our webhook, ensuring it contains all the necessary details to process form submissions.(🤖 view code).
When posting to Webflow's webhook endpoint, we filter the request by
pageId, formName, and pageName to target only relevant forms(🤖 view code).We display
pageName instead of pageId on our webhook screen for clarity. However, given that page names can change, a more reliable future approach would involve using the stable pageId and dynamically retrieving the pageName.We modify the
mailerlite route so that we process new form submissions as they come in. (🤖 view code).Finally, in the
page.tsx, we import the ConfigureMailerlite (🤖 view code) component and display this component when on page 3 (🤖 view code).7. View Form Connections
The final component is a screen for users to view and manage their existing form connections, including deleting them directly from within our component.
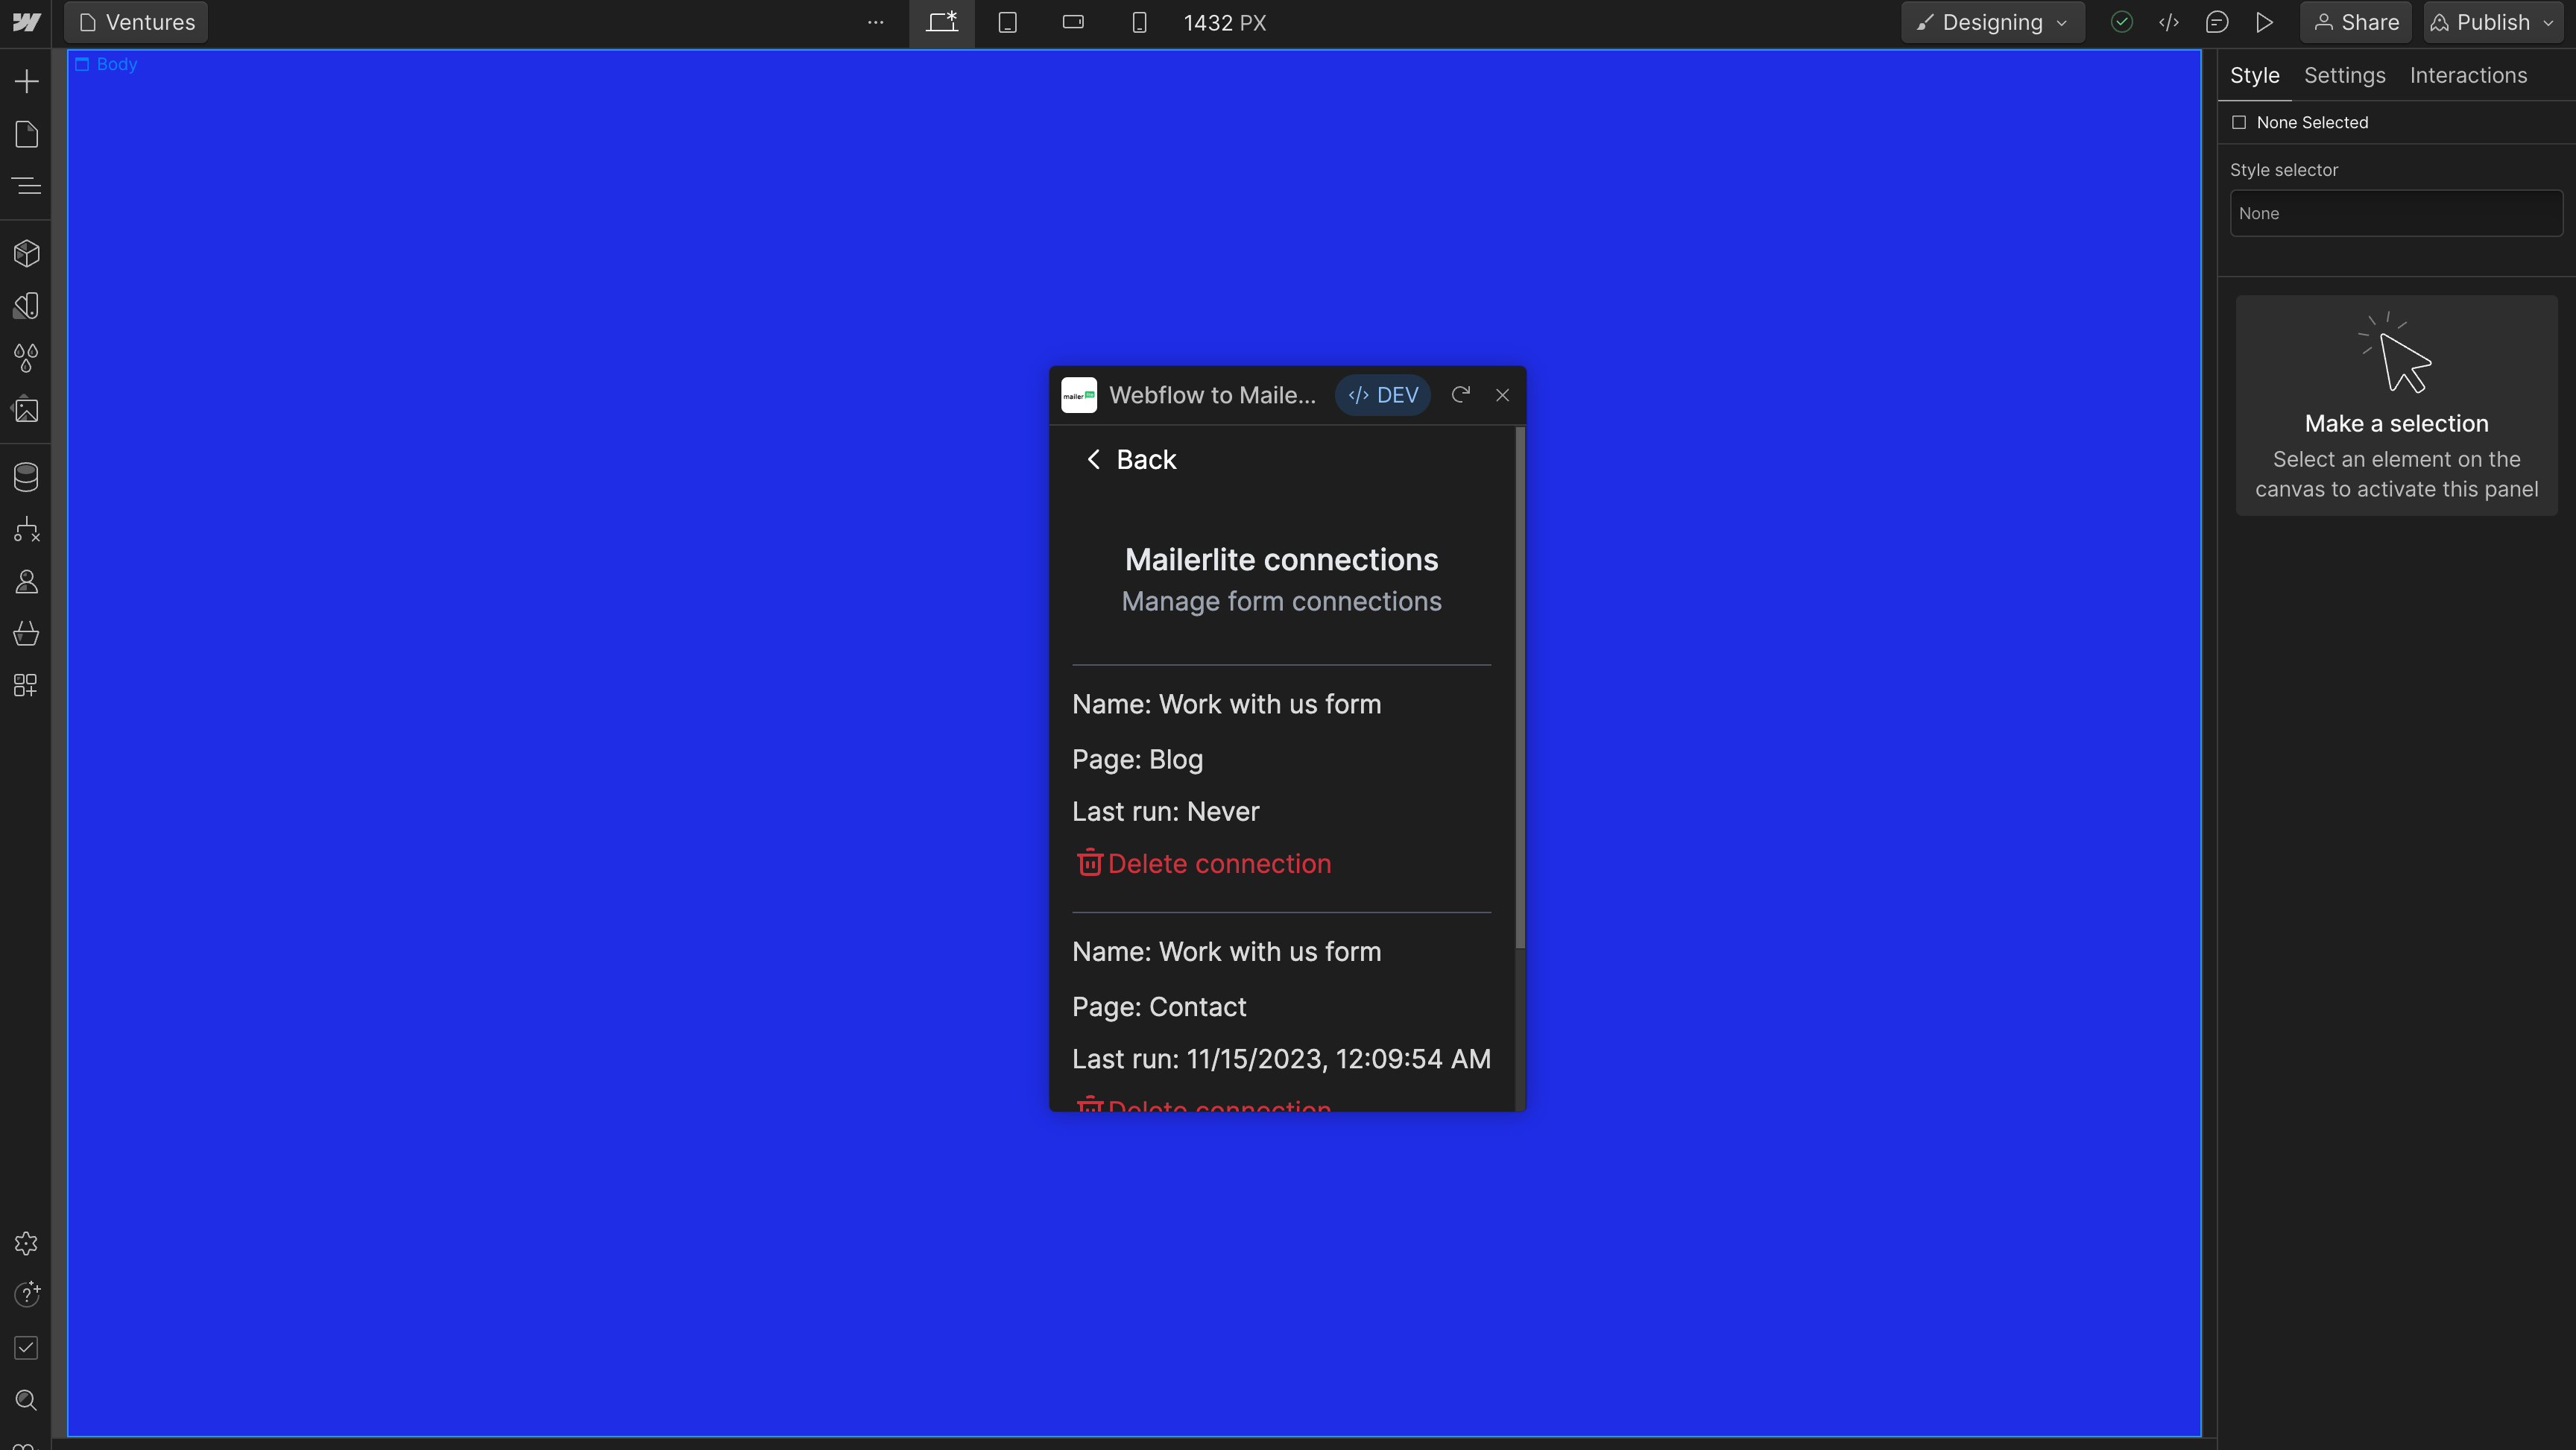
Begin by fetching the webhooks (🤖 view code)
In the
webhooks route, we filter for relevant forms before posting to MailerLite. This helps differentiate our webhooks from any others the user might have on their account(🤖 view code).We add a delete button to allow users to remove the connection (🤖 view code). Then delete the connections in the
webhooks route (🤖 view code).In our designer extension's
page.tsx, we import the component (🤖 view code) and display the component when on page 3 (🤖 view code). Give it a try from start to finish by launching the app and attempting to connect a form. If you'd like to verify whether the webhooks are processing correctly, keep your development server running and submit a form submission.

That wraps up our introductory tutorial on integrating MailerLite with Webflow. If you decide to explore any aspects of this tutorial, please don't hesitate to reach out. We'd love to hear from you at hey@lunchpaillabs.com.
.png?table=block&id=9ba33ac6-8e12-48f6-b980-4333b612ec56&cache=v2)
.png?table=block&id=64e0a301-b9c1-4c1c-b973-7bb5447c2684&cache=v2)
.png?table=block&id=82c5f52a-a497-45e3-a039-3404e584c372&cache=v2)