
Do not index
Webflow apps offer a world of potential, especially when it comes to hybrid apps, the versatile app types that include both server-side and client functionality. While Webflow has a thorough guide for using the hybrid example app with codespaces, I wanted to share an example of running it locally using NGROK. Webflow needs apps to use a publicly accessible HTTPS URI for redirects. Ngrok allows you to do this while testing locally. This approach is useful if you're thinking of using the hybrid app example as a foundation for your future integrations.
About the Hybrid app example
The hybrid app example enables users to generate images using OpenAI’s Dall-E and add them to their Webflow assets. I'm fond of this example for several reasons:
- It's built on Next.js, offering a glimpse into constructing data-client apps in this framework.
- It illustrates the process of integrating third-party APIs within Webflow’s Hybrid apps.
- It highlights how data from these APIs can be channeled into designer extensions, allowing users to view the info directly within Webflow.
It’s a demonstration of functionality that you could use to build many different kinds of hybrid apps within Webflow.
.gif%3Ftable=block&id=e7031381-9441-42a3-81e0-bf53ba163932&spaceId=480f0932-72ea-496f-a70d-3632da8d6e99&expirationTimestamp=1784016000000&signature=SRfc4OEEgavFT-I388llTE8ViZ2d2KBkUZ6vBBlkNA8?table=block&id=e7031381-9441-42a3-81e0-bf53ba163932&cache=v2)
Running the Hybrid App with Ngrok
Before diving into running a Webflow hybrid app locally using Ngrok, make sure you meet the prerequisites. These tools and accounts are crucial for following along with this guide.
Prerequisites
- Node.js 16.20 or later
- A Webflow site for development and testing
- An OpenAI API key
- A Webflow site for development and testing
- A NGROK account.
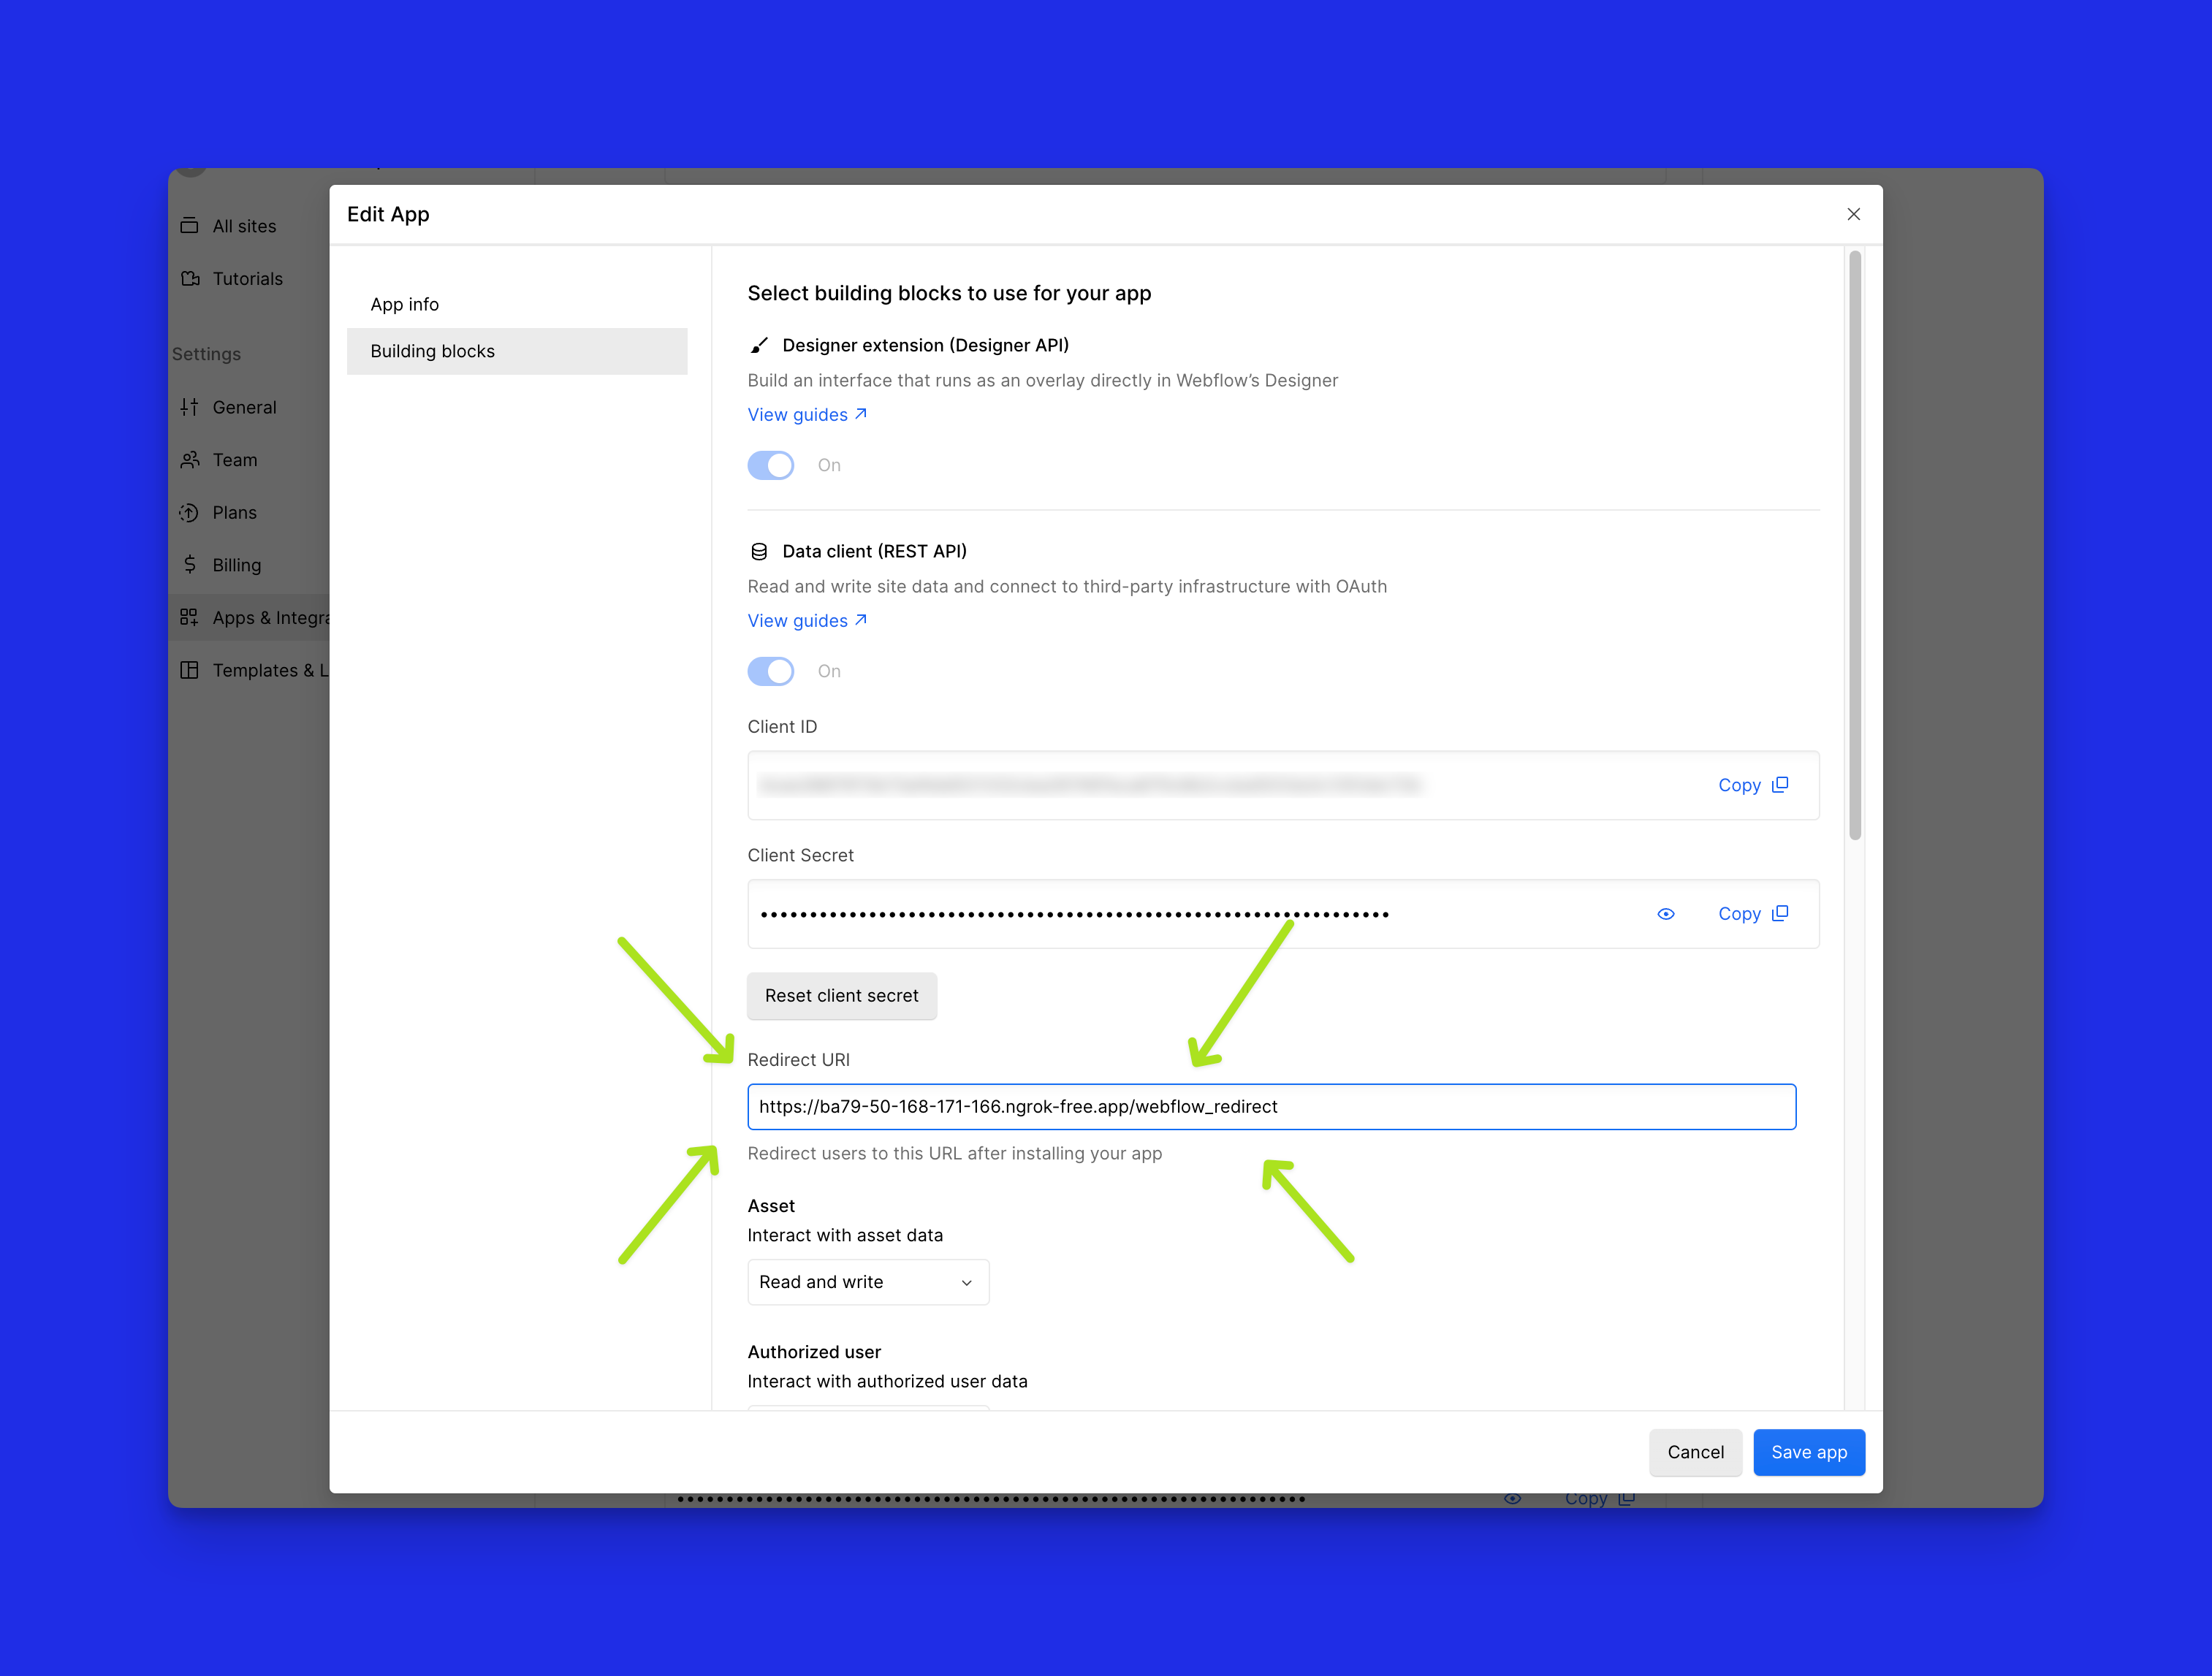
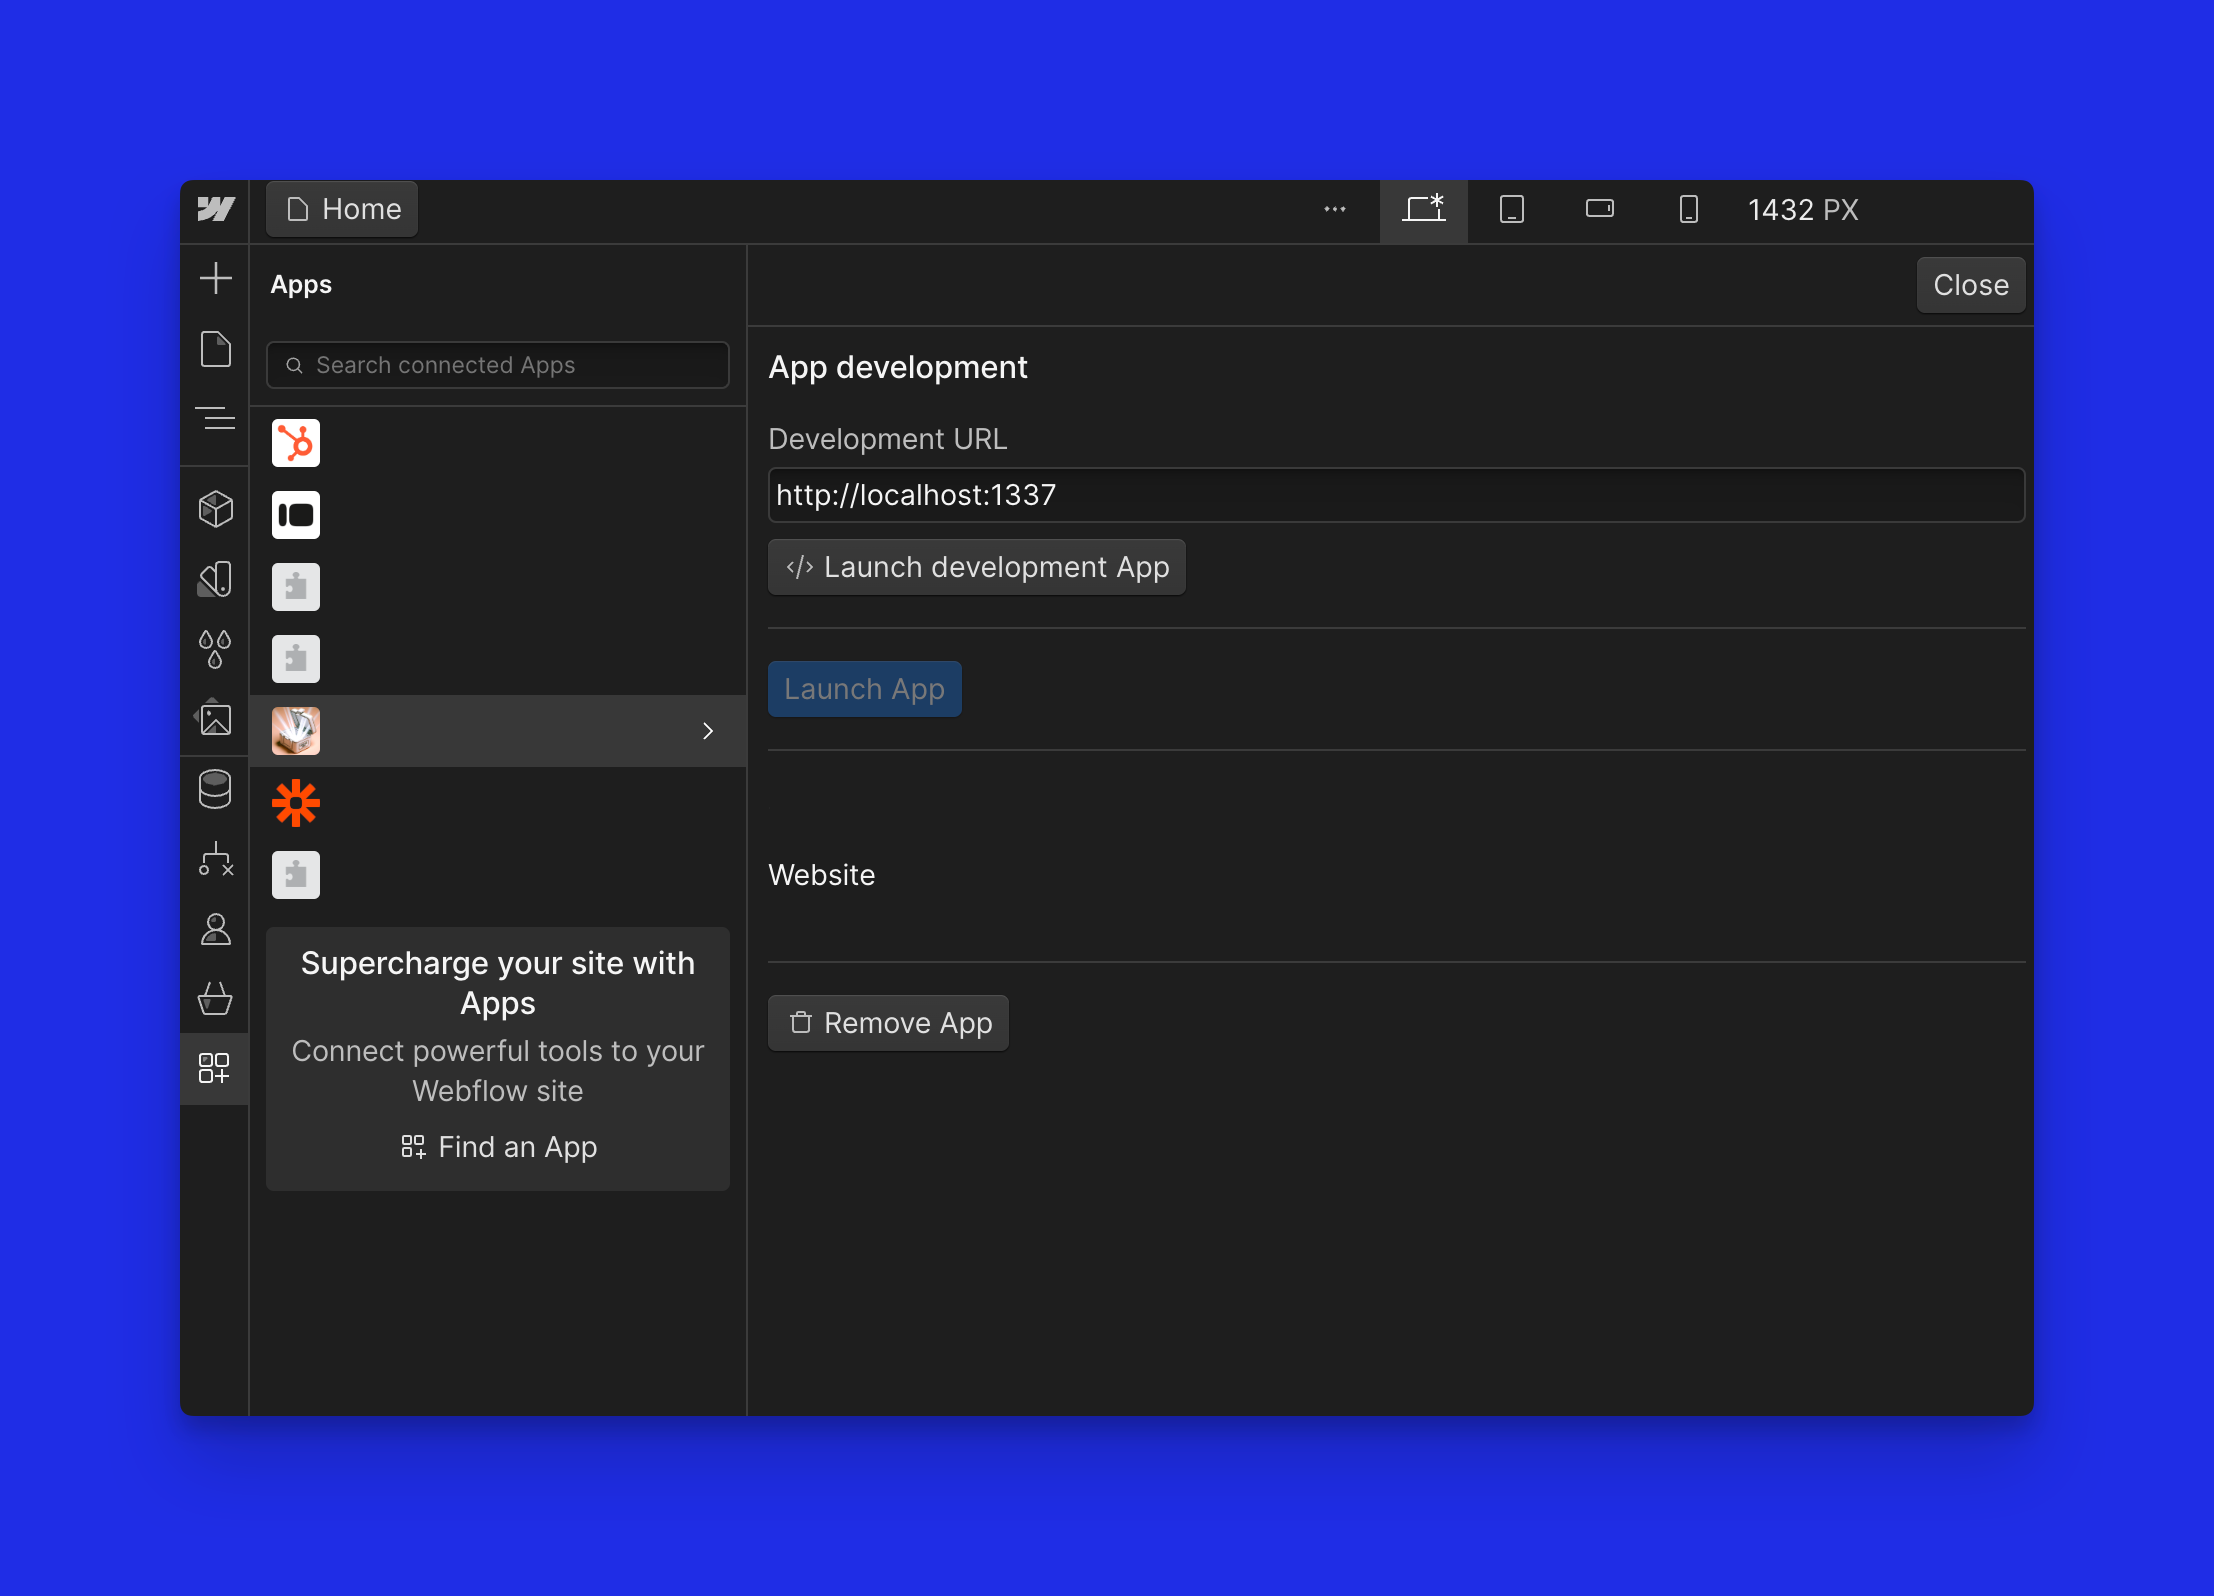
Step 1: Configure Webflow App
Follow Webflow's guide to create an app. Enable the data client and designer extension options. Set the following scopes:
'assets:read',
  'assets:write',
  'authorized_user:read',
  'cms:read',
  'cms:write',
  'custom_code:read',
  'custom_code:write',
  'forms:read',
  'forms:write',
  'pages:read',
  'pages:write',
  'sites:read',
  'sites:write',
Step 2: Clone the Repository
Clone the Webflow hybrid example repository. Use this command in your terminal:
git clone https://github.com/Webflow-Examples/Hybrid-App-Example.gitOnce cloning is complete, switch to the new project directory with:
cd Hybrid-App-ExampleStep 3: Set Up Ngrok
Webflow needs apps to use a publicly accessible HTTPS URI for redirects. Ngrok allows you to do this while testing locally.
While these instructions largely follow Webflow's own guide, note that for the hybrid example, you should use port 3001 instead of 3000 and set the redirect URI to
/webflow_redirect instead of /auth.
- Sign Up: Create a free Ngrok account.
- Install: In your terminal, run
$ brew install ngrok.
- Authenticate: Use
$ ngrok config add-authtoken <your-token>to add your auth token.
- Start Tunnel: Open a tunnel on port 3001 with
$ ngrok http 3001.
- Configure Webflow App: Copy the Ngrok forwarding URI. Set this as your App's homepage in Webflow.
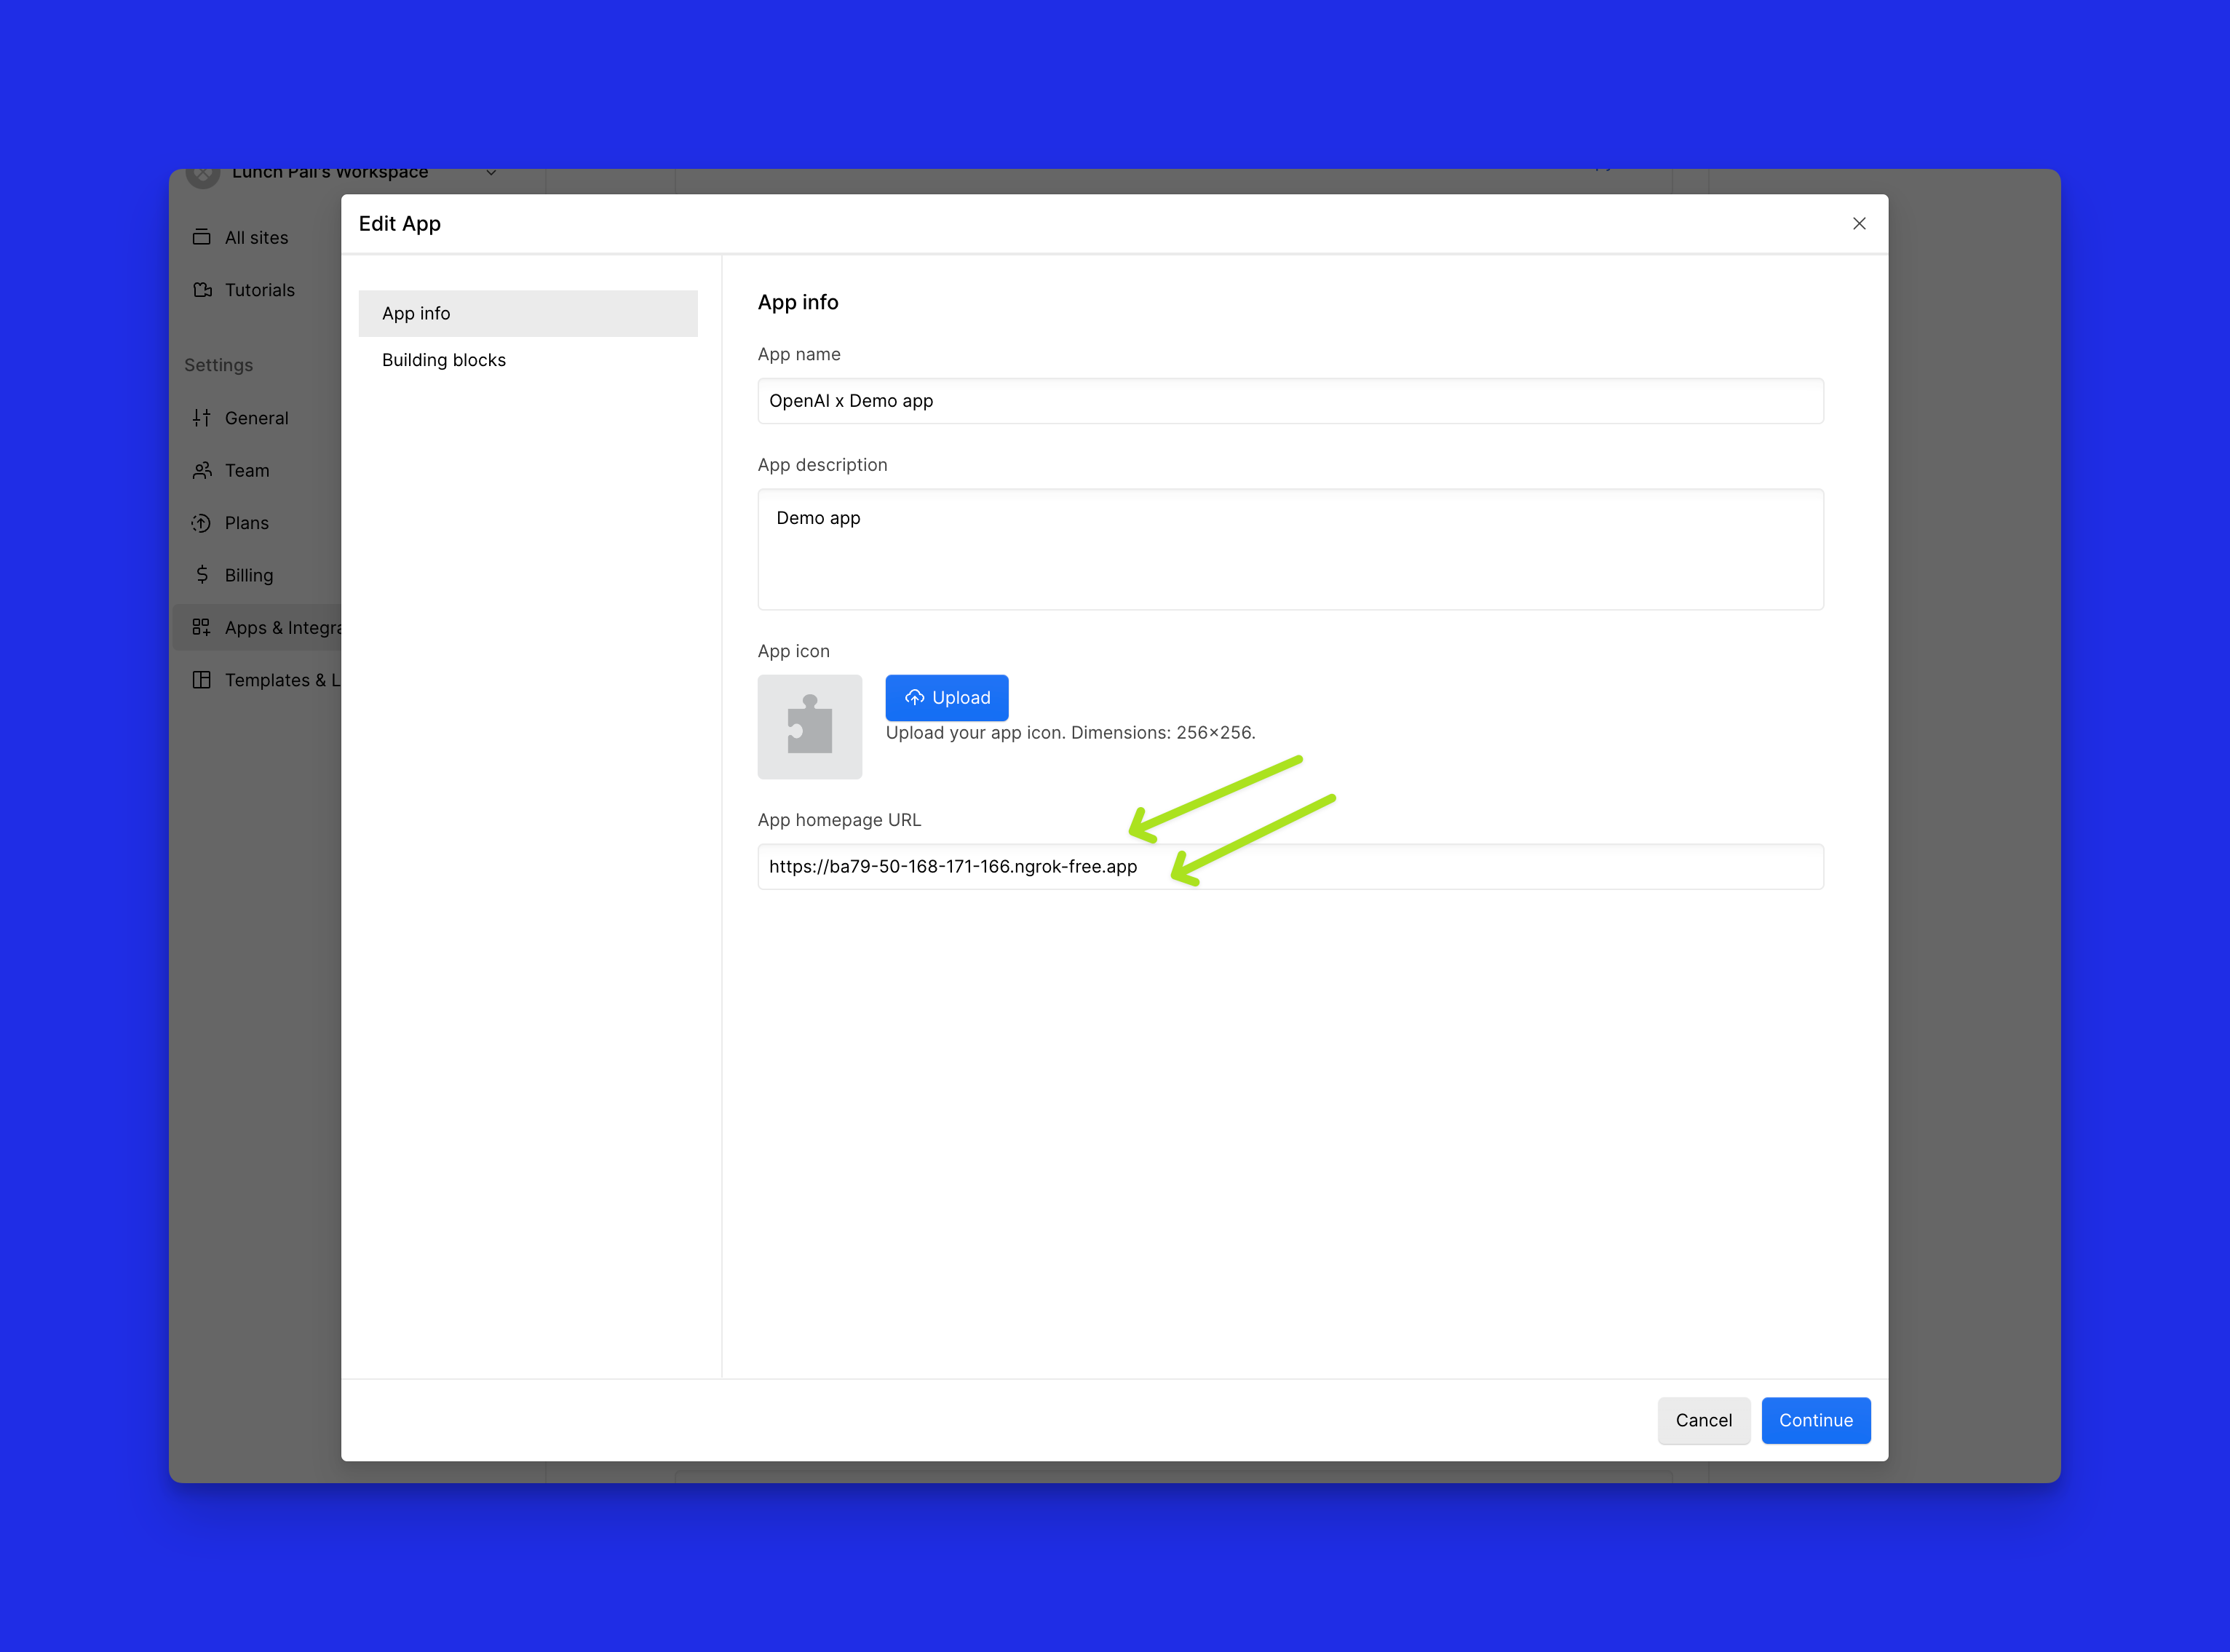
- Add
/webflow_redirectto the end of this URI for the Redirect URL. For example:https://939c-136-33-253-184.ngrok.io/webflow_redirect.
Step 4: Set Up Environment Variables
- Create an
.env.localfile in both thedata-clientanddesigner-extensionfolders.
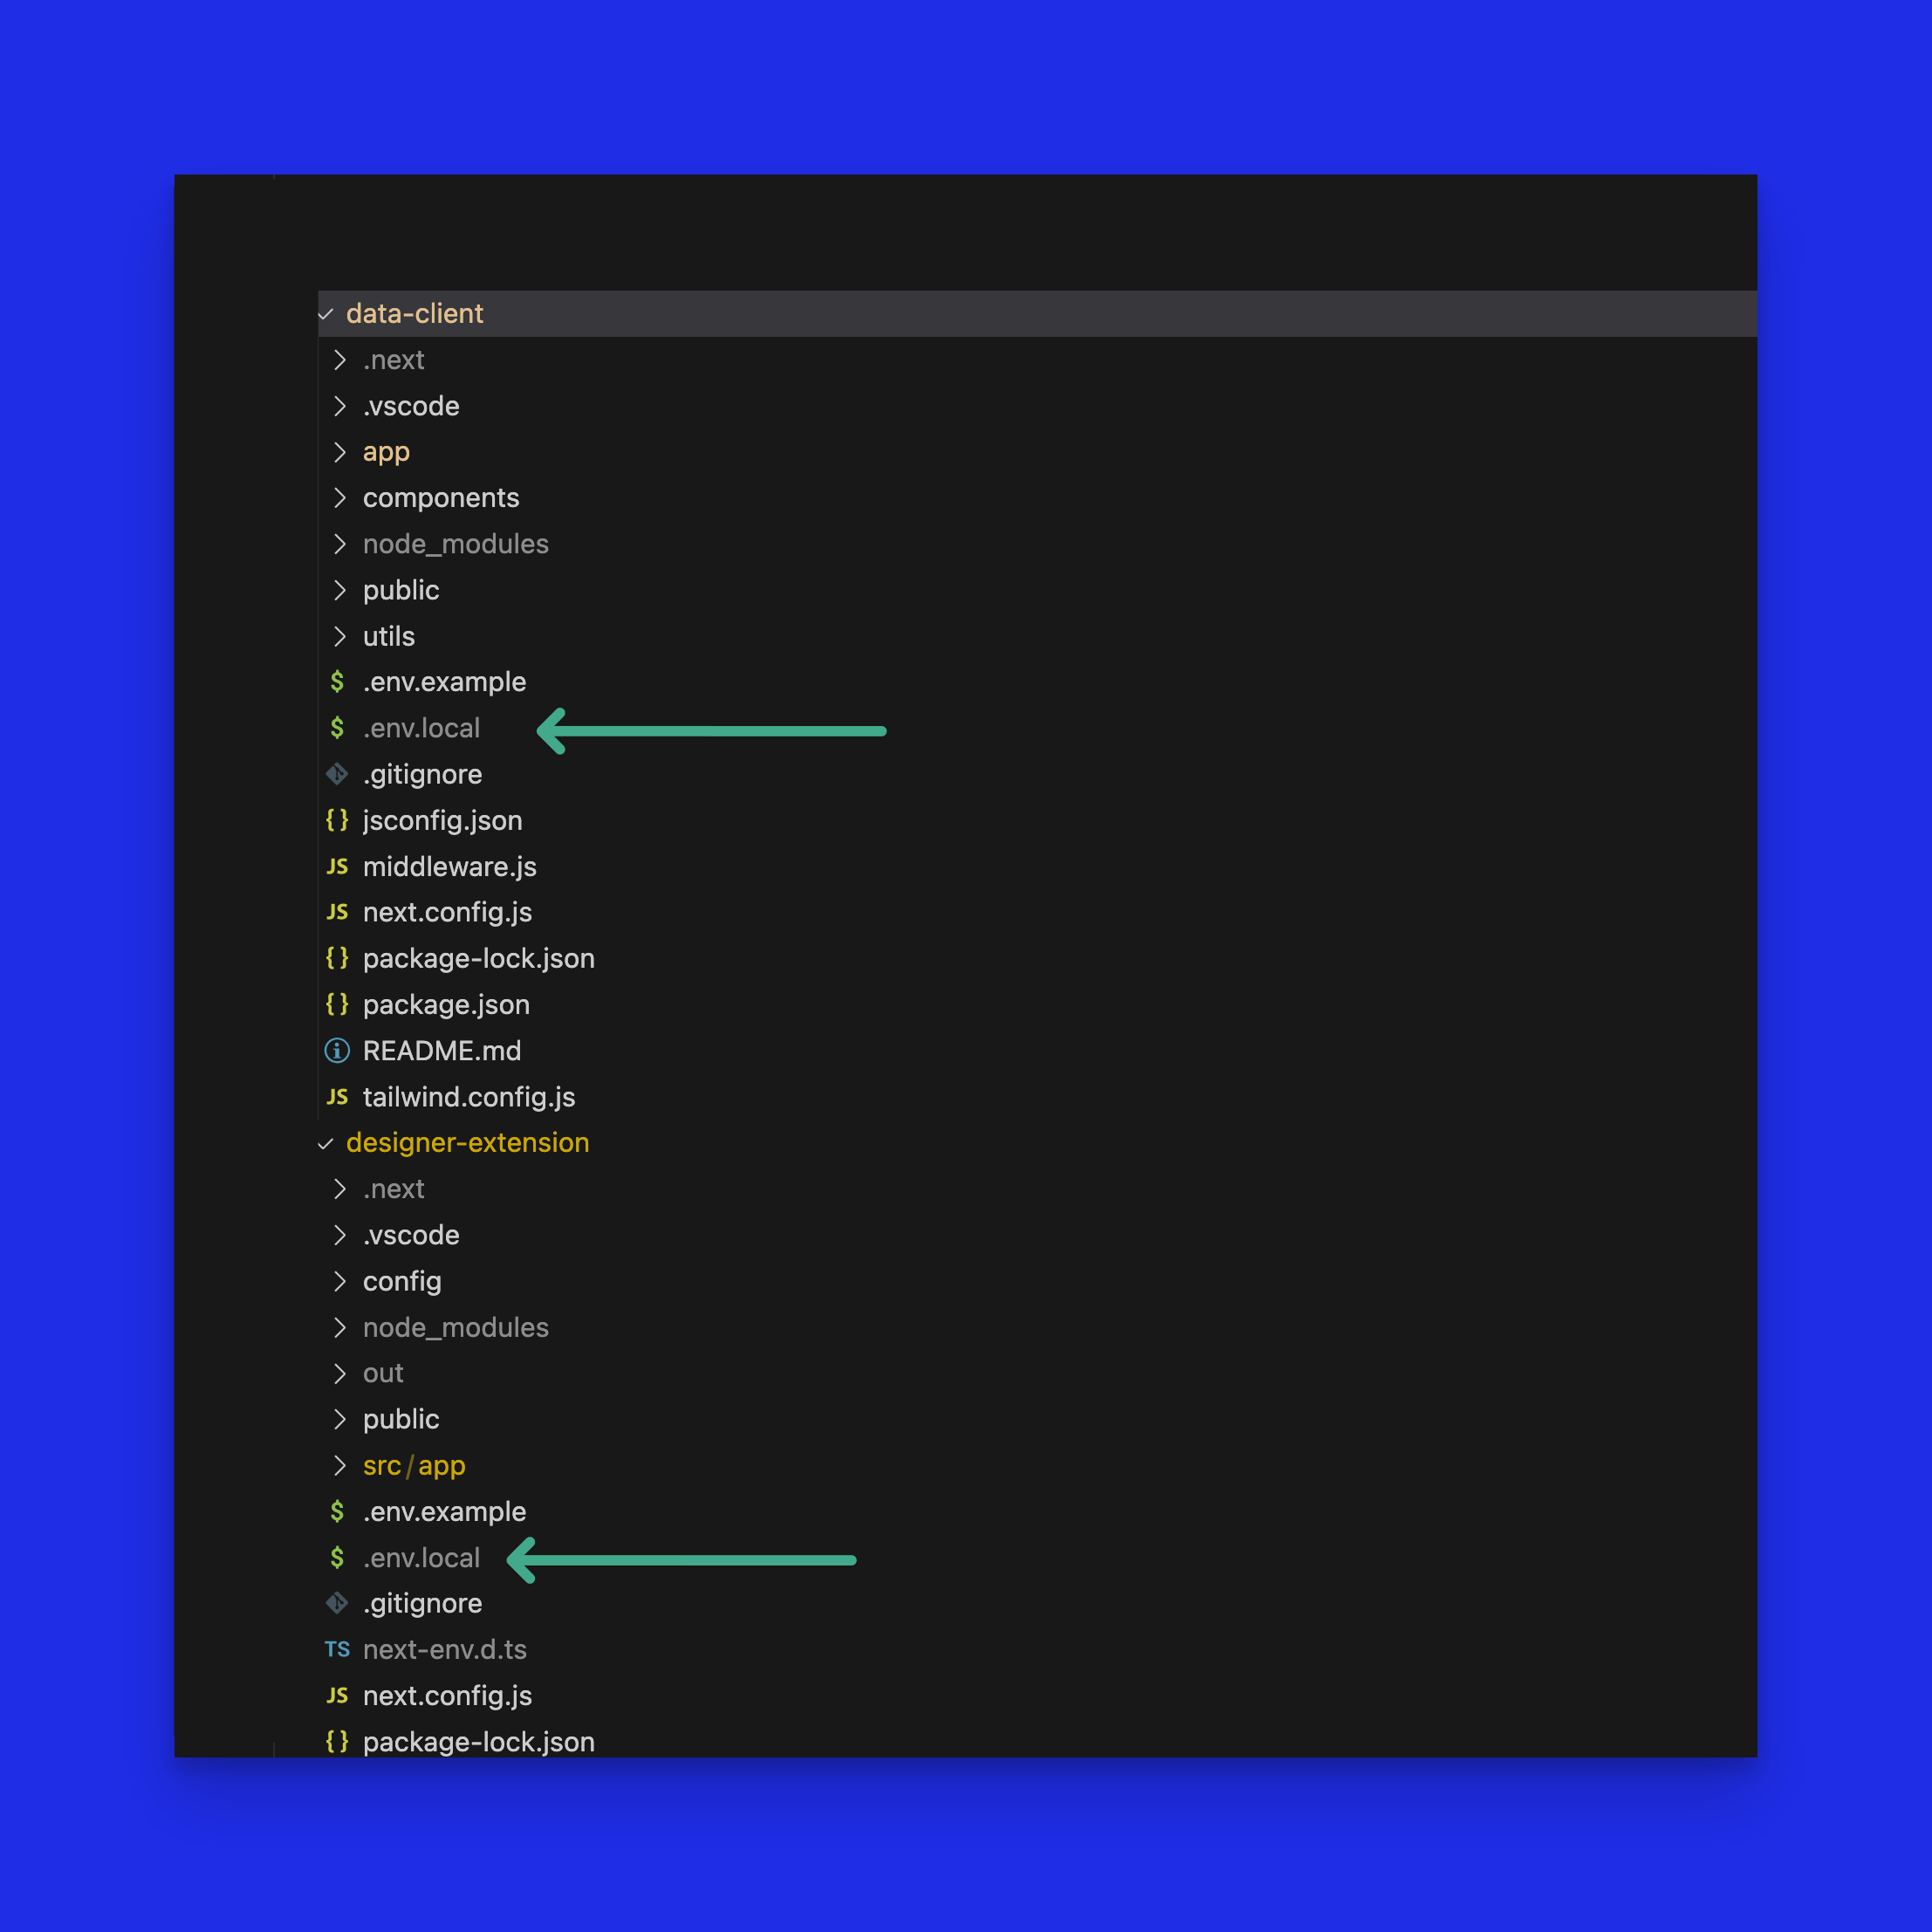
- Add the following variables:
CLIENT_ID=your_client_id
CLIENT_SECRET=your_client_secret
OPENAI_API_KEY=your_openai_api_key
NEXT_PUBLIC_BACKEND_URL='your_NGROK_URL example https://939c-136-33-253-184.ngrok.io/'
Step 5: Install Dependencies
Run
npm install in the data-client and designer-extension folders as well as your main folder.Step 6: Run the App
Execute
npm run dev to start the app and log in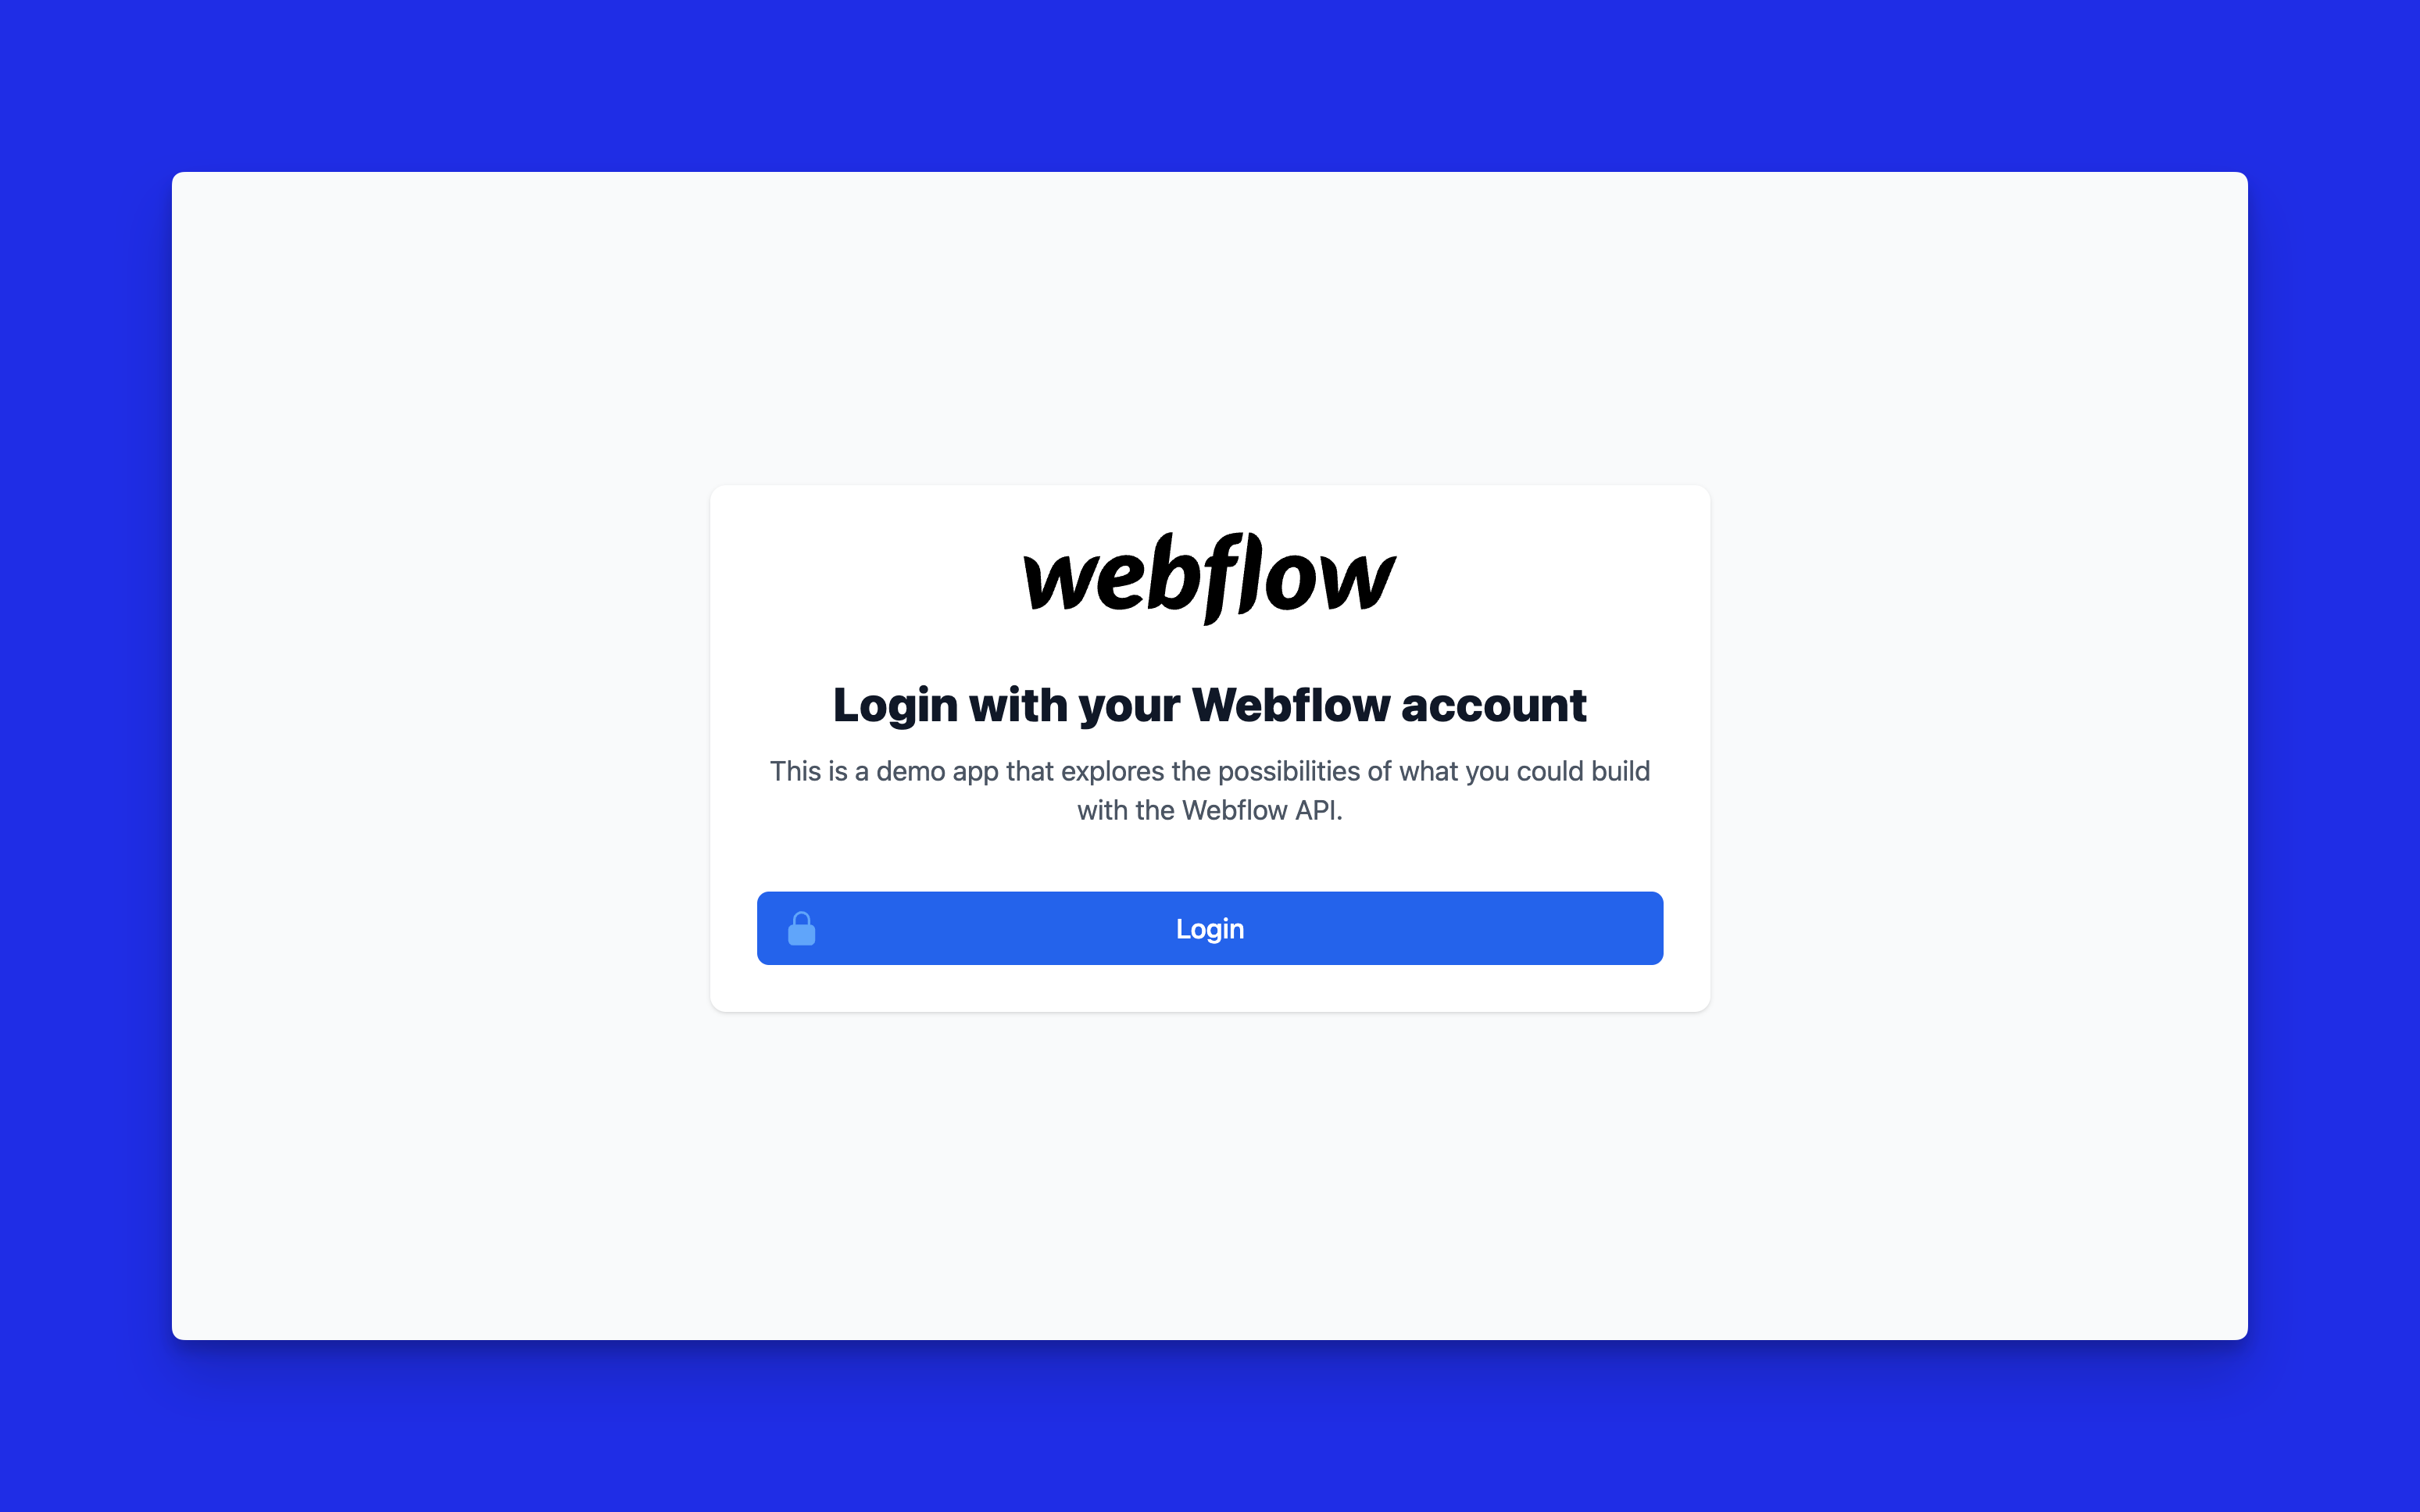
After authorization, copy your token
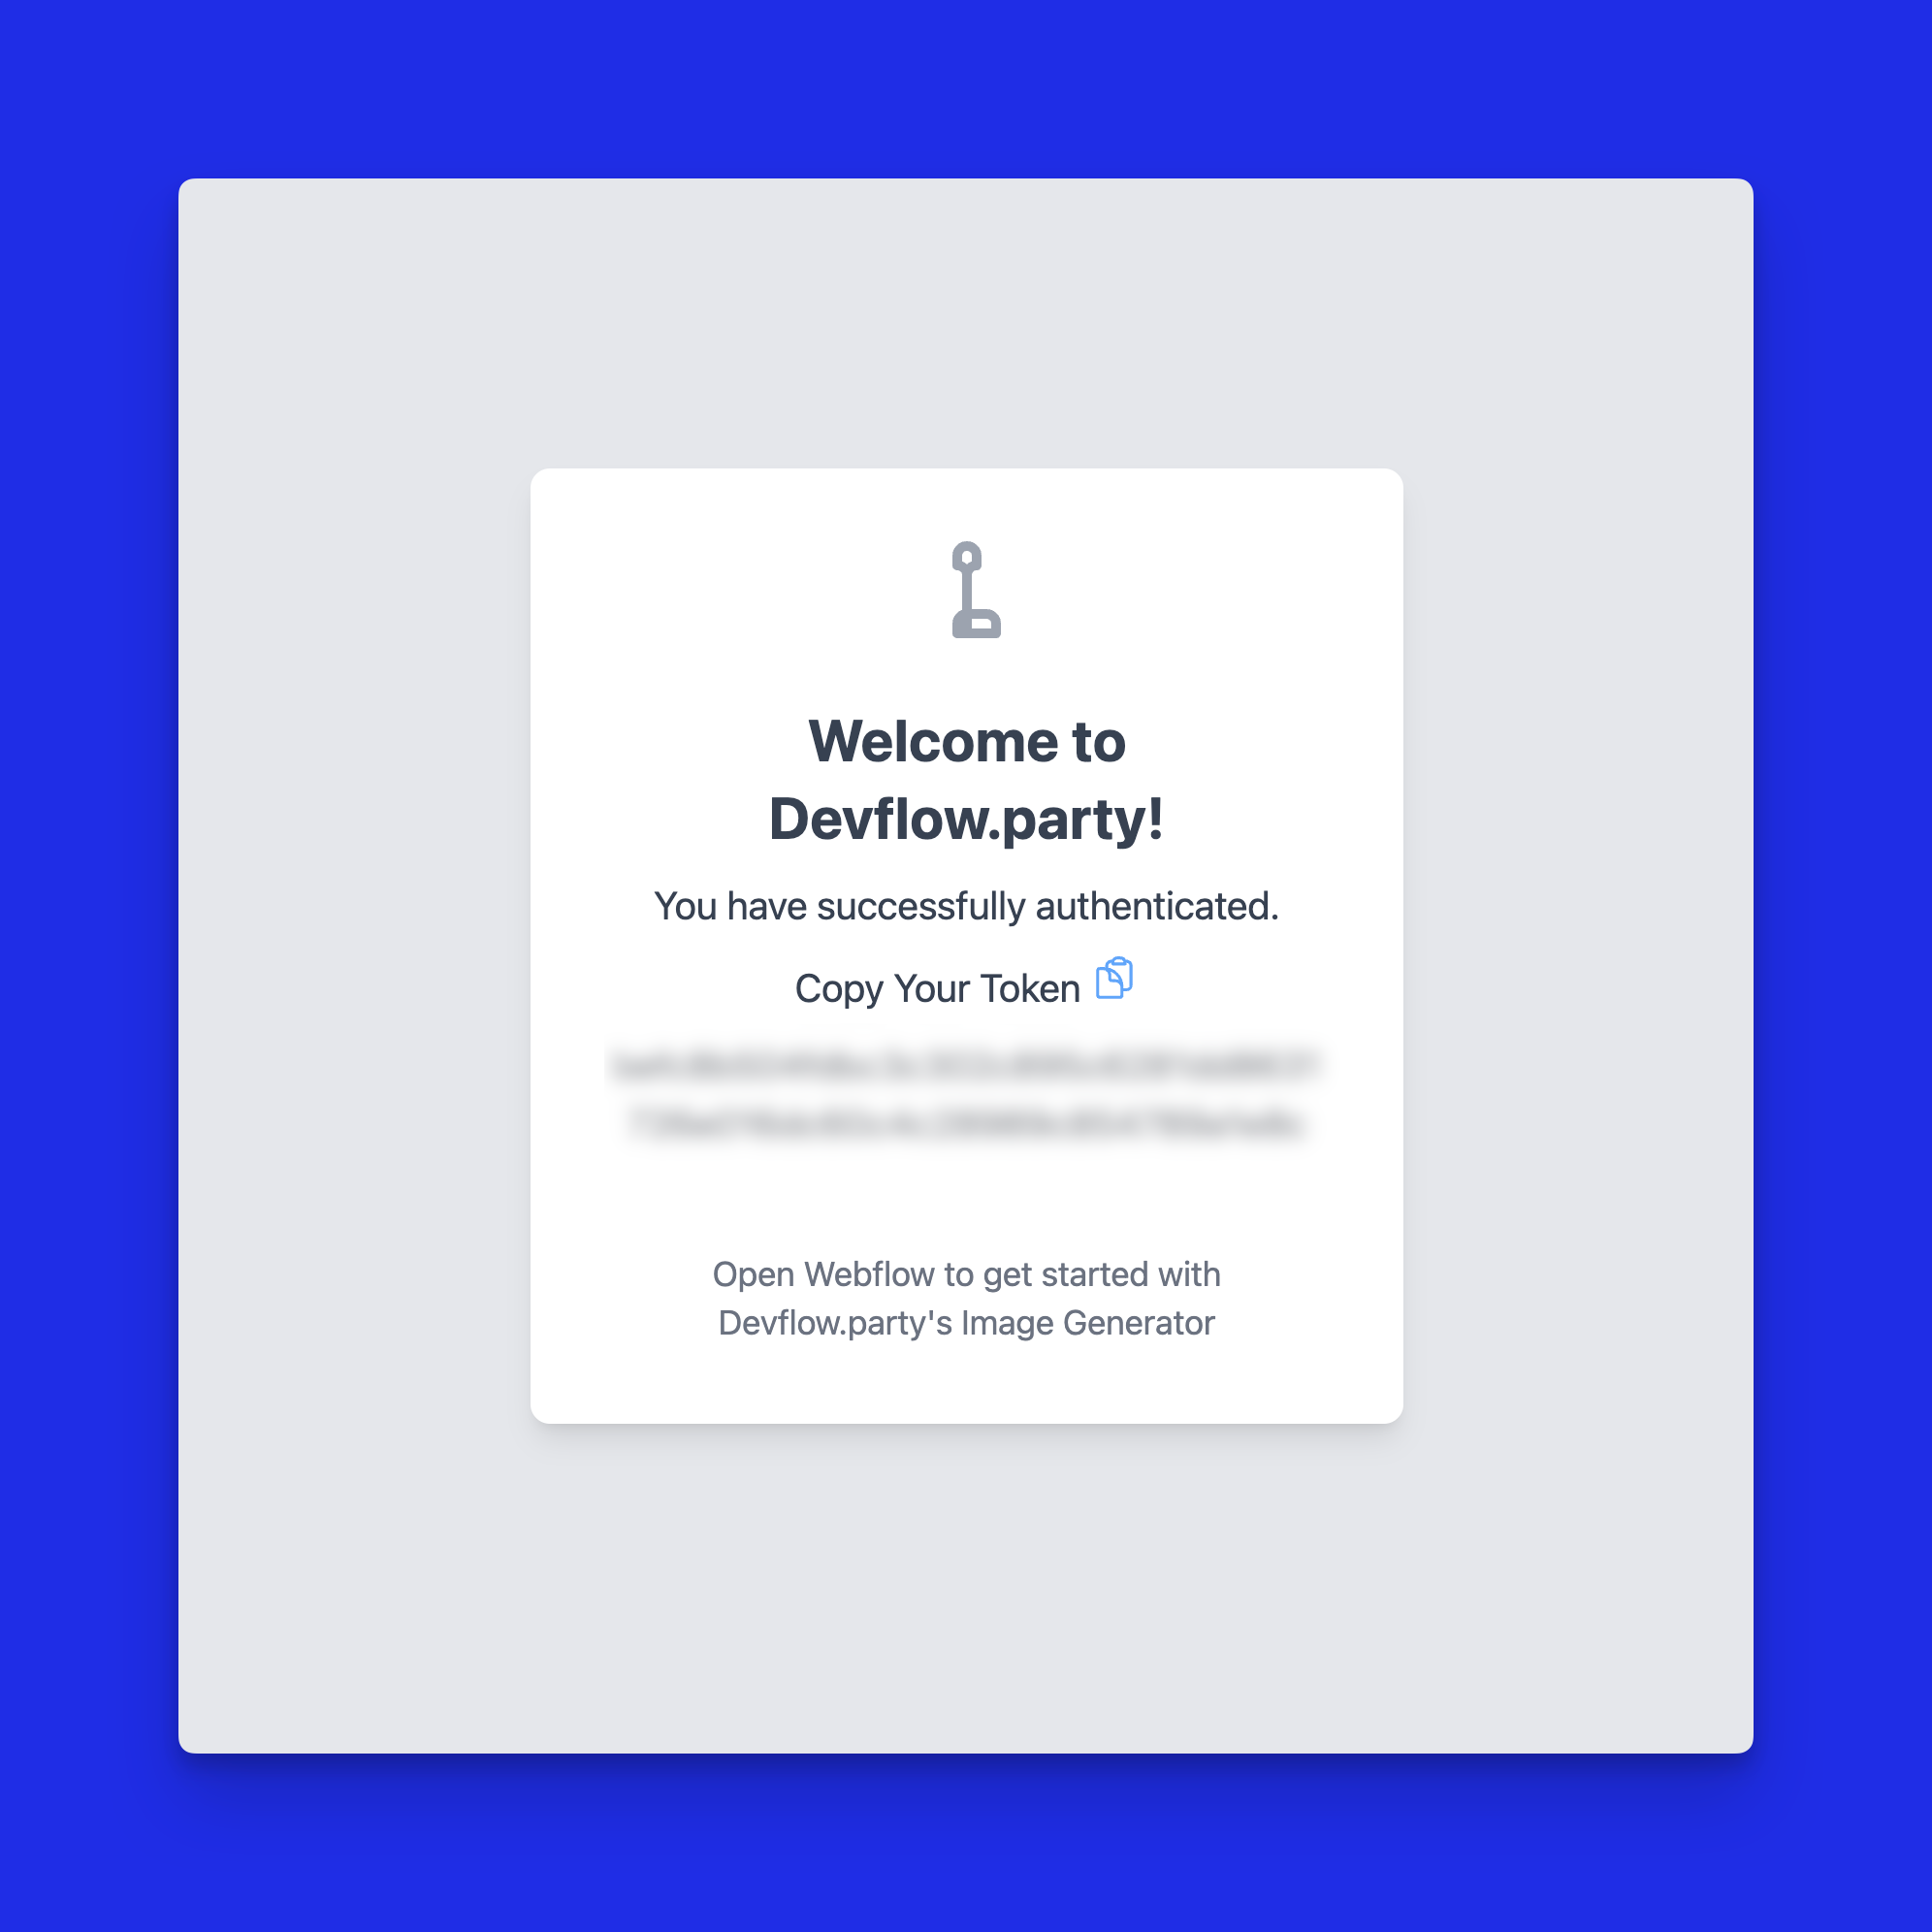
and then log into your test site, and launch your development app to start generating images
There you have it! If you try running the Webflow app example locally, I'd love to hear about it. Drop me a tweet at @ojabowlola or send a quick note to hey@lunchpaillabs.com. Always keen to learn and connect!
Dive Deeper:
- Get to know more with the Webflow docs.
- Delve into the Webflow Rest APIs.
- View the hybrid app example
- Explore the capabilities of Webflow Designer APIs.
.png?table=block&id=9ba33ac6-8e12-48f6-b980-4333b612ec56&cache=v2)
.png?table=block&id=a5ef0a0d-9ea2-4efd-8149-191e26f38c8f&cache=v2)
